A medicine cabinet can fit the wall on paper and still fail at the faucet, light, door swing, or wall cavity. The right measuring method depends on whether the cabinet will be surface-mounted, recessed, or used as a replacement. This guide shows which dimensions to record, how to find the limiting measurement, and how to compare the site with the drawing for the exact cabinet before ordering or cutting the wall.
To compare the wall requirements before choosing a mounting method, see our recessed vs surface-mount medicine cabinet guide.
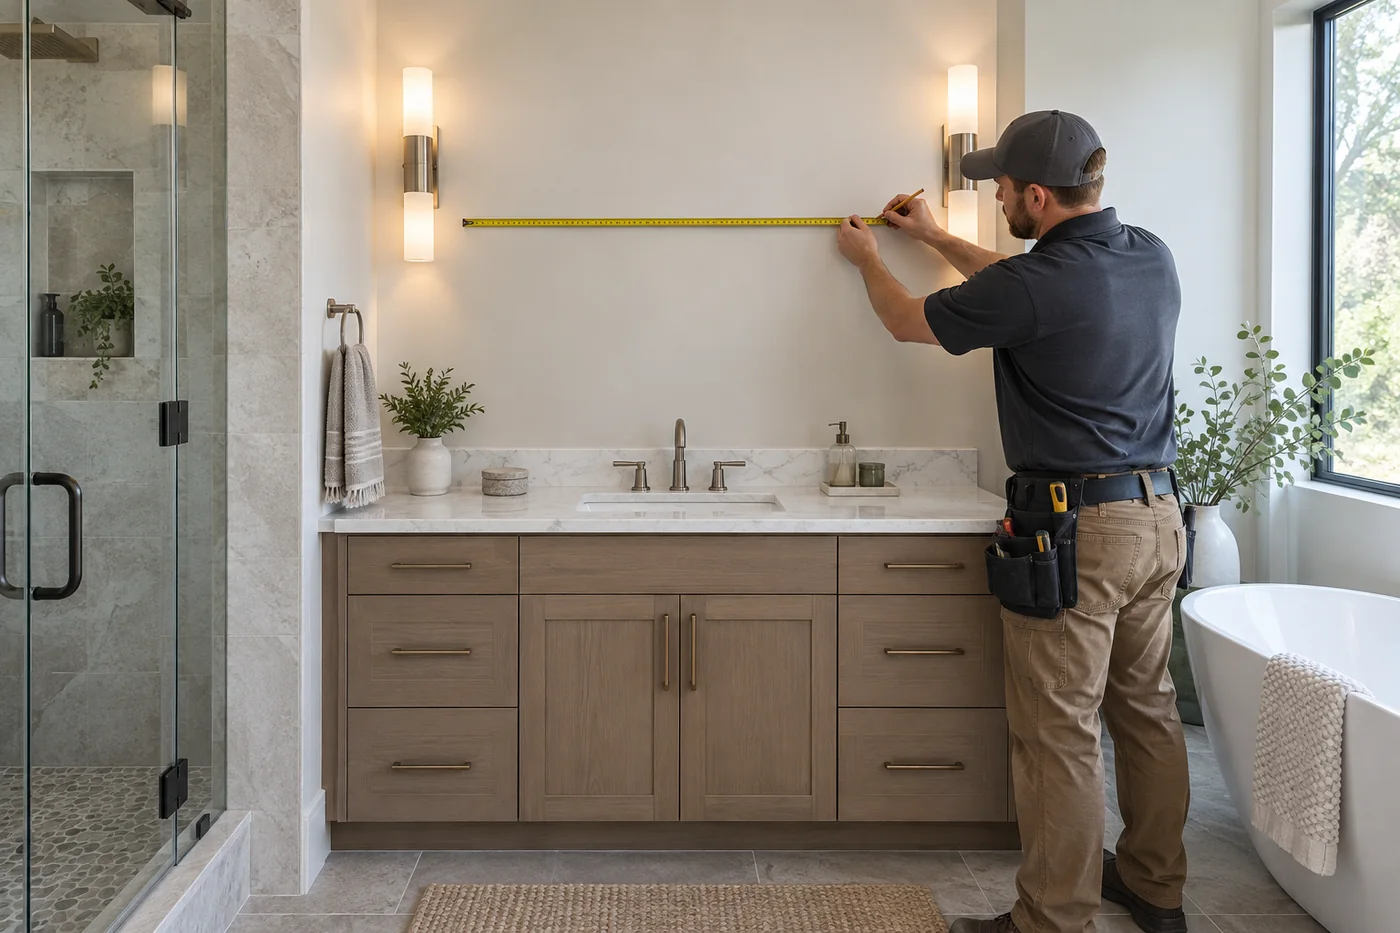
Quick Answer
To measure for a medicine cabinet:
- Confirm whether it will be surface-mounted or recessed.
- Measure the vanity and mark the sink centerline.
- Record the clear wall width and height, then check the faucet, lights, side walls, and door path.
- For a recessed cabinet, measure the opening at several points and use the smallest reliable width, height, and depth.
- Compare the site with the exact model drawing—not the nominal mirror size.
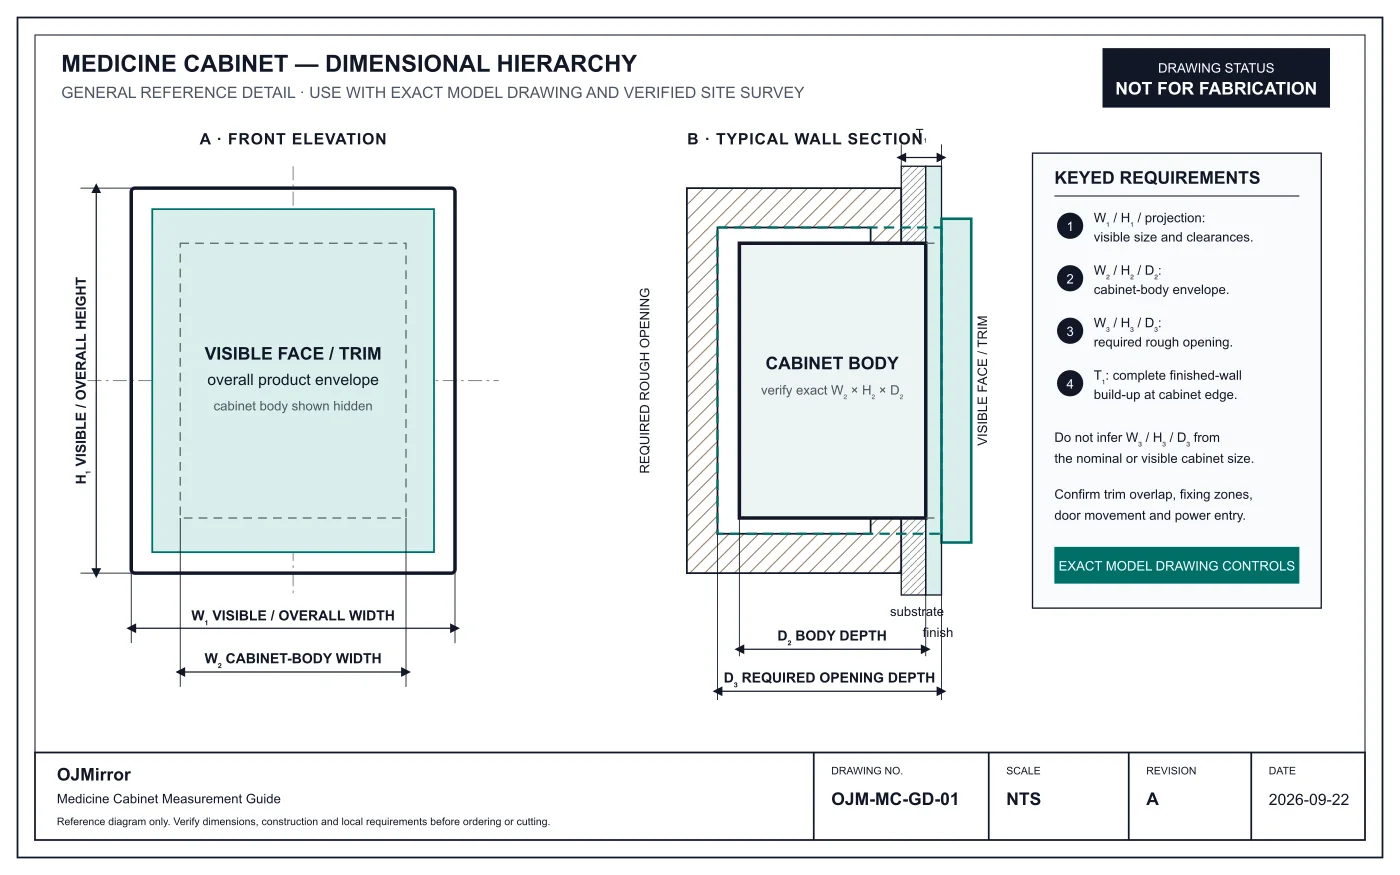
Do not derive a rough opening from a nominal mirror size unless the manufacturer provides an explicit planning rule for the selected model and confirms the mirror-face dimensions used in that calculation. Any preliminary calculation must still be verified against the approved installation drawing. The visible face, cabinet body, and required wall opening may all be different.
For the four OJMirror configurations listed in our 24-inch vanity guide, the published preliminary opening dimensions use a total ⅝-inch deduction from each full mirror-face dimension and 4¾ inches of clear opening depth. These planning values are separate from cabinet-body dimensions. Confirm the selected model’s current approved installation drawing before framing or cutting.
The key rule
Use the tightest room and fixture clearances to choose placement; verify a recessed wall opening separately against the exact model drawing.
Table of Contents
- Measurement Tools Checklist
- Choose the Mounting Method First
- Know Which Dimensions You Are Comparing
- Measure a New Cabinet Location
- Medicine Cabinet Rough Opening and Wall Depth
- Measure a Medicine Cabinet for Replacement
- Example: Checking a 24 × 30-Inch Cabinet
- Medicine Cabinet Size Guide
- Common Medicine Cabinet Measurement Mistakes
- For Project Teams: Create a Usable Measurement Brief
- Frequently Asked Questions
Measurement Tools Checklist
Have the basic survey tools ready before marking the wall. A second person is useful for wide cabinets and full-size templates.
| Tool | Use |
|---|---|
| Tape measure | Wall, vanity, cabinet, opening, and fixture dimensions |
| Pencil and low-tack tape | Centerlines, cabinet outline, and door-swing limits |
| Level | Check whether the proposed outline and opening are level and plumb |
| Straightedge or framing square | Check opening edges and corners |
| Cardboard or paper template | Test visible size and door movement at full scale |
| Flashlight and inspection mirror | View accessible cavity edges and obstructions |
| Phone or camera | Record the wall, opening, fixtures, labels, and drawing revision |
Do not use a probe, drill, or cutting tool to investigate a concealed wall unless the work has been made safe and is being handled by the responsible trade.
Choose the Mounting Method First
The mounting method changes what you need to measure. Decide it before comparing cabinet sizes.
| Mounting method | What controls the fit | What to verify |
|---|---|---|
| Surface-mounted | Clear wall area, fixing surface, cabinet projection, and door movement | Overall size, mounting points, side appearance, nearby fixtures, and any power entry |
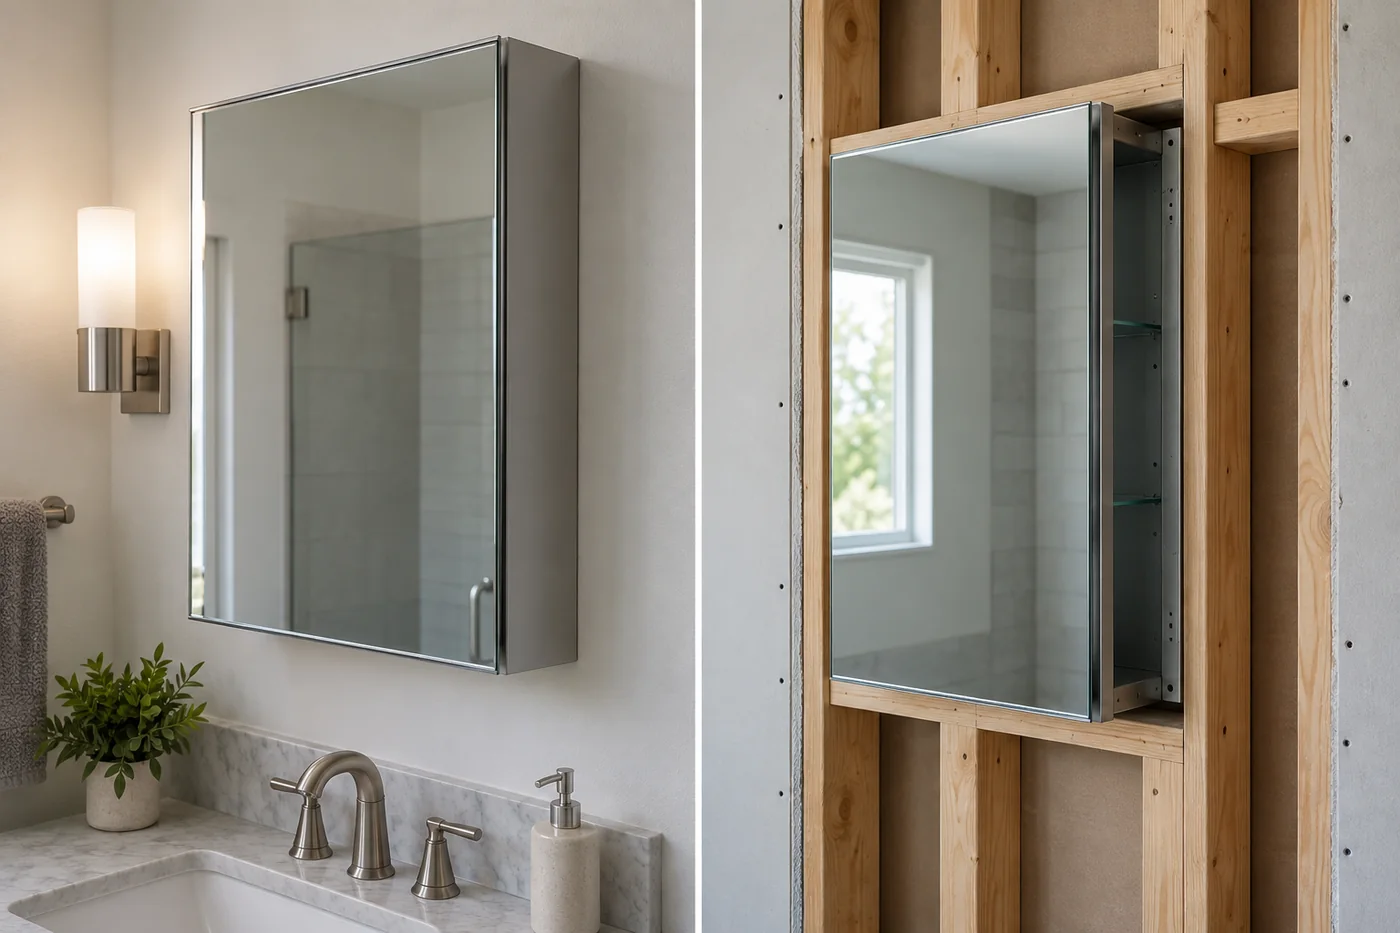
| Recessed | Visible wall area plus a usable three-dimensional wall cavity | Cabinet body, required rough opening, cavity depth, framing, services, trim coverage, and power entry |
| Dual-mount | The requirements for the chosen installation method | Correct brackets or side kits, projection, fixing points, and method-specific drawing details |
Surface-Mounted Cabinets
A surface-mount medicine cabinet sits on the finished wall. Measure the clear area between side walls, windows, sconces, outlets, switches, trim, and adjacent units. Then check how far the cabinet projects into the room and how its doors move when fully open.
The wall must also provide the fixing condition specified for the model. A powered cabinet may require a coordinated cable entry even though no wall recess is needed.
Recessed Cabinets
A recessed medicine cabinet must fit both the room layout and the wall cavity. A clear-looking wall does not prove that the full cabinet volume is available. Studs, pipes, cables, ducts, blocking, insulation, or structural elements may cross the proposed opening.
Wall construction matters. Exterior walls, masonry, concrete, load-bearing assemblies, and walls with moisture or air-control layers need project-specific review. Do not cut or alter the wall until the concealed condition and the cabinet drawing have been checked by the responsible trade.
Know Which Dimensions You Are Comparing
Four measurements are often confused. Keep them in separate fields on the survey sheet.
| Dimension | What it describes | Why it matters |
|---|---|---|
| Overall or visible size | The maximum visible width, height, and projection of the mirror, doors, frame, or trim | Controls proportion and surrounding clearances |
| Cabinet-body size | The box behind the visible face | Determines projection or the volume that enters the wall |
| Rough-opening size | The framed opening required by a specific recessed model | Controls whether the cabinet can be installed as designed |
| Finished opening and wall build-up | The opening after drywall, tile, stone, backer board, adhesive, or other finish layers | Affects final depth, edge condition, and trim coverage |
For a recessed cabinet, use the opening requirement stated in the exact product drawing; do not calculate it from the visible face or add an assumed allowance to the cabinet body.
Measure a New Cabinet Location
1. Establish the Vanity and Sink References
Measure the full vanity width and mark the centerline of each basin. Do not assume the sink is centered on the countertop. An offset basin may require the cabinet to align with the user rather than the furniture.
Working with a compact vanity? The 24-inch vanity medicine cabinet guide compares cabinet widths and shows how an offset sink changes the visible edge relationships.
2. Find the Clear Wall Width
Measure the usable width between side walls, windows, sconces, outlets, switches, tile edges, trim, and adjacent cabinets. Note any object that projects into the door path. Vanity width is a useful visual reference; clear wall width is the physical limit.
3. Find the Available Height
Measure from the highest relevant element below the cabinet—such as the faucet, backsplash, upstand, or shelf—to the lowest relevant element above it, such as a light, soffit, or ceiling detail.
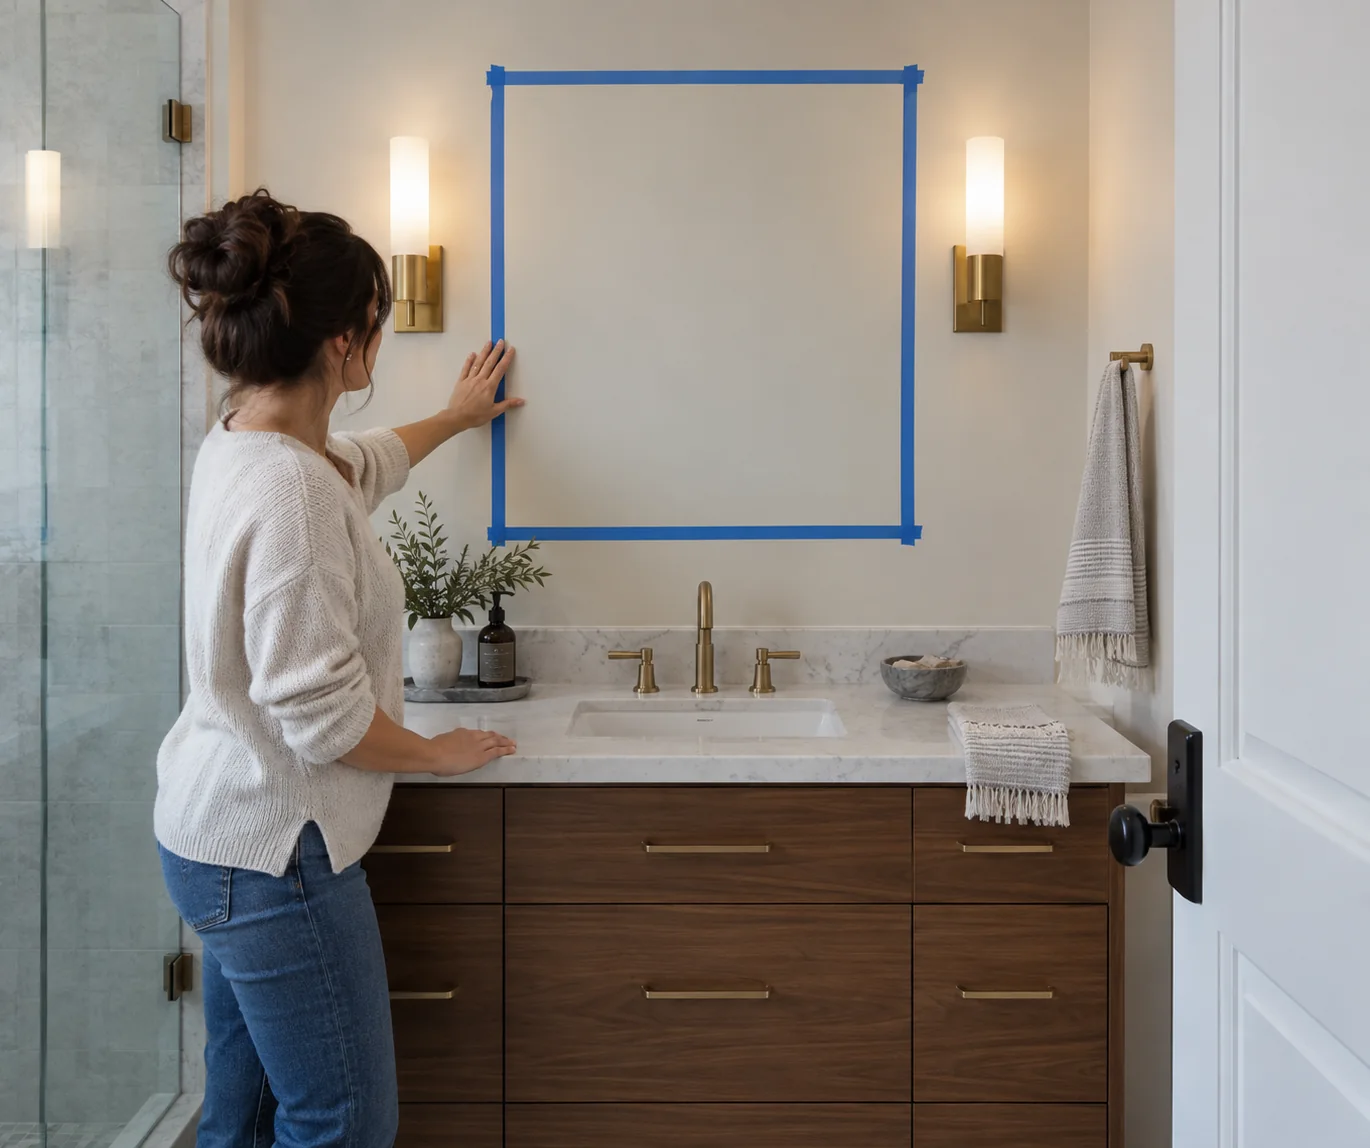
Set the mounting height from the user's sightline and reach, then check it against the faucet, cabinet height, lighting, and door movement. Marking the outline at full size usually exposes conflicts that an elevation drawing can hide.
How Much Space Should Be Between the Faucet and Medicine Cabinet?
Faucet clearance depends on the actual faucet height and projection, the backsplash, and the cabinet door path. Check the handles at full travel and the cabinet doors fully open; neither should touch the other or crowd the finished layout.
4. Test Door Swing and Projection
Use low-tack tape or a cardboard template to mark the cabinet face. Check the full opening path for left-hand, right-hand, double-door, or multi-door configurations. Pay attention to side walls, lights, faucets, shelves, another cabinet door, and decorative trim.
For a surface-mounted cabinet, also check the user's working space at the basin and nearby circulation. A cabinet can fit the wall yet project too far into a narrow room.
5. Flag Wall Conditions for a Recessed Cabinet
Note visible framing and any known pipes, wiring, vents, blocking, insulation, or back-wall limits near the proposed cabinet location. A clear wall surface does not confirm that the full cavity is available. Do not cut, remove framing, or relocate services based on a preliminary measurement; have uncertain conditions reviewed by the responsible project professional or trade.
6. Compare the Site With the Exact Drawing
A practical drawing review puts the site measurements next to the requirements for the exact model. Check the visible size against the room, then review the body, opening, mounting points, trim coverage, finish thickness, door movement, and power entry as one installation. Record the drawing revision; a product photograph or nominal size is not an approval document.
Medicine Cabinet Rough Opening and Wall Depth
A nominal size such as 24 × 30 inches is a comparison label, not a cutout dimension. The visible face, cabinet body, and required rough opening can differ, and two cabinets with the same nominal size may call for different openings.
Product documents may use “rough opening” and “cutout” differently. Confirm the selected model's required width, height, depth, reference surface, and any stated tolerance in its current drawing. Do not derive the opening from the visible size or add an assumed allowance to the body.
Some recessed cabinets can fit in a 2×4 wall, but the framing label alone does not establish compatibility. Wall finishes, blocking, pipes, wiring, vents, insulation, studs, and the surface behind the cavity can reduce usable depth. Compare the model's required recessed depth with the clear cavity available across the cabinet footprint; have uncertain wall conditions reviewed before cutting or altering framing.
Before requesting a drawing review: record the mounting method, site measurements, wall finish, and candidate model. Final compatibility still depends on the approved drawing and verified site condition.
How to Measure a Medicine Cabinet for Replacement
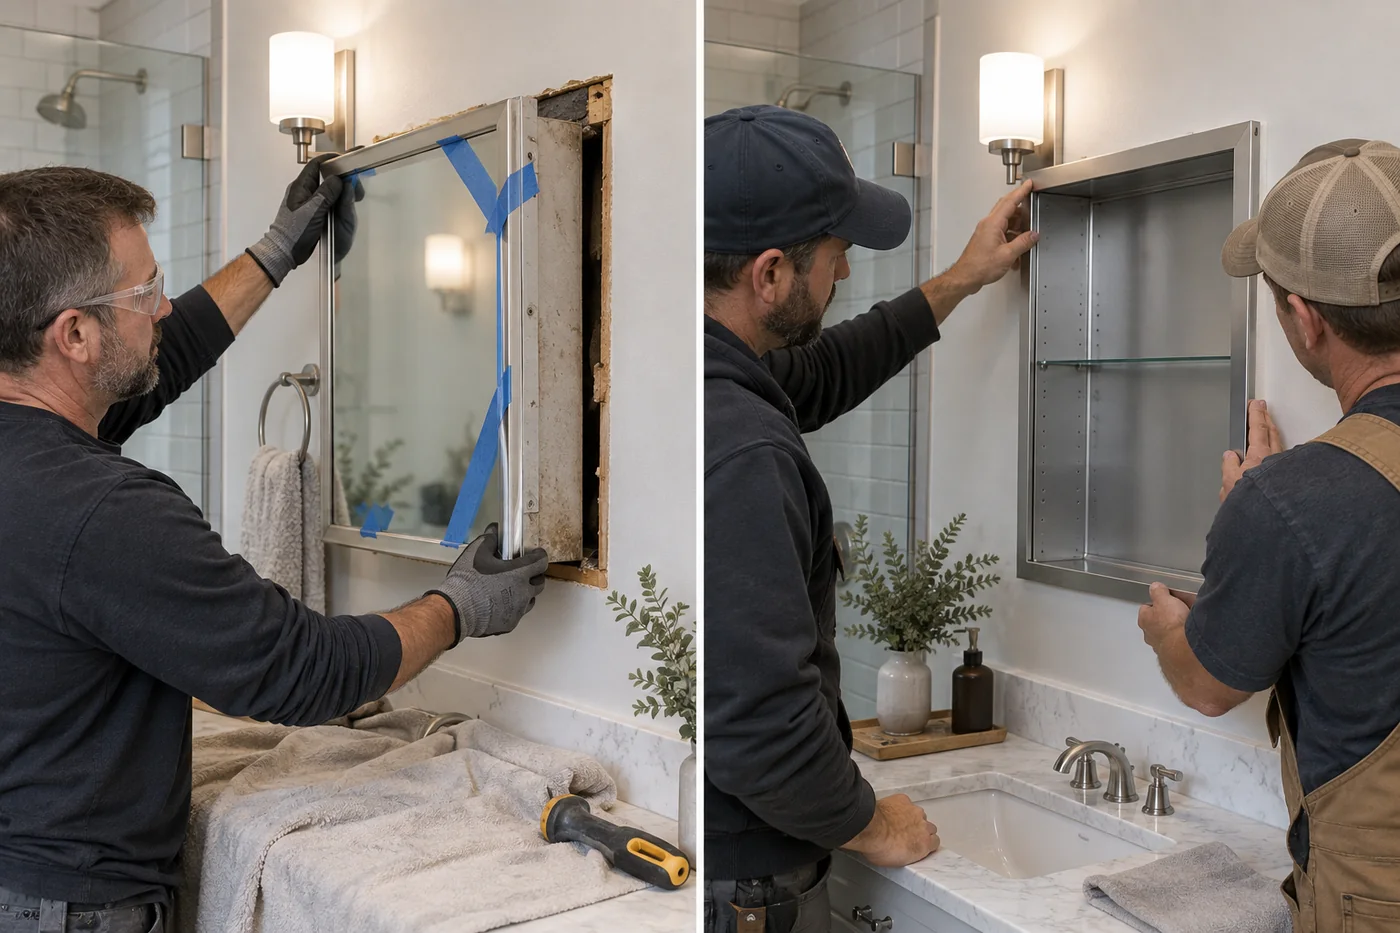
Photograph the cabinet in place and record its visible size, mounting height, door handing, nearby fixtures, perimeter finish, and powered functions. If electricity is present, the responsible qualified trade should make the installation safe before removal. The old door dimensions do not establish the size or condition of the opening behind it.
Once the opening is safely accessible, record more than one reading in each direction. Use the smallest reliable width and height and the shallowest clear depth when comparing the site with the candidate model drawing.
| Dimension | Where to take readings | Value used to assess fit |
|---|---|---|
| Width | Top, middle, and bottom | Smallest reliable width |
| Height | Left, center, and right | Smallest reliable height |
| Depth | Several points across the cavity | Shallowest usable depth |
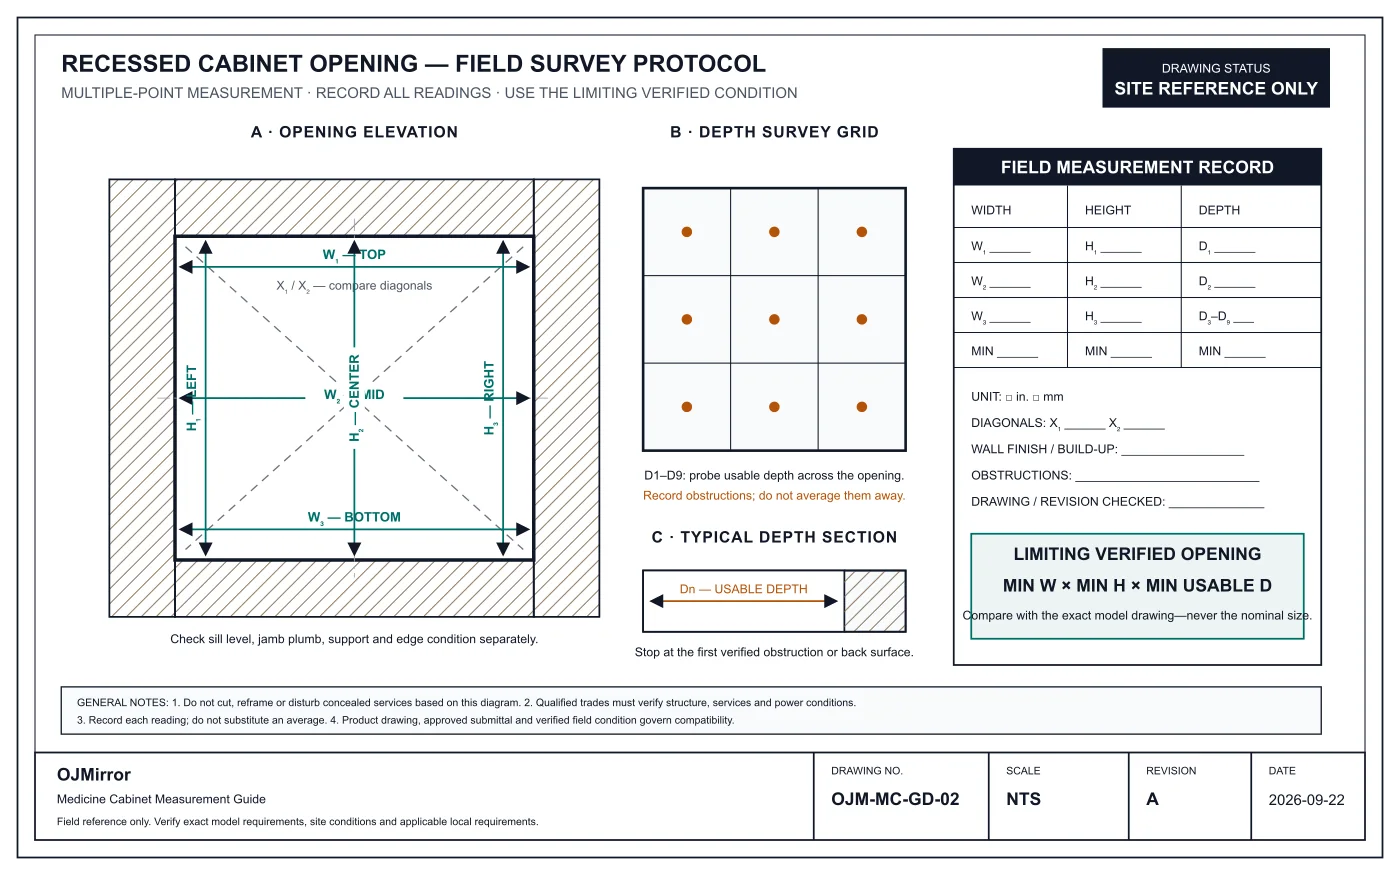
Check diagonal measurements for a wall opening that is out of square. Also confirm that the replacement's visible face or trim covers the opening edges and old fixing holes, and check door handing, fixing support, finish thickness, power entry, and service access. Compare all site readings with the exact model drawing; do not assume a cabinet with the same nominal size will fit.
Example: Checking a 24 × 30-Inch Cabinet
This hypothetical example shows how to identify limiting site measurements. It is not an OJMirror product specification or a universal cutout size.
| Site measurement | Readings |
|---|---|
| Vanity width | 36 in. |
| Clear wall width | 34 in. |
| Available height | 38 in. |
| Existing opening width | 23 3/8 in.; 23 1/2 in.; 23 7/16 in. |
| Existing opening height | 29 1/4 in.; 29 3/8 in.; 29 5/16 in. |
| Clear cavity depth | 3 7/8 in.; 4 in.; 3 3/4 in. |
The limiting site envelope is 23 3/8 in. W × 29 1/4 in. H × 3 3/4 in. D. A nominal 24 × 30-inch label does not confirm fit; compare those site values with the selected model's required opening, body depth, trim coverage, and fixing details. If any requirement exceeds the available site condition, select another cabinet or installation approach, or obtain project-specific review before proceeding.
How to Determine Whether a Medicine Cabinet Will Fit
Compare the smallest verified site measurements with the installation requirements for the selected cabinet. For a recessed installation, use the model-specific cutout and recessed-depth values—not the nominal product size.
| Check | Compare | If it does not fit |
|---|---|---|
| Opening width | Smallest usable width vs. required cutout width | Select another model or request a framing review |
| Opening height | Smallest usable height vs. required cutout height | Check an alternative cabinet or installation route |
| Wall depth | Shallowest clear depth vs. required recessed depth | Consider a shallower or surface-mounted cabinet |
| Visible coverage | Cabinet face or trim vs. finished opening edges | Confirm that the opening and old fixing marks will be concealed |
| Door clearance | Full door path vs. faucet, lights, walls, and adjacent doors | Adjust placement, handing, or door configuration |
| Mounting support | Required fixing points vs. verified wall structure | Request a mounting-detail review |
Passing the width, height, and depth checks is only a preliminary result. Opening geometry, wall finishes, fixing points, concealed services, electrical entry, and installation access still need to match the drawing and site condition.
Medicine Cabinet Size Guide: Choosing a Width to Evaluate
The vanity width and the available height between the faucet and lighting are useful starting constraints, not a fixed sizing formula. Also account for the sink centerline, side walls, door movement, projection, storage needs, and visual balance.
| Vanity width | Suggested overall cabinet widths to evaluate | Layout questions to resolve |
|---|---|---|
| 24 in. | 16–20 in. | Can a single door clear the side wall and nearby light? |
| 30 in. | 20–24 in. | Does the cabinet align with the sink centerline and leave fixture clearance? |
| 36 in. | 24–30 in. | Will the selected door arrangement open without conflict? |
| 48 in. | 30–42 in. | Is one wide cabinet or a divided-door layout easier to use? |
| 60 in. | 36–48 in. | How do the sink arrangement, seams, and multi-door access align? |
| 72 in. | Two cabinets or one wide configuration | Do basin spacing, lighting, and door paths support the layout? |
These are preliminary planning examples, not universal product recommendations or confirmed OJMirror stock sizes. The final cabinet width depends on the clear wall, sink position, mounting method, door movement, required storage, and the selected manufacturer's drawing.
Width ranges refer to the overall visible cabinet width, not the recessed cabinet body or required rough opening.
For more specific sizing guidance, see our guides to choosing a medicine cabinet for a 30-inch vanity and a medicine cabinet for a 48-inch vanity.
For a single sink, begin with the basin centerline and test the proposed outline against the clear wall. For a double vanity, compare one wide cabinet with two cabinets centered over the basins. Check basin spacing, lighting, seams, door interaction, and electrical coordination before choosing a layout.
In a small bathroom, projection and door movement may matter more than maximum mirror area. A narrower or differently handed cabinet can work better than the largest unit that fits the elevation.
Common Medicine Cabinet Measurement Mistakes
Most measurement failures come from comparing the wrong dimensions or overlooking a condition around the cabinet. Use this short check before ordering or approving a drawing.
| Mistake | Correct approach |
|---|---|
| Measuring only the mirror face | Record the overall size, cabinet body, and required opening separately |
| Using the largest opening measurement | Use the smallest reliable width and height and the shallowest clear depth |
| Assuming a 2×4 wall is automatically deep enough | Verify the actual finished wall assembly, clear cavity, and obstructions |
| Checking the cabinet only with the doors closed | Test the complete door path against walls, lights, faucets, and adjacent doors |
| Ignoring wall finishes | Include drywall, tile, stone, backer board, adhesive, and edge conditions |
| Ordering by nominal size | Compare the site with the exact model drawing and its stated opening requirements |
A cabinet that clears one dimension can still fail at the trim, fixing points, power entry, or door swing. Resolve those conditions before the wall is cut or the order is released.
For Project Teams: Create a Usable Measurement Brief
Most homeowners can stop after comparing the room and opening with the model drawing. A hotel, apartment, or multi-unit project needs one additional safeguard: a controlled record that keeps the design, the manufacturer's requirement, and the field condition separate.
A useful brief does not need to repeat every instruction in this article. It needs to identify the room or room type, mounting method, vanity and basin reference, clear wall area, wall finish, door handing, power position, candidate model, drawing revision, and related photographs. For recessed openings, attach the separate fit worksheet or survey. Use one unit system throughout and mark anything unknown as Review, not as an assumed dimension. If a standard configuration does not match the site, a custom medicine cabinet review can start from the verified opening, overall size, wall condition, and required functions.
Use the fillable Medicine Cabinet Measurement Worksheet to keep the room, placement, recessed opening, proposed cabinet, electrical requirements, and photo references together.
For repeated rooms, approve the first installation before the detail is released across the project. If the model or site condition changes, update the cabinet schedule and the affected room records rather than relying on the original survey.

Frequently Asked Questions
What size medicine cabinet do I need for a 36-inch vanity?
Start with the 36-inch vanity and the actual sink centerline. The cabinet then has to fit the clear wall, lighting, door path, and storage requirement. Many layouts keep it within the vanity width, but the room—not a fixed ratio—sets the final size.
How do I measure an existing medicine cabinet?
Record the visible size and surrounding fixtures first. If the cabinet is recessed, measure the opening at several points and compare the smallest reliable width, height, and depth with the exact model drawing before ordering.
Should a medicine cabinet be narrower than the vanity?
A narrower cabinet often leaves useful space for sconces or a side wall. Other rooms work better with one wide cabinet or two units over separate basins. Base the choice on sink position, clear wall width, and door movement rather than a fixed percentage.
How high should a medicine cabinet be above the vanity?
Set the height around the required viewing range and storage access. Then test the position against the faucet, backsplash, light, ceiling, cabinet height, and door path. A full-size taped outline is often the quickest approval check.
Can I replace a recessed cabinet with a surface-mounted cabinet?
Yes, if the surface-mounted cabinet covers the old opening and unfinished edges, has suitable fixing support, clears nearby fixtures, and works safely with the existing electrical condition.
What measurements should I send for a custom medicine cabinet inquiry?
Send the mounting method, target visible size, opening width × height × depth where recessed, vanity width, sink position, door arrangement, wall finish, power position, required functions, quantity, destination market, photographs, and any available drawing.
Conclusion
Good measurement starts with the room: establish the mounting method, available wall area, vanity and basin references, and nearby fixtures before selecting the cabinet size and placement. If the cabinet will be recessed, treat the wall cavity as a separate model-specific fit check rather than assuming the wall label or old mirror size proves compatibility.
If a standard cabinet does not coordinate with the wall, vanity, lighting, or existing opening, prepare a short measurement brief with site photographs, required functions, quantity, destination market, and the candidate drawing. That gives the project team a practical basis for specification or customization review. Configuration, electrical version, certification scope, minimum quantity, and lead time must still be confirmed for the actual project.
Not Sure Whether Your Opening Fits?
For an OJMirror project inquiry, send:
- opening width × height × depth;
- a full-wall bathroom photograph;
- vanity width and sink position;
- required or preferred cabinet size;
- surface-mounted or recessed installation;
- door arrangement and electrical requirements;
- quantity and project location;
- the candidate drawing, if available.
Share your wall measurements, preferred cabinet size, and project quantity. OJMirror can review the information against a proposed cabinet configuration and identify the details needed before preparing drawings or a quotation. Final requirements remain subject to project confirmation.
Download Measurement Worksheet