Updated October 12, 2026 · OJMirror
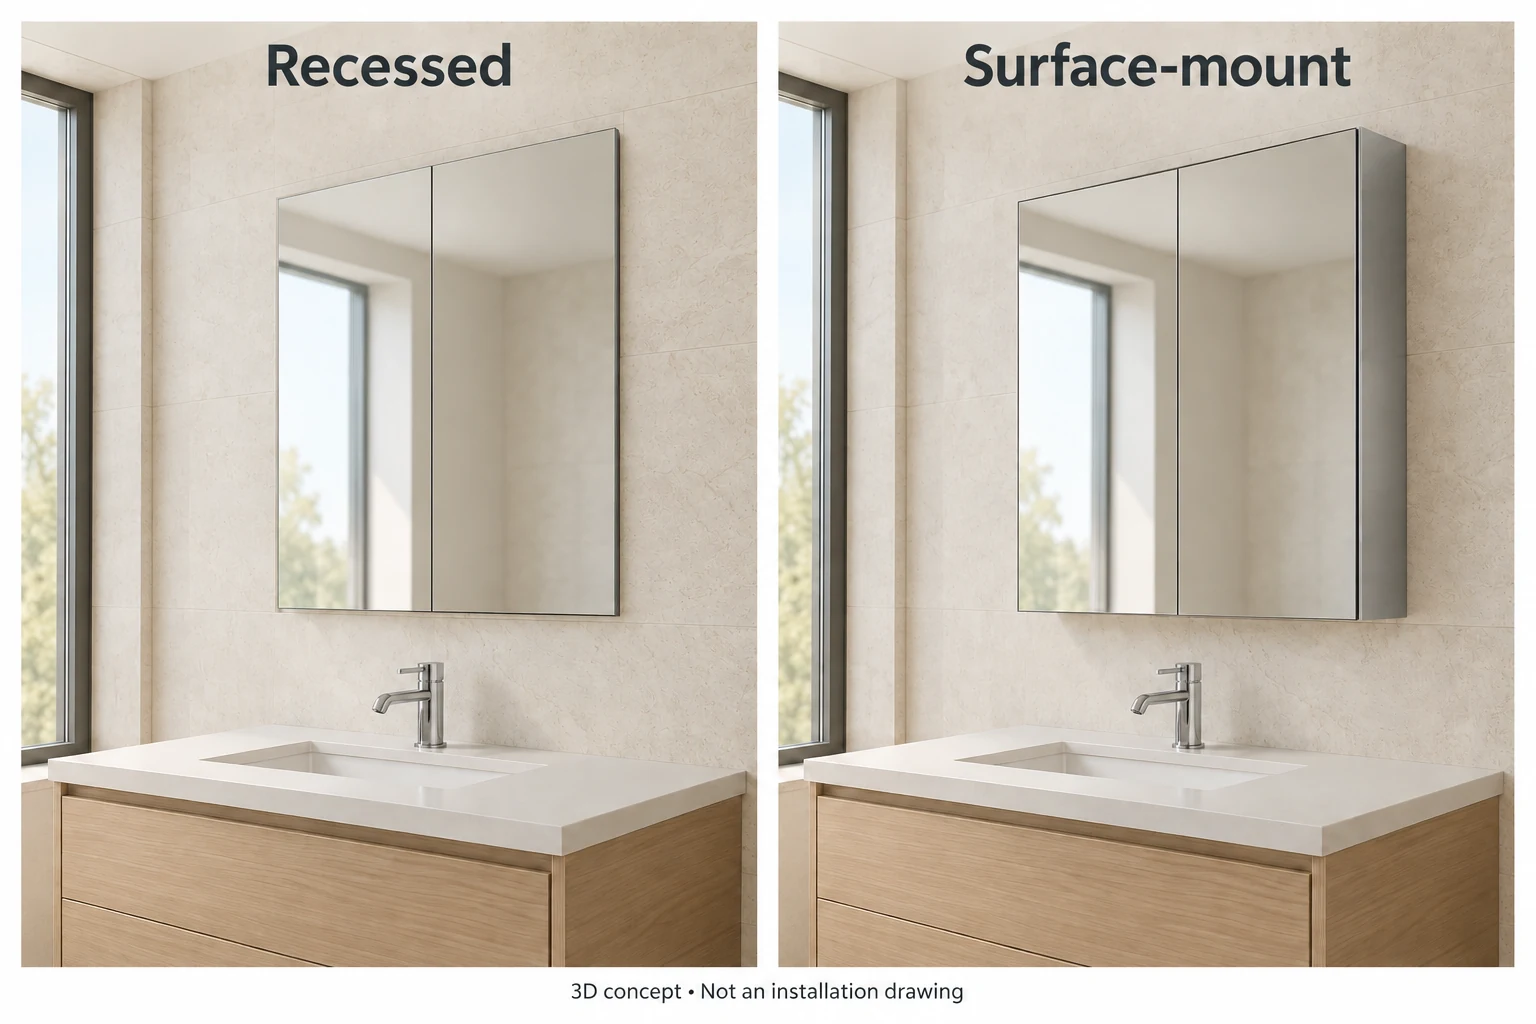
Quick answer: Choose a recessed medicine cabinet when the selected model fits a verified wall cavity and reduced projection matters. Start with surface-mount when a recess is impractical or wall cutting is undesirable, provided the wall support, projection and door clearance work. Both need more than a matching mirror size. This guide explains which measurements decide the fit before you choose a model or approve an installation.
In this guide
- Recessed vs Surface-Mount: Which Measurements Matter?
- Which Mounting Type Should You Choose?
- Read the Dimensions From the Same Reference Points
- Recessed Cabinets: Match the Opening, Depth and Edge Coverage
- Surface-Mount Cabinets: Check Projection and Mounting Space
- Both Mounting Types Need Door and Fixture Clearance
- Installation Difficulty and Cost: Compare the Work Included
- When Dual-Mount or Semi-Recessed Options Help
- Final Fit Check: Avoid These Common Mistakes
- What to Send for a Model and Drawing Review
- FAQs
Recessed vs Surface-Mount: Which Measurements Matter?
For a recessed cabinet, check both the visible wall area and the space behind it. For a surface-mount cabinet, check the wall area and how far the installed cabinet extends into the room. Neither choice removes the need to check opening doors, nearby fixtures and wall support.
| Fit check | Recessed | Surface-mount |
|---|---|---|
| Visible width and height | The face or trim must fit the wall area and cover the opening as specified. | The complete assembly must fit the available wall area. |
| Space behind the wall | Verify the required opening and usable cavity depth. | A full cabinet recess is normally unnecessary; fixing and service routes still need review. |
| Projection into the room | Confirm how much remains beyond the finished wall. | Confirm the full installed projection, including the mounting arrangement. |
| Door movement | Check the opening path against nearby obstacles. | Check the opening path against nearby obstacles. |
| Fixing and access | Match the installation detail to the wall and any powered features. | Match the installation detail to the wall and any powered features. |
A recessed option may reduce projection, but only a compatible wall and model make that option workable. Surface mounting shifts more of the fit check to the room side of the wall.
Which Mounting Type Should You Choose?
Use the site condition to choose a starting option, then test it against the model drawing. Neither mounting method is automatically better for every bathroom.
| Project condition | Starting option | What decides the fit |
|---|---|---|
| New construction with an accessible, suitable cavity | Recessed | Opening, depth, framing and service coordination before wall closure |
| Finished bathroom where opening the wall is undesirable | Surface-mount | Support, installed projection, exposed sides and door movement |
| Limited room-side clearance | Recessed, if the wall allows it | Actual remaining projection and full door movement |
| Shallow or obstructed cavity | Surface-mount or an explicitly supported alternative | Required clear depth, safe fixing locations and room-side clearance |
| Replacement of an existing recessed cabinet | Compare both routes | Existing opening, edge coverage, support and finish repairs |
A surface-mounted replacement does not make an old opening irrelevant: it may still need suitable closure, support and finish work. When retaining a recess, matching the old mirror size is not enough. Measure the accessible opening and compare the new model's complete installation detail.
Read the Dimensions From the Same Reference Points
Before comparing drawings, separate four measurements:
- Visible face or trim size: the width and height that occupy the wall and, where applicable, cover the opening edges.
- Cabinet-body size: the dimensions of the box behind the mirror door.
- Required opening: the installation space specified for the recessed model, including its stated width, height and depth.
- Installed projection: the distance from the finished wall to the outermost point of the closed cabinet assembly.
“Depth” alone is ambiguous. Ask what its starting and ending points are. A drawing may refer to the cabinet body, the whole product or the space needed for installation. Usable shelf depth is a separate storage measurement.
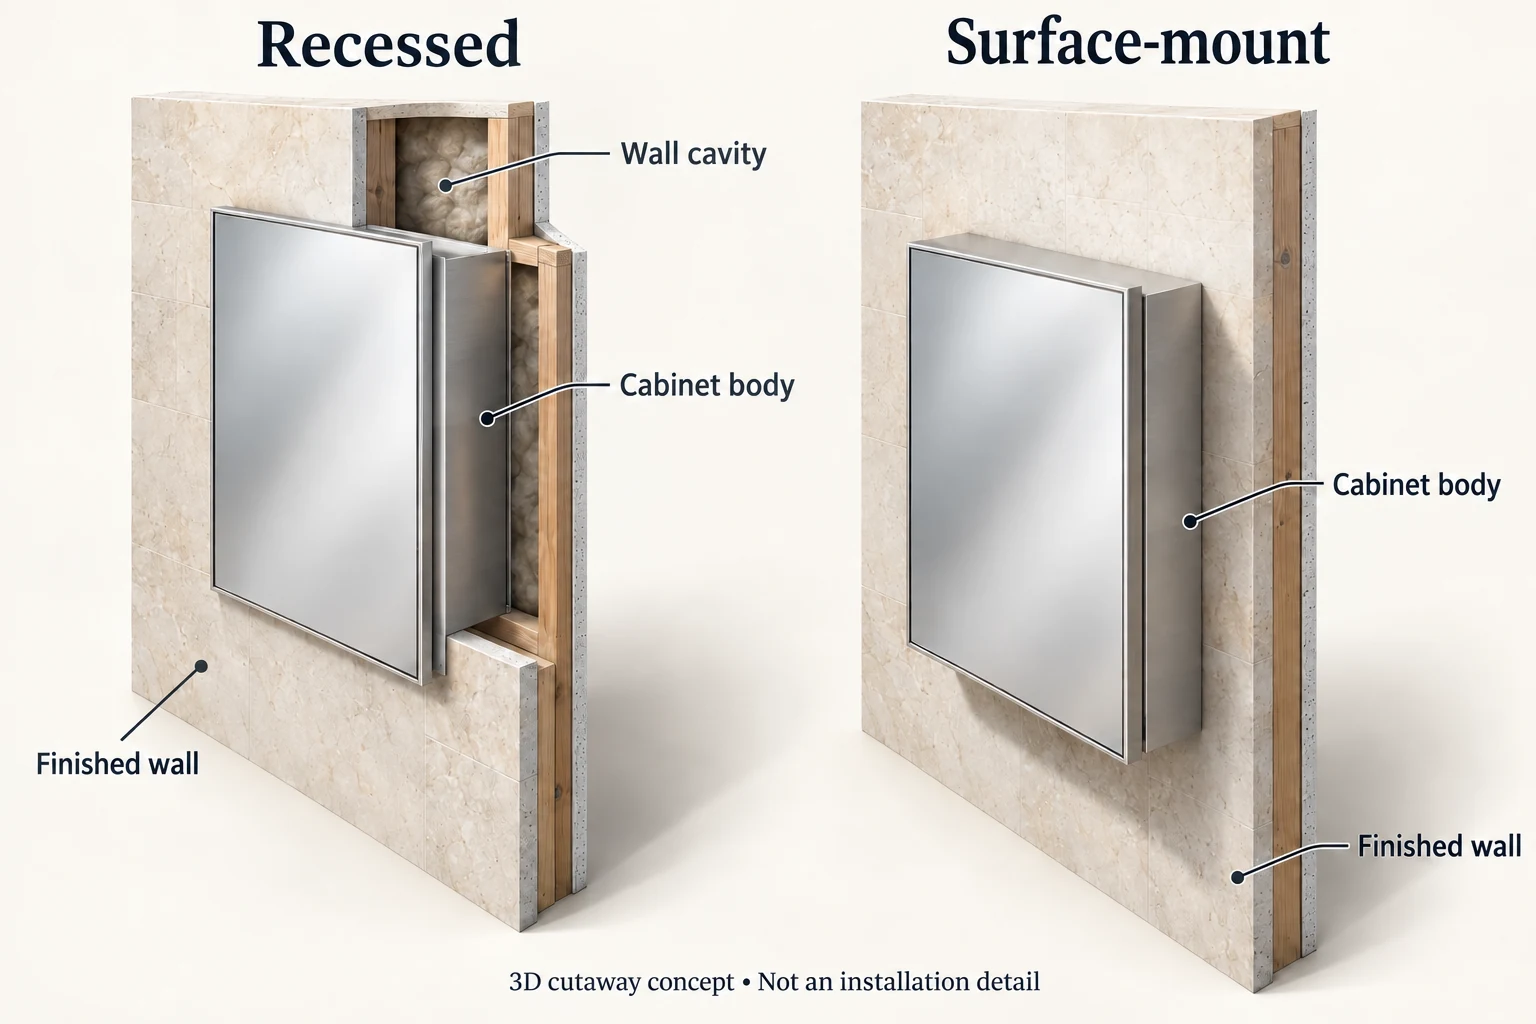
Compare site dimensions and model requirements using the same reference surfaces. Do not calculate projection simply by subtracting the required opening depth from the product depth: the opening requirement may include installation space rather than describe the cabinet’s position. For width and height options, see the medicine cabinet sizes guide.
Recessed Cabinets: Match the Opening, Depth and Edge Coverage
Compare the Available Cavity With the Required Opening
The available cavity and the required opening are two different sets of information. Record the site condition, then compare it with the chosen model’s installation requirement. The mirror face does not establish the opening to cut, and a nominal wall description does not prove that the cavity is clear.
Example: an opening matches the required width and height, but an obstruction at the back leaves insufficient depth. The cabinet has not passed the fit check. Compare another model or have the wall arrangement reviewed; do not approve the installation from width and height alone.
Unknown concealed conditions need site verification. Have the responsible project professional or trade review framing, services and wall restrictions before cutting or altering the wall.
Check the Finished Wall and Perimeter Coverage
Tile, backing and other finish layers affect where the cabinet sits and how its edges meet the wall. Coordinate that finished condition with the installation detail.
An oversized existing opening is not automatically easier to use. The face or trim may cover the edges while the fixing arrangement remains unsuitable. Check coverage and support together.
Use the complete medicine cabinet measuring guide for the survey process. When comparing recessed medicine cabinets, keep the opening, cavity and finished-wall information beside the candidate drawing.
OJMirror Planning Example: A 24 × 30-Inch Mirror Face
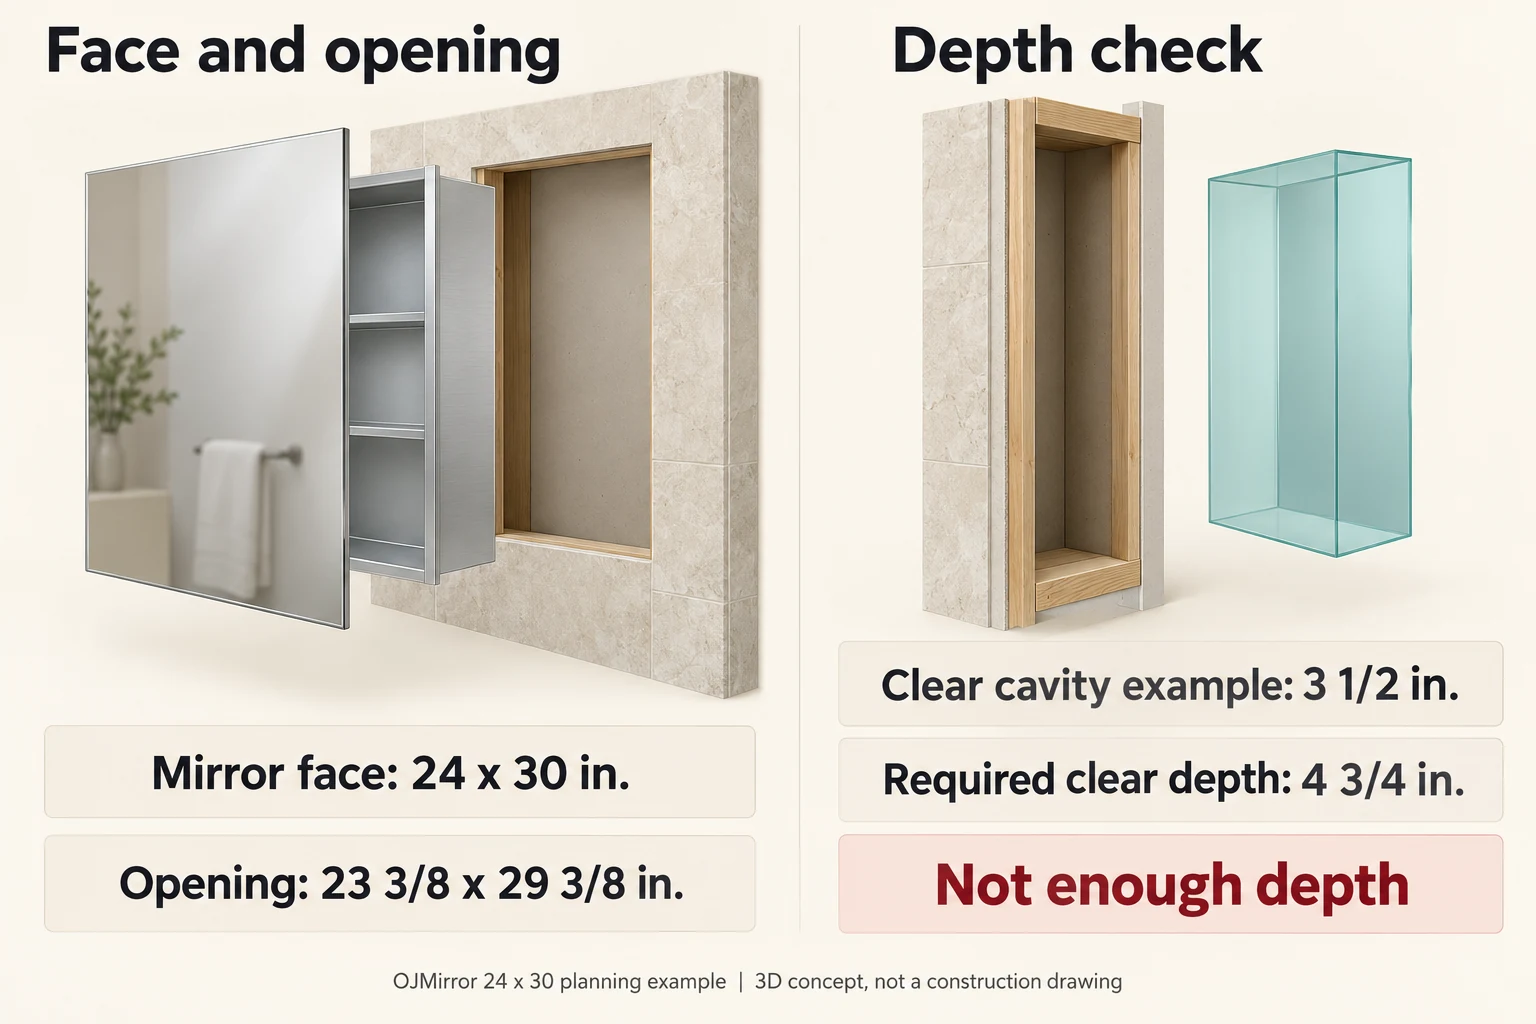
OJMirror's recorded planning dimensions for the 24 × 30-inch example distinguish the visible face from the required opening:
| Measurement | Planning value | What it describes |
|---|---|---|
| Mirror face, W × H | 24 × 30 in. | The visible front covering the opening |
| Required opening, W × H | 23⅜ × 29⅜ in. | The planned wall opening, not cabinet-body dimensions |
| Required clear opening depth | 4¾ in. | The clear installation depth, not shelf depth or wall projection |
The opening is ⅝ inch less than the face in each complete dimension, not ⅝ inch less at every edge. These are OJMirror planning values recorded on October 9, 2026, not a universal sizing formula or a released construction drawing. Confirm their applicability in the current drawing for the selected cabinet before framing or cutting. Body width and height, fixing details and installed projection still need that drawing.
Need the dimensions for your cabinet? Request a model-specific mounting drawing. Send the candidate model or preferred face size, mounting method and available wall measurements. Identify any unknown dimensions so the next drawing review can address them.
What a 2×4 Wall Tells You—and What It Does Not
A dry, dressed nominal 2×4 wood member is typically 1½ × 3½ inches. That describes the lumber, not the complete finished wall or its usable cabinet cavity.
If the verified clear cavity is only 3½ inches deep, it cannot meet the example's 4¾-inch requirement: it is 1¼ inches short. Do not assume tile or wallboard automatically supplies that missing space. Compare dimensions from the reference surfaces specified by the installation detail. A different model or professionally reviewed wall arrangement may be needed; this does not mean every recessed cabinet is incompatible with every 2×4 wall.
Surface-Mount Cabinets: Check Projection and Mounting Space
Check the Complete Installed Projection
The cabinet’s installed position matters more than an isolated depth figure. Confirm the closed assembly’s projection from the finished wall, accounting for the mounting arrangement shown for that model.
Example: the cabinet fits between the lights, but projects too far over the basin for comfortable use. Compare a shallower candidate with documented installed dimensions or review its position. Choosing a narrower mirror face alone does not resolve a depth conflict.
Include exposed sides in the review. Ask whether the proposed configuration needs side panels or other finishing components, and whether they change the installed envelope.
Confirm the Fixing and Service Zones
Check the fixing locations against the actual wall construction. If the specified installation needs space to lift, engage or remove the cabinet, allow for that space too.
For powered versions, coordinate cable entry, connections and maintenance access before finalizing the location. This applies to recessed cabinets as well. Electrical work belongs with the qualified trade and the product’s installation requirements.
Compare surface-mount medicine cabinets using the complete installation detail, including projection and fixing positions.
Both Mounting Types Need Door and Fixture Clearance
A closed cabinet can fit perfectly while an open door hits a side wall, light or faucet. Check the full movement, including the proposed hinge side and the split between doors on a multi-door cabinet.
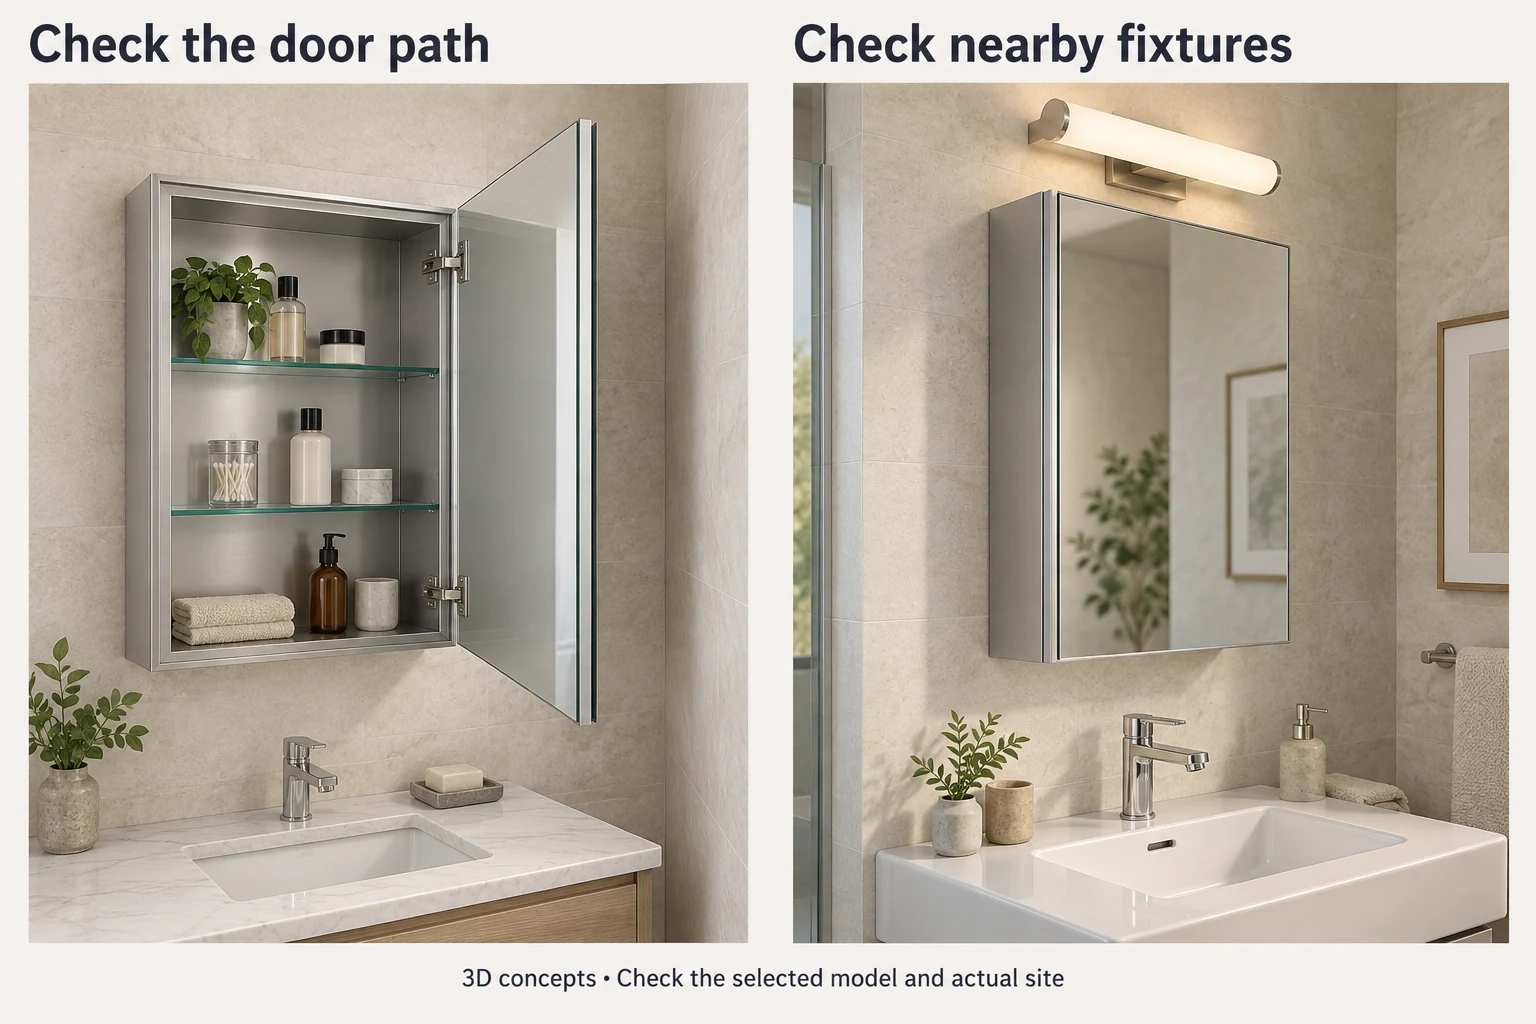
Look at the room in more than one view. A plan view helps assess side-wall conflicts; a side view helps assess height and projection around faucets and lights. Include faucet-handle movement and space needed to use or service the cabinet.
Example: the body and opening match, but the proposed door handing makes the door strike an adjacent wall. Ask whether the selected model supports another handing or arrangement. Do not assume the cabinet can simply be turned upside down.
These examples describe possible fit conflicts, not completed projects. Actual door movement must be checked against the chosen hardware and site conditions.
Installation Difficulty and Cost: Compare the Work Included
Compare installed scope as well as cabinet price. A new recess in a finished wall can require opening preparation, framing and finish repair. An already suitable opening may reduce that work. Surface mounting usually avoids a full cabinet cutout, but support, drilling, brackets and exposed-side finishing still affect the job.
Ask quotations to identify which tasks are included:
- wall preparation, support and any approved framing changes;
- tile or drywall repair and perimeter finishing;
- brackets, side panels or other model-specific accessories;
- power coordination for the selected features; and
- removal, disposal and repair when replacing an existing cabinet.
Avoid a fixed cost premium or installation-time promise without a site assessment. Local labor, wall condition and the selected product can change the comparison. For repeated rooms, unresolved differences in walls or door handing can also create rework, so verify the relevant room types before repeating one detail.
When Dual-Mount or Semi-Recessed Options Help
A dual-mount model supports both recessed and surface installation, subject to its instructions and required accessories. Semi-recessed describes an arrangement with part of the body inside the wall and part outside. The terms are not interchangeable.
If a full recess is unsuitable, an explicitly supported semi-recessed option may be worth comparing. Recheck the opening, fixing, finish and remaining projection. It does not automatically solve a structural or service obstruction. Likewise, changing a dual-mount cabinet’s installation method may change its accessory requirements and installed dimensions.
Final Fit Check: Avoid These Common Mistakes
Before ordering, confirm that:
- The opening comes from the model detail. Mirror dimensions are not cutout dimensions.
- The full cavity is verified. Matching width and height does not compensate for insufficient depth or an obstruction.
- Projection uses the finished-wall reference. Overall product depth alone does not establish the installed position.
- Doors and fixtures work together. Test the proposed handing and movement, not just the closed outline.
- Fixing and accessories are resolved. A mirror covering an old opening does not prove the cabinet has adequate support.
If a critical dimension is unknown, obtain it before approving the installation. If a known conflict remains, revise the model or site arrangement rather than treating it as an assumed allowance.
What to Send for a Model and Drawing Review
Use the Medicine Cabinet Measurement Worksheet (fillable PDF) to record the room, wall area, opening where applicable, proposed cabinet, door handing, power-entry position and drawing revision. Keep site readings separate from model requirements. Use one unit system and mark unknown items as “Review” in the notes; leave non-applicable recessed-opening fields marked “N/A” for a surface-mount proposal.
Put the completed worksheet beside the candidate drawing. The comparison below helps identify what still needs confirmation before ordering.
| Site information to send | Model details to confirm |
|---|---|
| Available wall area, installation preference and photos | Face and body dimensions; supported mounting method |
| Existing opening and cavity information, if safely accessible | Required opening, reference surfaces and installation detail |
| Nearby fixtures, room constraints and preferred door arrangement | Installed projection, door handing and movement |
| Wall finish and planned powered features | Fixing, accessory scope, power entry and service requirements |
Include quantity, destination and the candidate model or drawing revision. For multi-room projects, identify different room and wall types rather than assuming one installation detail fits every location.
You can start without a selected model: send the available site information and explain what remains unknown. Before releasing the order, distinguish confirmed dimensions from items awaiting site checks or a revised drawing.
Compare a cabinet with your wall conditions. Send OJMirror your installation preference, measurements, photos and any candidate drawing to discuss the next step.
FAQs
Can a recessed medicine cabinet fit in a 2×4 wall?
Some can, but fit depends on the model and the actual cavity. A nominal 2×4 label alone is insufficient. In the planning example above, a verified 3½-inch clear cavity would not meet a 4¾-inch requirement. Other models may need different depths; compare their own installation details.
Can a recessed medicine cabinet be surface-mounted?
Only if that model supports surface mounting with the appropriate installation detail and accessories. A cabinet designed for a recess may lack suitable exposed-side treatment or wall-mounting provisions. Confirm the supported method instead of treating the two arrangements as interchangeable.
Will the same nominal cabinet size fit an existing recess?
Not necessarily. Matching nominal sizes can conceal differences in body dimensions, opening requirements, depth, perimeter coverage and fixing points. Check the existing condition against the replacement drawing. The old mirror’s width and height are useful references, but they do not establish replacement compatibility.
Which mounting type offers more usable storage?
Compare the actual interiors. Shelf depth, spacing, hinges and electrical components affect what fits inside. A cabinet that projects farther into the room does not necessarily offer more usable storage, and a recessed cabinet is not automatically smaller inside. Request internal dimensions when storage is a deciding factor.
How much installation clearance should I leave around the cabinet?
Use the selected model’s specified opening and installation allowances. There is no single gap that can be applied to every cabinet: the body, trim, fixing method and space needed to position the cabinet can differ. Do not add a guessed allowance to the mirror-face size, or add it again if the drawing’s required opening already includes it. Confirm the intended finished-wall condition and door clearances separately.