Visual side differences are not installation clearances. Check sink alignment, lights, door travel and wall conditions before choosing.
Updated October 12, 2026
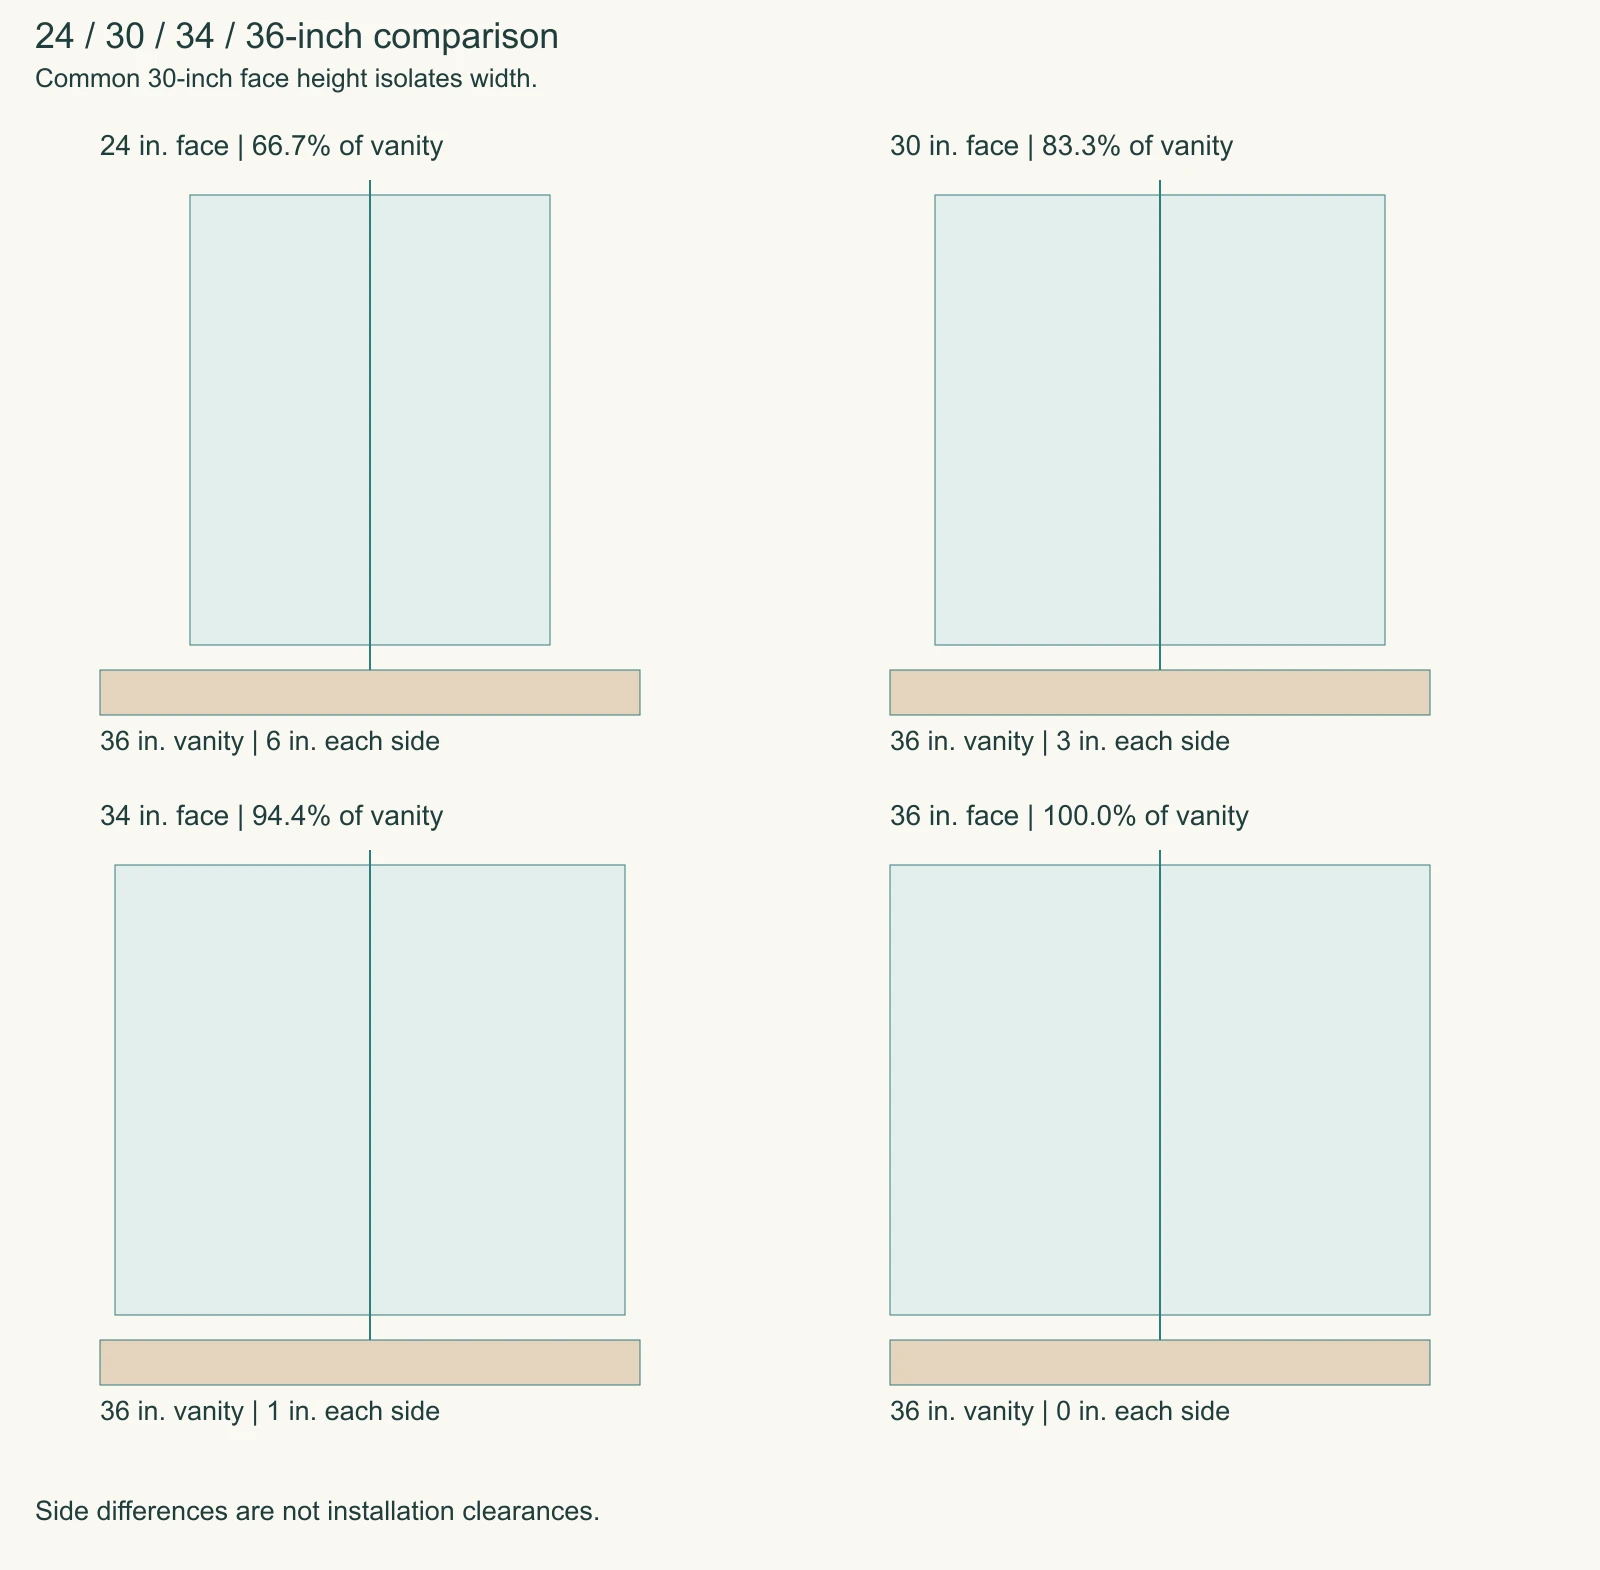
Table of Contents
36-Inch Vanity Medicine Cabinet Size Chart
For a measured 36-inch vanity with a centered sink and cabinet, the visible difference at each side is (36 − cabinet face width) ÷ 2. That gives you a quick way to compare proportions. It does not tell you whether a wall light fits or a mirrored door opens freely.
Swipe or scroll sideways to view all columns.
| Cabinet face width | Share of 36-inch vanity | Centered visual inset per side | Candidate use | Main check |
|---|---|---|---|---|
| 24 in. | 66.7% | 6 in. | Narrower face | Reflection and storage needs |
| 30 in. | 83.3% | 3 in. | Starting comparison | Sconces, doors and sink position |
| 34 in. | 94.4% | 1 in. | Fuller mirror coverage | Side walls and door travel |
| 36 in. | 100% | 0 in. | Equal-width planning option | Confirm a model and the complete wall layout |
These are candidate widths, not a mandatory pairing. The model references below distinguish confirmed configurations from a 36-inch planning width. A vanity sold as 36 inches may also have a top with different overall dimensions. Measure the actual piece and use the selected cabinet's overall face width for the final comparison.
When a 24-Inch Cabinet Makes Sense
A 24-inch face leaves six inches of vanity width visible on either side in the centered example. That can be a useful width to compare when side lighting or nearby wall elements limit the available mirror area. It also asks more of the smaller mirror: check that the person standing at the basin has comfortable reflection coverage and that the cabinet's interior meets the storage need.
Do not assign those six inches to a sconce without measuring the fixture. A sconce can extend beyond the vanity's width, and its body or shade can still conflict with an open cabinet door. The wall, fixture, and door path—not the vanity margin alone—set the available space.
When a 30-Inch Cabinet Is Worth Comparing
A 30-inch face leaves three inches at each side in the same centered layout. It offers a broader mirror, but it reduces the room available within the vanity's projected width. If the wall is open and lighting sits above the cabinet, this may be a straightforward proportion to test. With side lights or a nearby return wall, verify the proposed layout on the elevation.
A wider outside dimension does not automatically provide more usable shelf space. Door divisions, hinges, lighting components, and the cabinet body affect the interior. Compare usable shelf width and depth when storage is a deciding factor.
When a 34-Inch Cabinet Is Worth Comparing
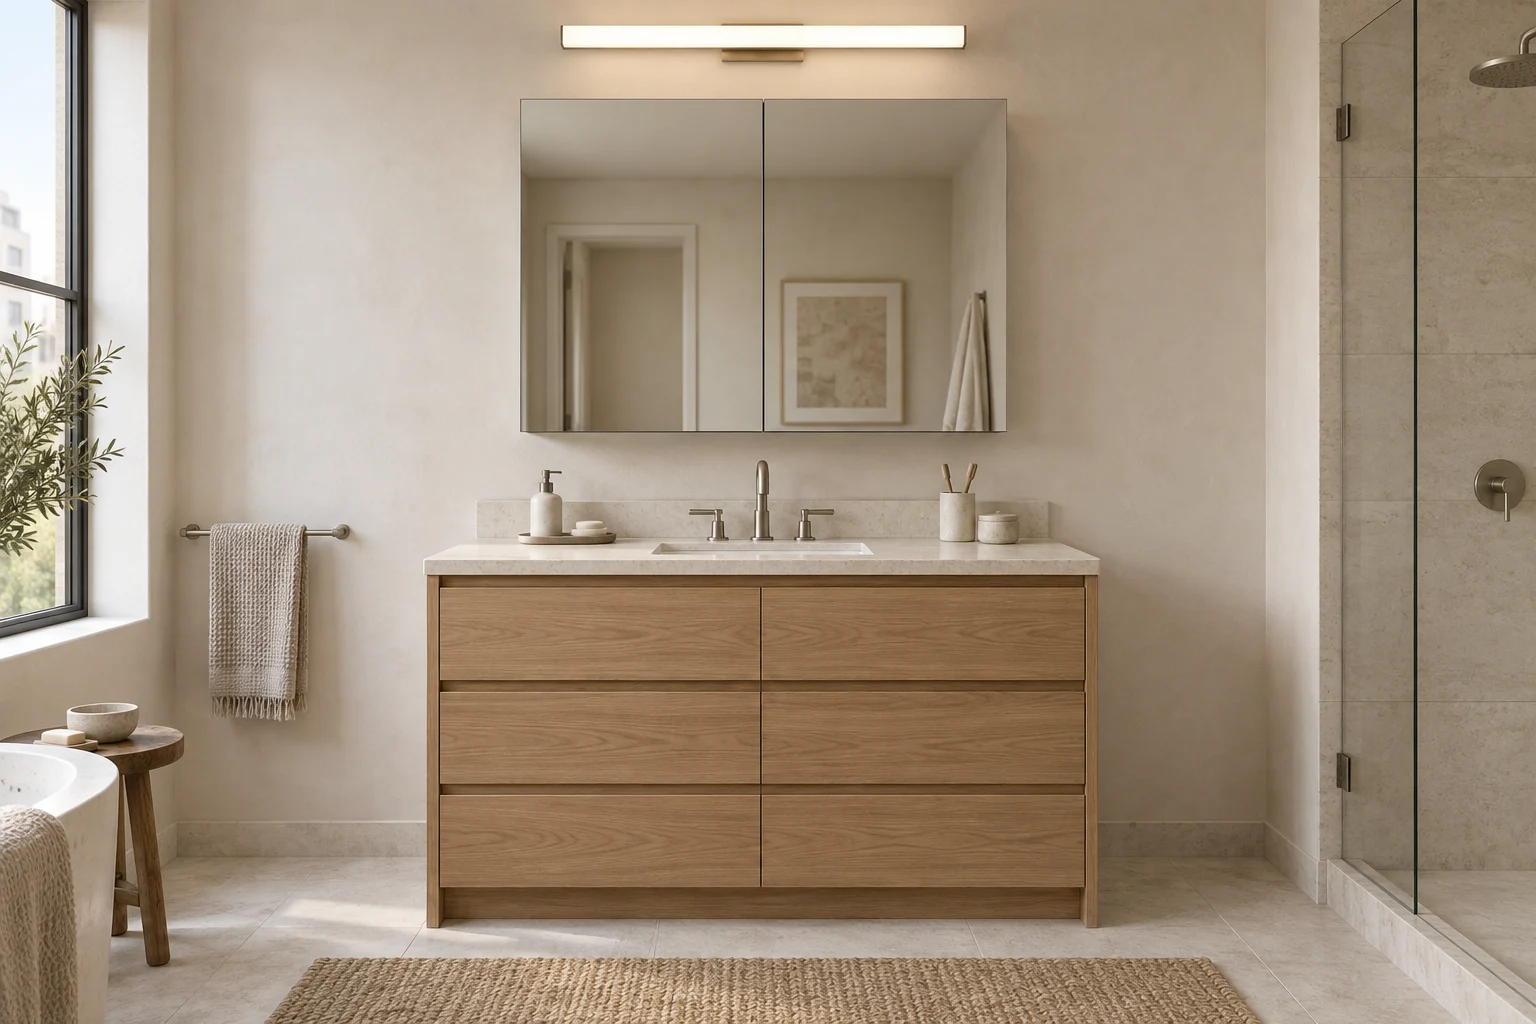
A centered 34-inch face leaves one inch at each side of a measured 36-inch vanity. OJ-CB-3430FS provides a confirmed 34 × 30-inch face configuration with two doors. It gives more face width than the 30 × 26-inch option, but also needs four additional inches of height. Compare both dimensions and the individual door paths before choosing it.
Can the Cabinet Be the Full 36 Inches Wide?
Yes, a full-width design can be considered if the wall and selected model support it. It leaves no width difference between the cabinet face and the vanity in the centered example, but the wall may continue beyond both edges. Sconces might be placed outside that projected width, or the lighting scheme might use another arrangement. Confirm the complete layout rather than rejecting or approving the cabinet from the two 36-inch labels alone.
Door construction changes the test. A hinged door needs clear travel beside the cabinet; an upward-opening design needs space above it. The advertised width alone cannot establish whether either door style will clear nearby fixtures.
OJMirror Configurations to Compare for a 36-Inch Vanity
The following OJMirror configurations provide three concrete starting points. W × H describes the mirror face; D is overall external depth. The side differences assume an exactly 36-inch vanity with the face centered. These specifications do not establish stock availability or approval for a particular wall.
Swipe or scroll sideways to view all columns.
| OJMirror model | Mirror face W × H | Overall depth | Doors | Centered difference per side |
|---|---|---|---|---|
| OJ-CB-2430FS | 24 × 30 in. | 5 in. | Single | 6 in. |
| OJ-CB-3026FS | 30 × 26 in. | 5 in. | Double | 3 in. |
| OJ-CB-3430FS | 34 × 30 in. | 5 in. | Double | 1 in. |
| 36-inch planning option | Confirm height and configuration | Confirm | Confirm | 0 in. |
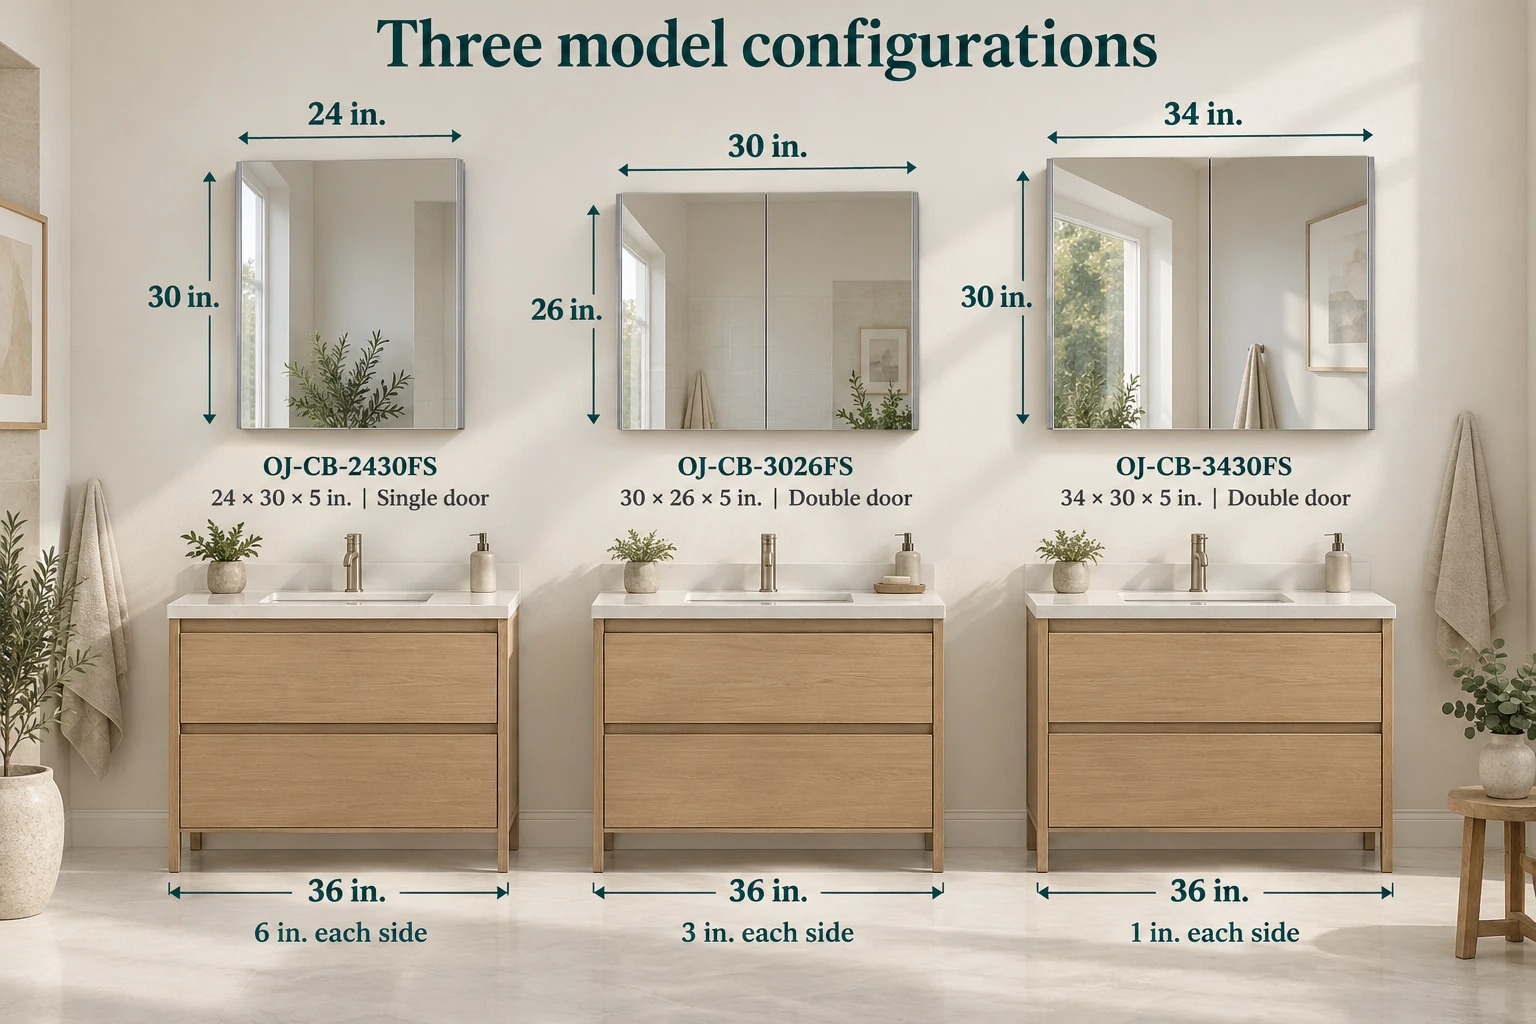
Choose the 24 × 30 configuration when a narrower face is useful; compare the 30 × 26 model when width matters but vertical space is tighter. The 34 × 30 model offers a fuller-width option with a one-inch visual difference at either side. Double doors introduce a different opening pattern from a single wide door, so compare each leaf's actual travel rather than assuming two doors always solve a clearance problem.
The selected model's drawing must identify its permitted mounting method, body width and height, fixing details, door handing, and usable shelf depth. Those details are not established by the face dimensions alone. No specific 36-inch model is confirmed in this table.
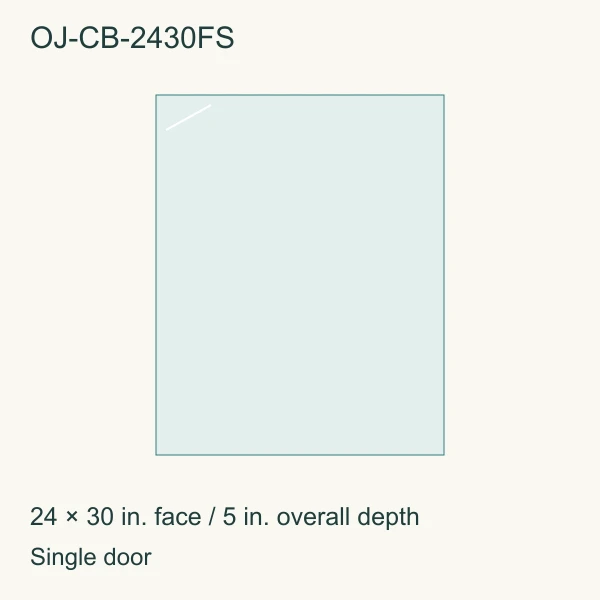
OJ-CB-2430FS
24 × 30 in. face · 5 in. overall depth
Single door
Compare for a narrower face and six-inch visual side differences.
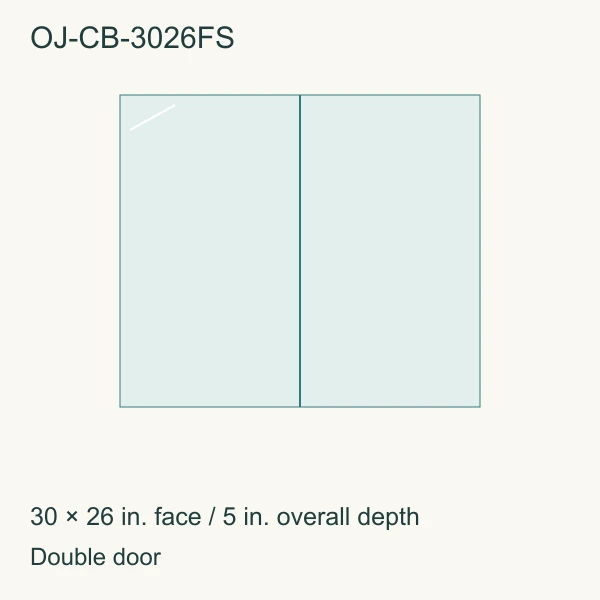
OJ-CB-3026FS
30 × 26 in. face · 5 in. overall depth
Double door
Compare when a 30-inch face suits the layout but vertical space is tighter.
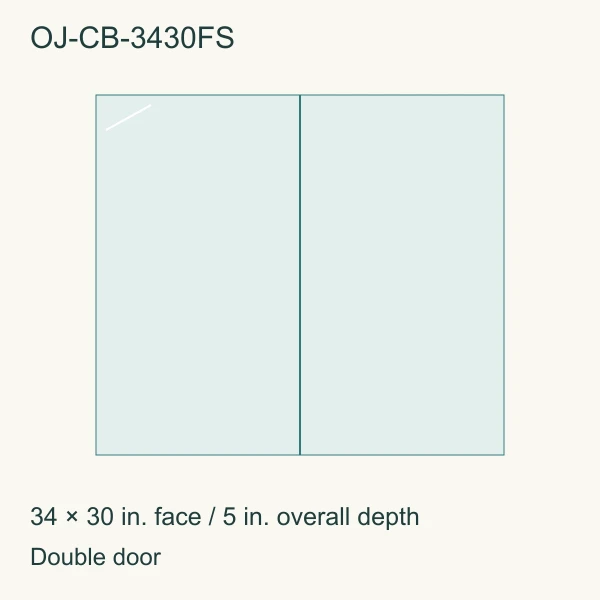
OJ-CB-3430FS
34 × 30 in. face · 5 in. overall depth
Double door
Compare for broader reflection coverage and one-inch visual side differences.
Include the model code with your request. These face layouts identify the confirmed dimensions and door count; mounting details and approved project drawings are supplied through the model review. Explore the mirrored medicine cabinet range for the broader product direction.
Let the Sink and Lighting Set the Layout
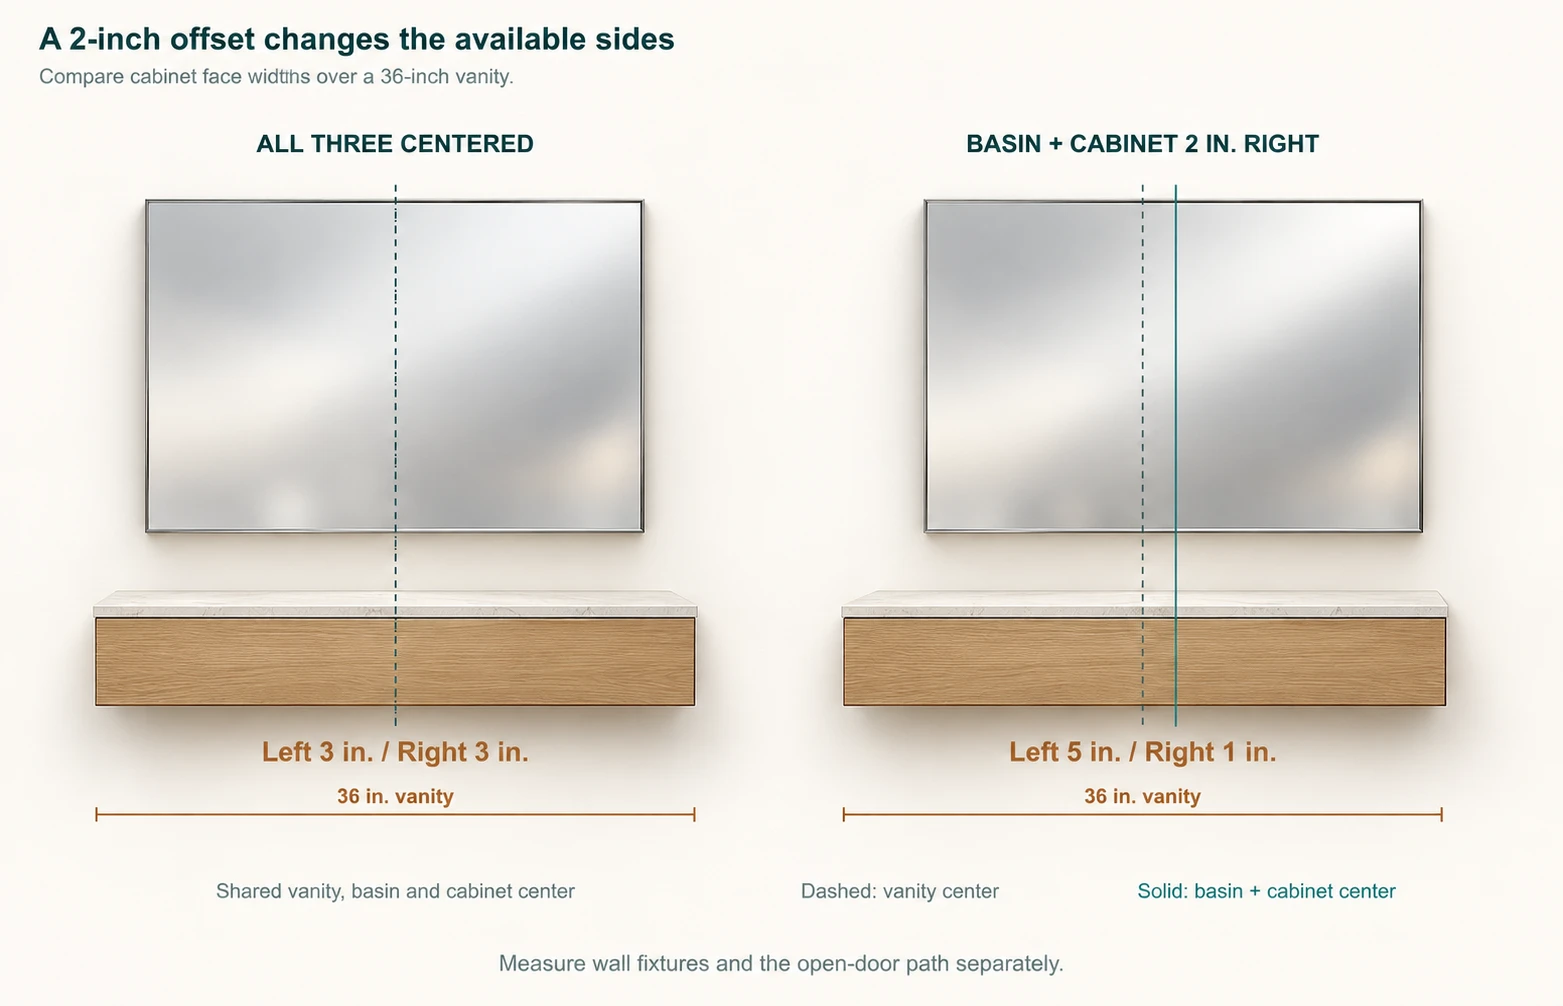
The calculation above assumes three aligned centerlines: vanity, sink, and medicine cabinet. Many single-sink vanities do not have a centered basin. A drawer stack, countertop choice, or site arrangement can move the user's position to one side, so mark the basin centerline before deciding where the mirror should sit.
How Door Swing Affects the Choice
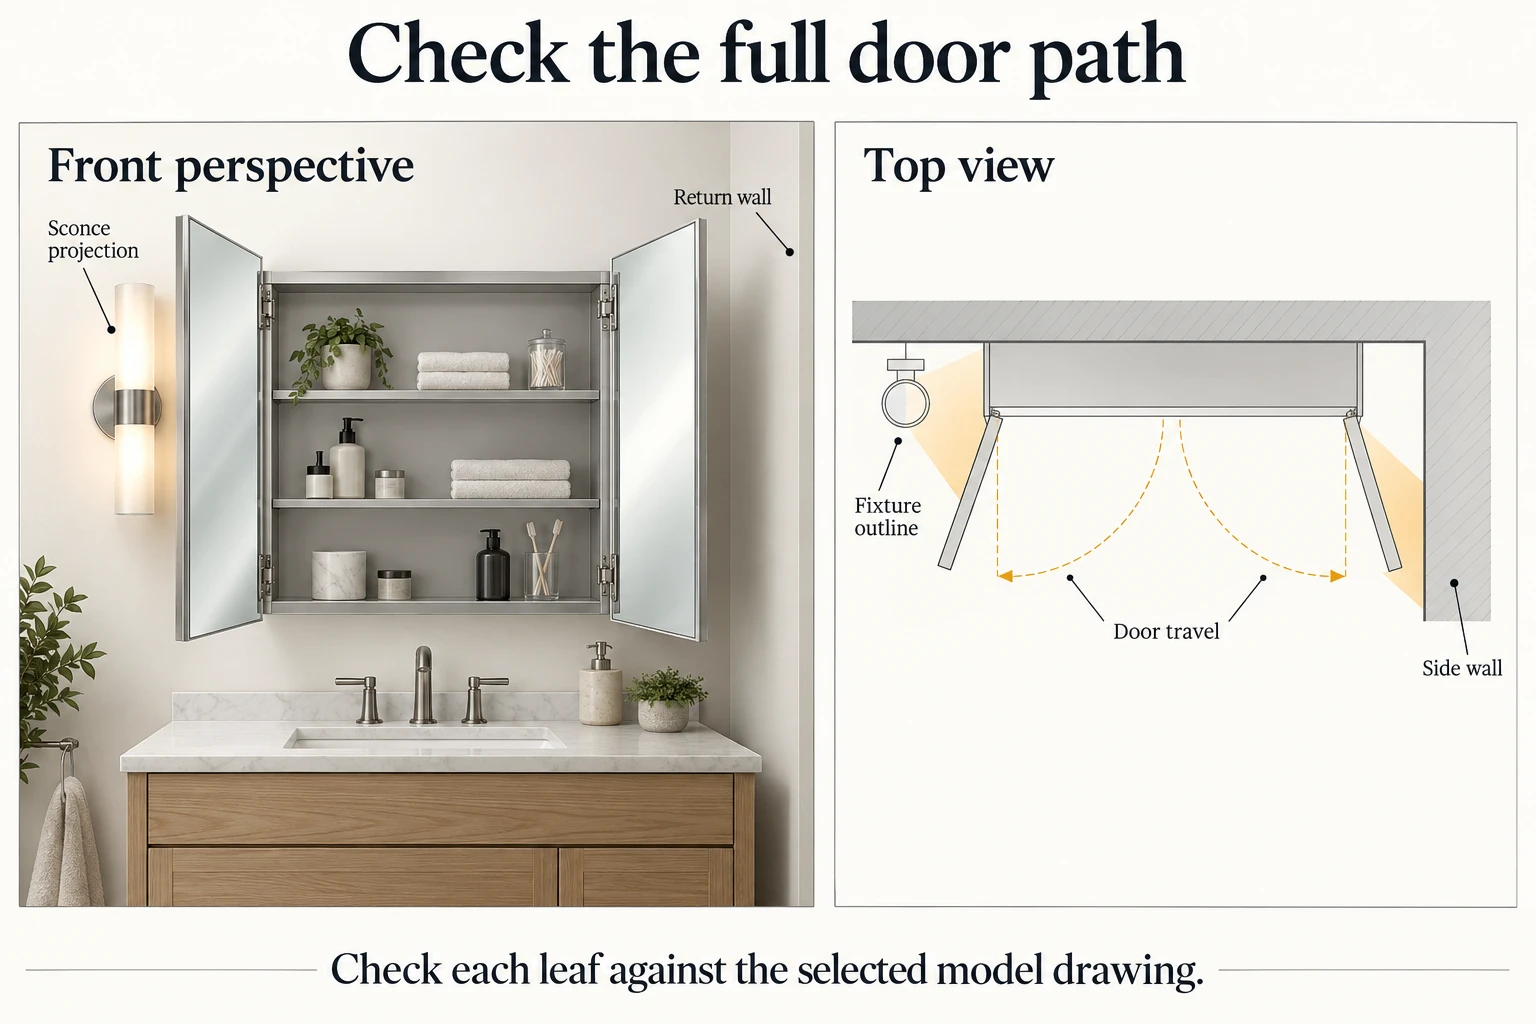
Trace each door leaf from closed to fully open on the selected model's plan view. Compare that path with the entire sconce, return wall and shower-screen outline, including anything projecting toward the user. Two narrow doors change the movement pattern; they do not automatically eliminate conflicts. Request the actual hinge location and permitted opening range before setting fixture positions.
Side Sconces Versus Lighting Above the Cabinet
Two bathrooms can have identical vanities but different usable wall width. Side sconces occupy space beside the mirror; their shades, backplates, and projection may also intersect the door's path. An overhead light changes the constraint above the cabinet instead. Record the light's actual outline and location, then test the cabinet with its door open.
Integrated lighting may change where separate fixtures are placed, but the presence of LEDs alone does not prove that a cabinet provides the required task lighting. Review the lighting plan and the chosen model's information. Keep electrical location and installation requirements in the project brief if a powered cabinet is being considered.
What Changes with an Offset Sink?
Suppose the sink and a 30-inch cabinet are centered two inches to the right of a measured 36-inch vanity. The visual differences become five inches at the left and one inch at the right. A sconce planned beside the right-hand door may now be the limiting element, even though a centered sketch showed three inches on both sides.
This example describes the vanity and cabinet in a front view. It does not measure the free wall beyond the vanity, and it is not a door-clearance calculation. For an actual room, mark the sink, cabinet face, wall edges, and fixture outlines at their real positions. The OJMirror measuring guide shows which dimensions to collect before comparing models.
Medicine Cabinet Height, Depth and Door Clearance
Width is only the first pass. Cabinet height must work for the people using the sink while fitting between the faucet or backsplash below and any lighting or other obstruction above. Measure the space between the faucet and lighting before setting the height; no one mounting height works for every room and model.
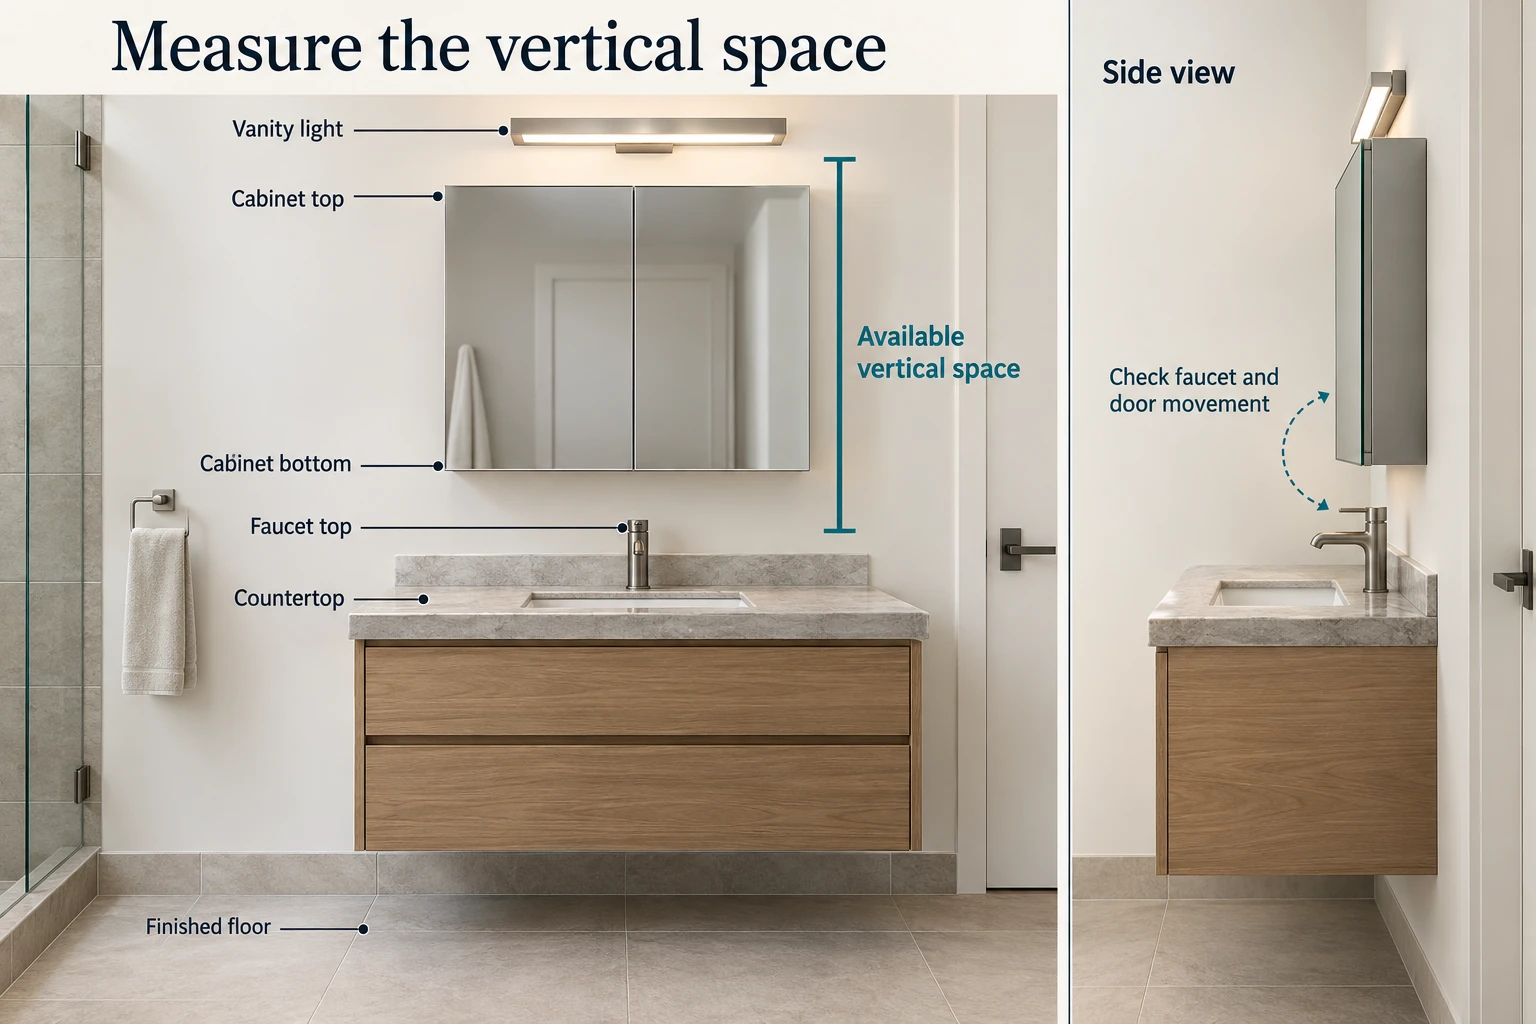
The 30 × 26-inch model has four inches less face height than either 30-inch-high configuration above. That difference can help where an overhead fixture limits the available height; it is not a recommended mounting height.
Swipe or scroll sideways to view all columns.
| Measurement | What it means | What to check |
|---|---|---|
| Overall face height | Top to bottom of the mirror face | Viewing range and obstacles above and below |
| Overall external depth | Complete cabinet from back to front | Product envelope; not automatically wall projection |
| Cabinet-body depth | Depth of the box behind the door | OJ-CB-2430FS: 4 in.; confirm other models separately |
| Clear opening depth | Unobstructed installation space within the wall | OJMirror reference requirement: 4¾ in. |
| Installed wall projection | Distance forward of the finished wall | Mounting position, door thickness and fittings |
| Usable shelf depth | Actual storage space inside | Your bottles and supplies; do not infer it from 5 in. overall depth |
Draw the proposed cabinet at full size on the wall or elevation. Check the bottom edge against the faucet and daily reach, then the top edge against lighting, ceiling details, and any upward-opening door. If the cabinet is surface-mounted, its projection from the finished wall may affect how the door clears a sconce or nearby wall. Recessing changes that projection, but it adds wall-cavity requirements.
Test the door open, not just the mirror closed. Note the hinge side and the complete travel of every door. A nearby shower screen, return wall, tall faucet, or projecting light can defeat a layout that looks balanced in a closed-front drawing. Record these conflicts in the selection checklist below; a generic swing allowance will not resolve them.
Commercial Projects and Accessible Mirror Height
Where the ADA mirror provision applies, mirrors above lavatories or countertops must place the bottom of the reflecting surface no higher than 40 inches above the finished floor. That datum is the reflecting surface, which may differ from the cabinet's lower outer edge. Coordinate the applicable accessibility requirements, user reach and the complete project layout rather than applying a residential mounting rule. See U.S. Access Board, ADA §603.3.
Recessed vs. Surface-Mount: Check the Wall and Opening
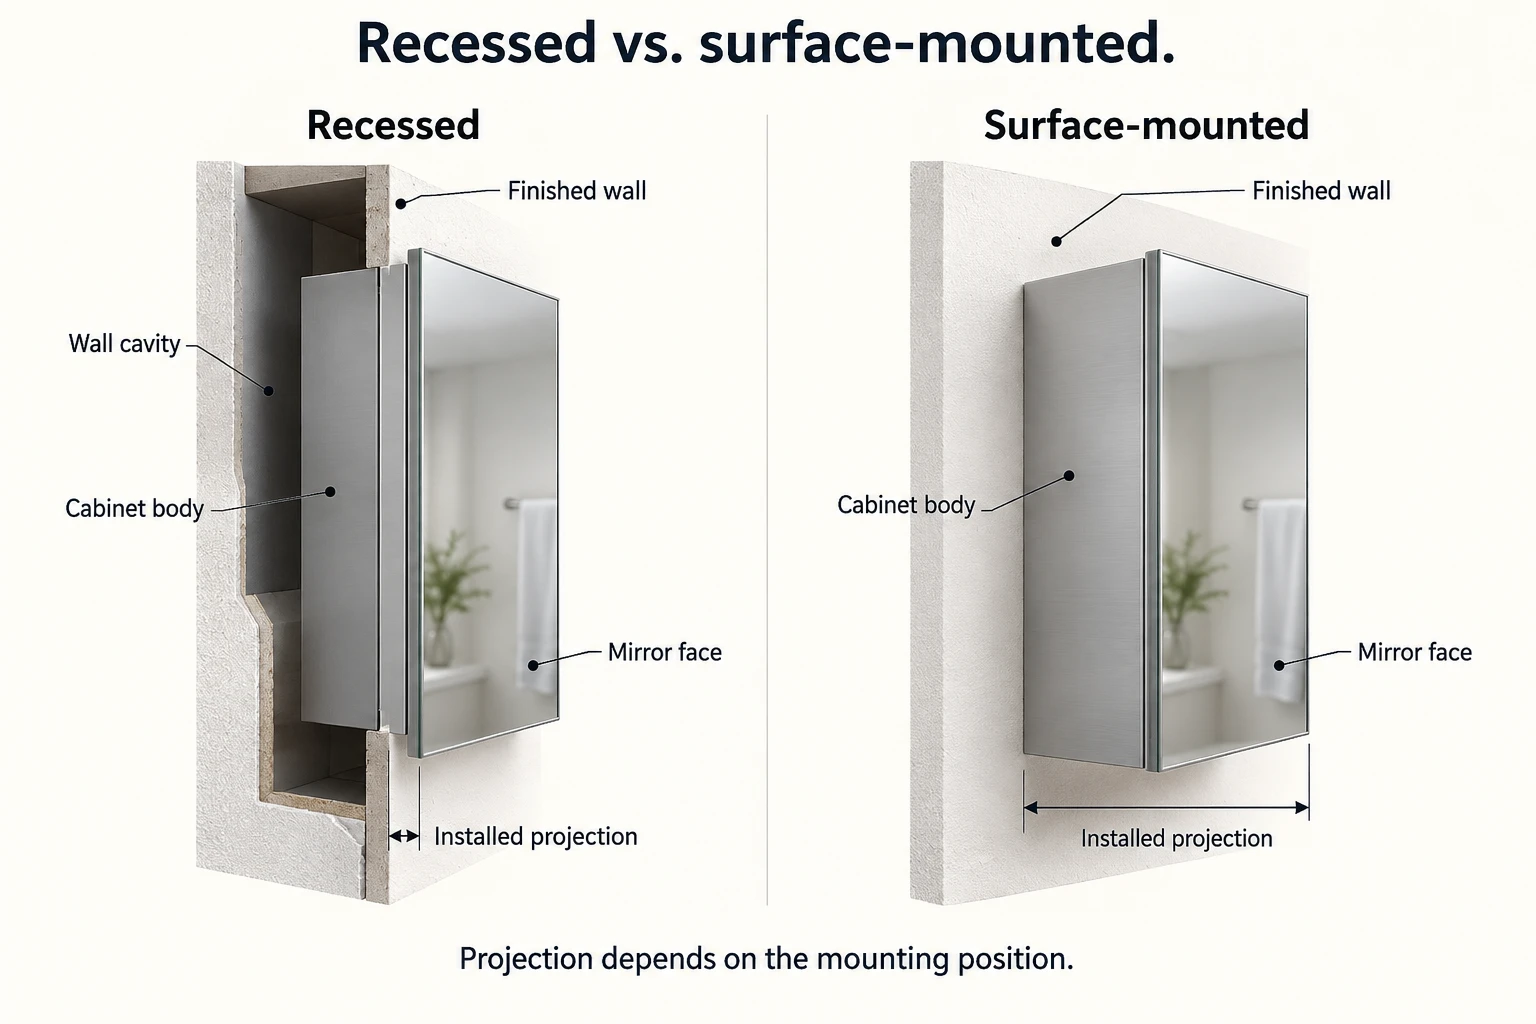
A cabinet's catalog label may describe its visible face, while the part entering the wall and the required opening have different dimensions. Do not cut a recessed opening from a width recommendation or a promotional image.
Face Size vs. Rough Opening: OJ-CB-2430FS
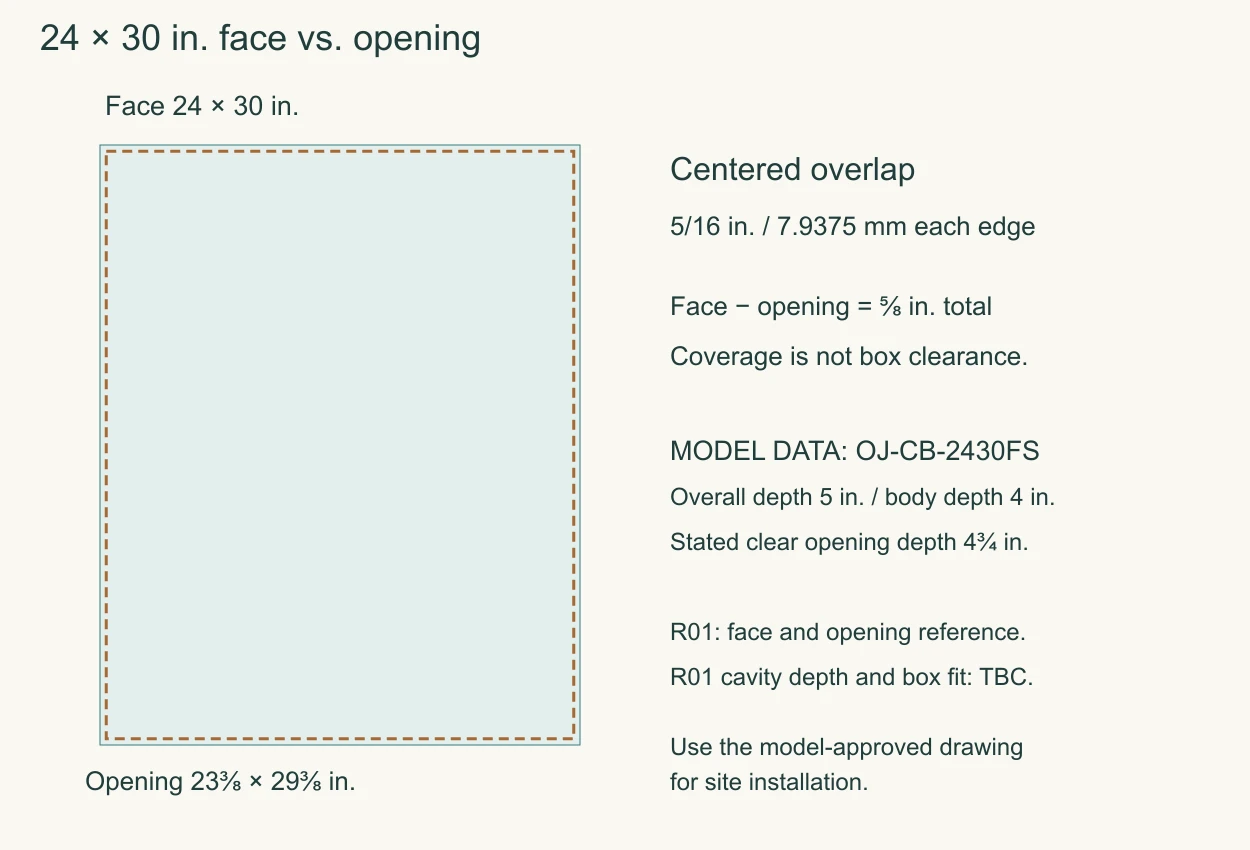
For the 24 × 30-inch face, OJMirror's reference opening is 23⅜ × 29⅜ inches, with 4¾ inches of clear opening depth. The width and height calculation subtracts ⅝ inch once from each complete face dimension, not from each edge. This is an OJMirror-specific requirement, not a universal rule for medicine cabinets.
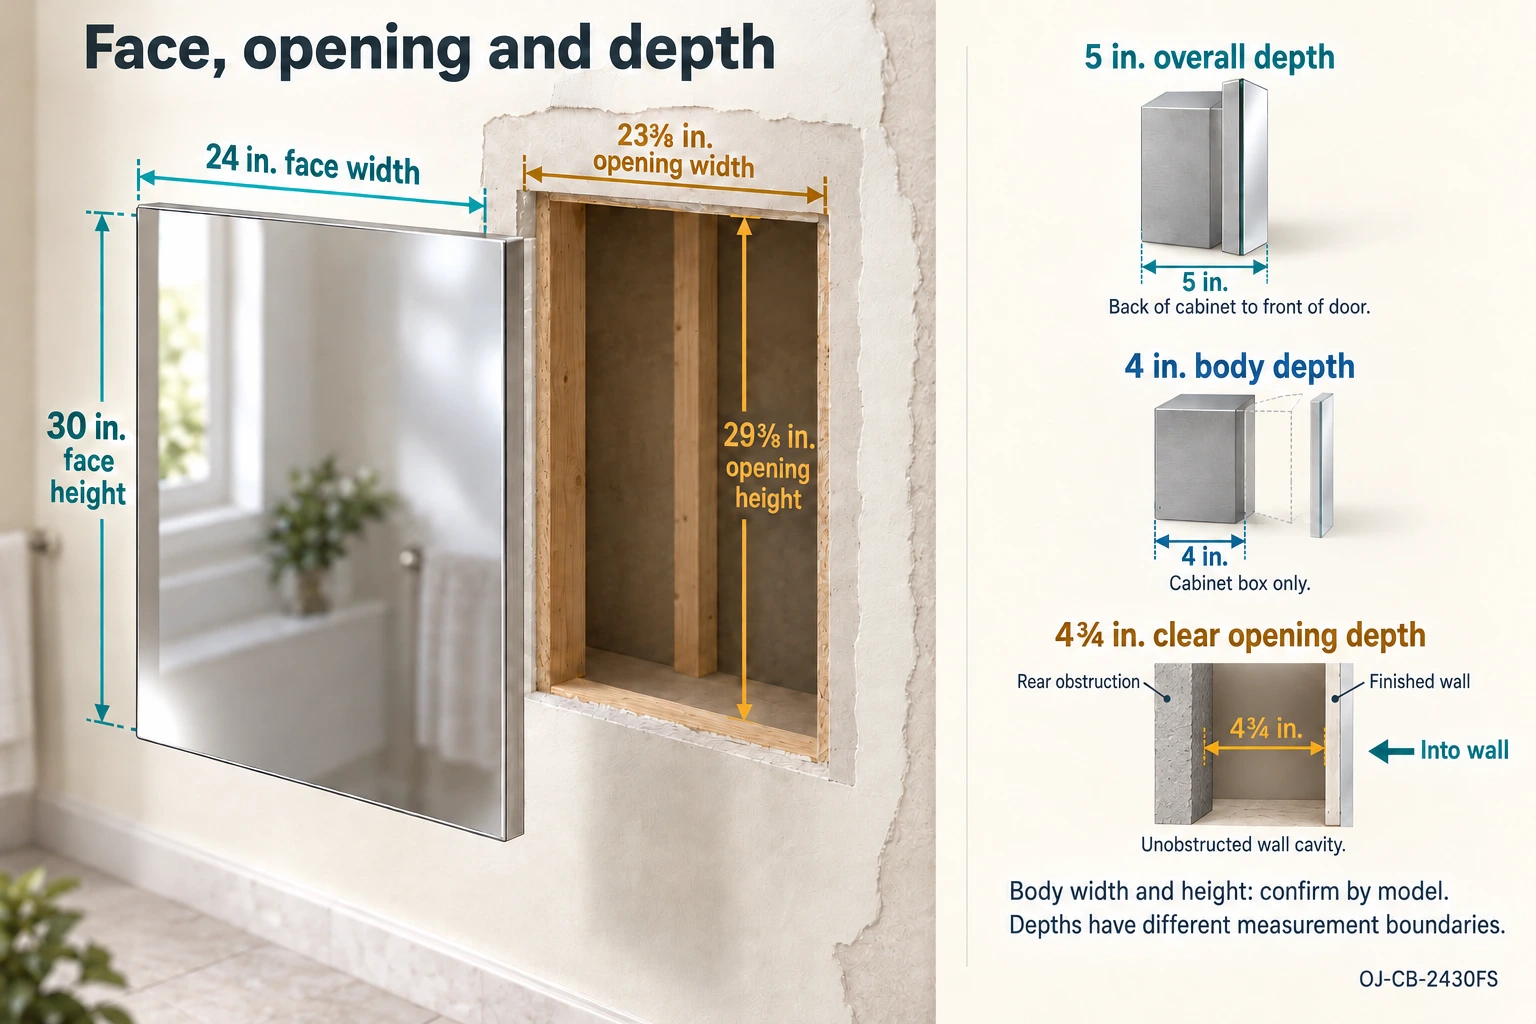
For this model, 5-inch overall depth, 4-inch body depth, and 4¾-inch clear opening depth have different measurement boundaries. Do not subtract opening depth from overall depth to calculate wall projection. The approved section drawing must locate the cabinet relative to the finished wall. A cavity with only 3½ inches of usable depth does not meet the stated 4¾-inch requirement.
Drawing Reference: 24 × 30-Inch Face and Wall Opening
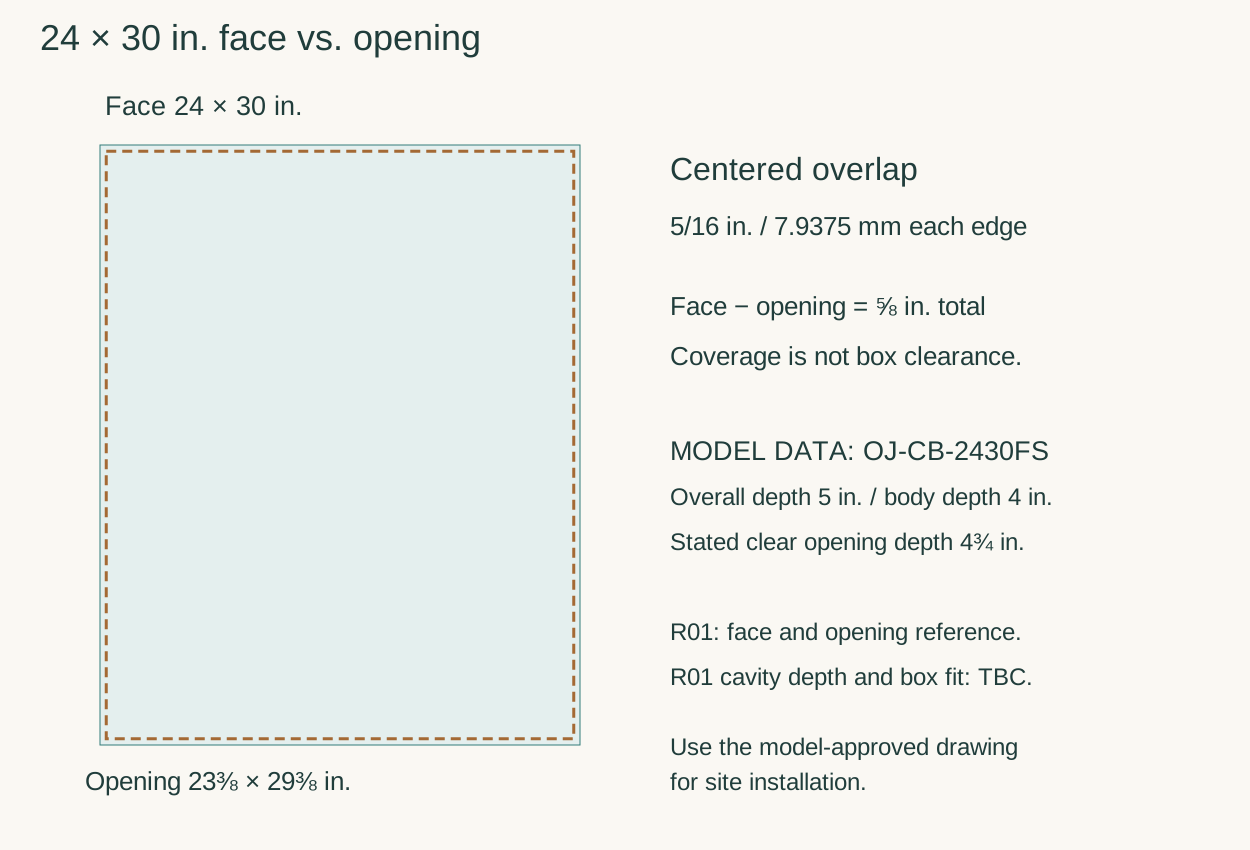
OJMirror drawing MC-24×30-RO-R01, dated October 12, 2026, shows a 609.6 × 762 mm (24 × 30 in.) mirror face over a 593.725 × 746.125 mm (23⅜ × 29⅜ in.) wall opening. When centered, the face covers the opening by 7.9375 mm (5/16 in.) at each edge. That overlap is face coverage, not installation clearance around the recessed cabinet body.
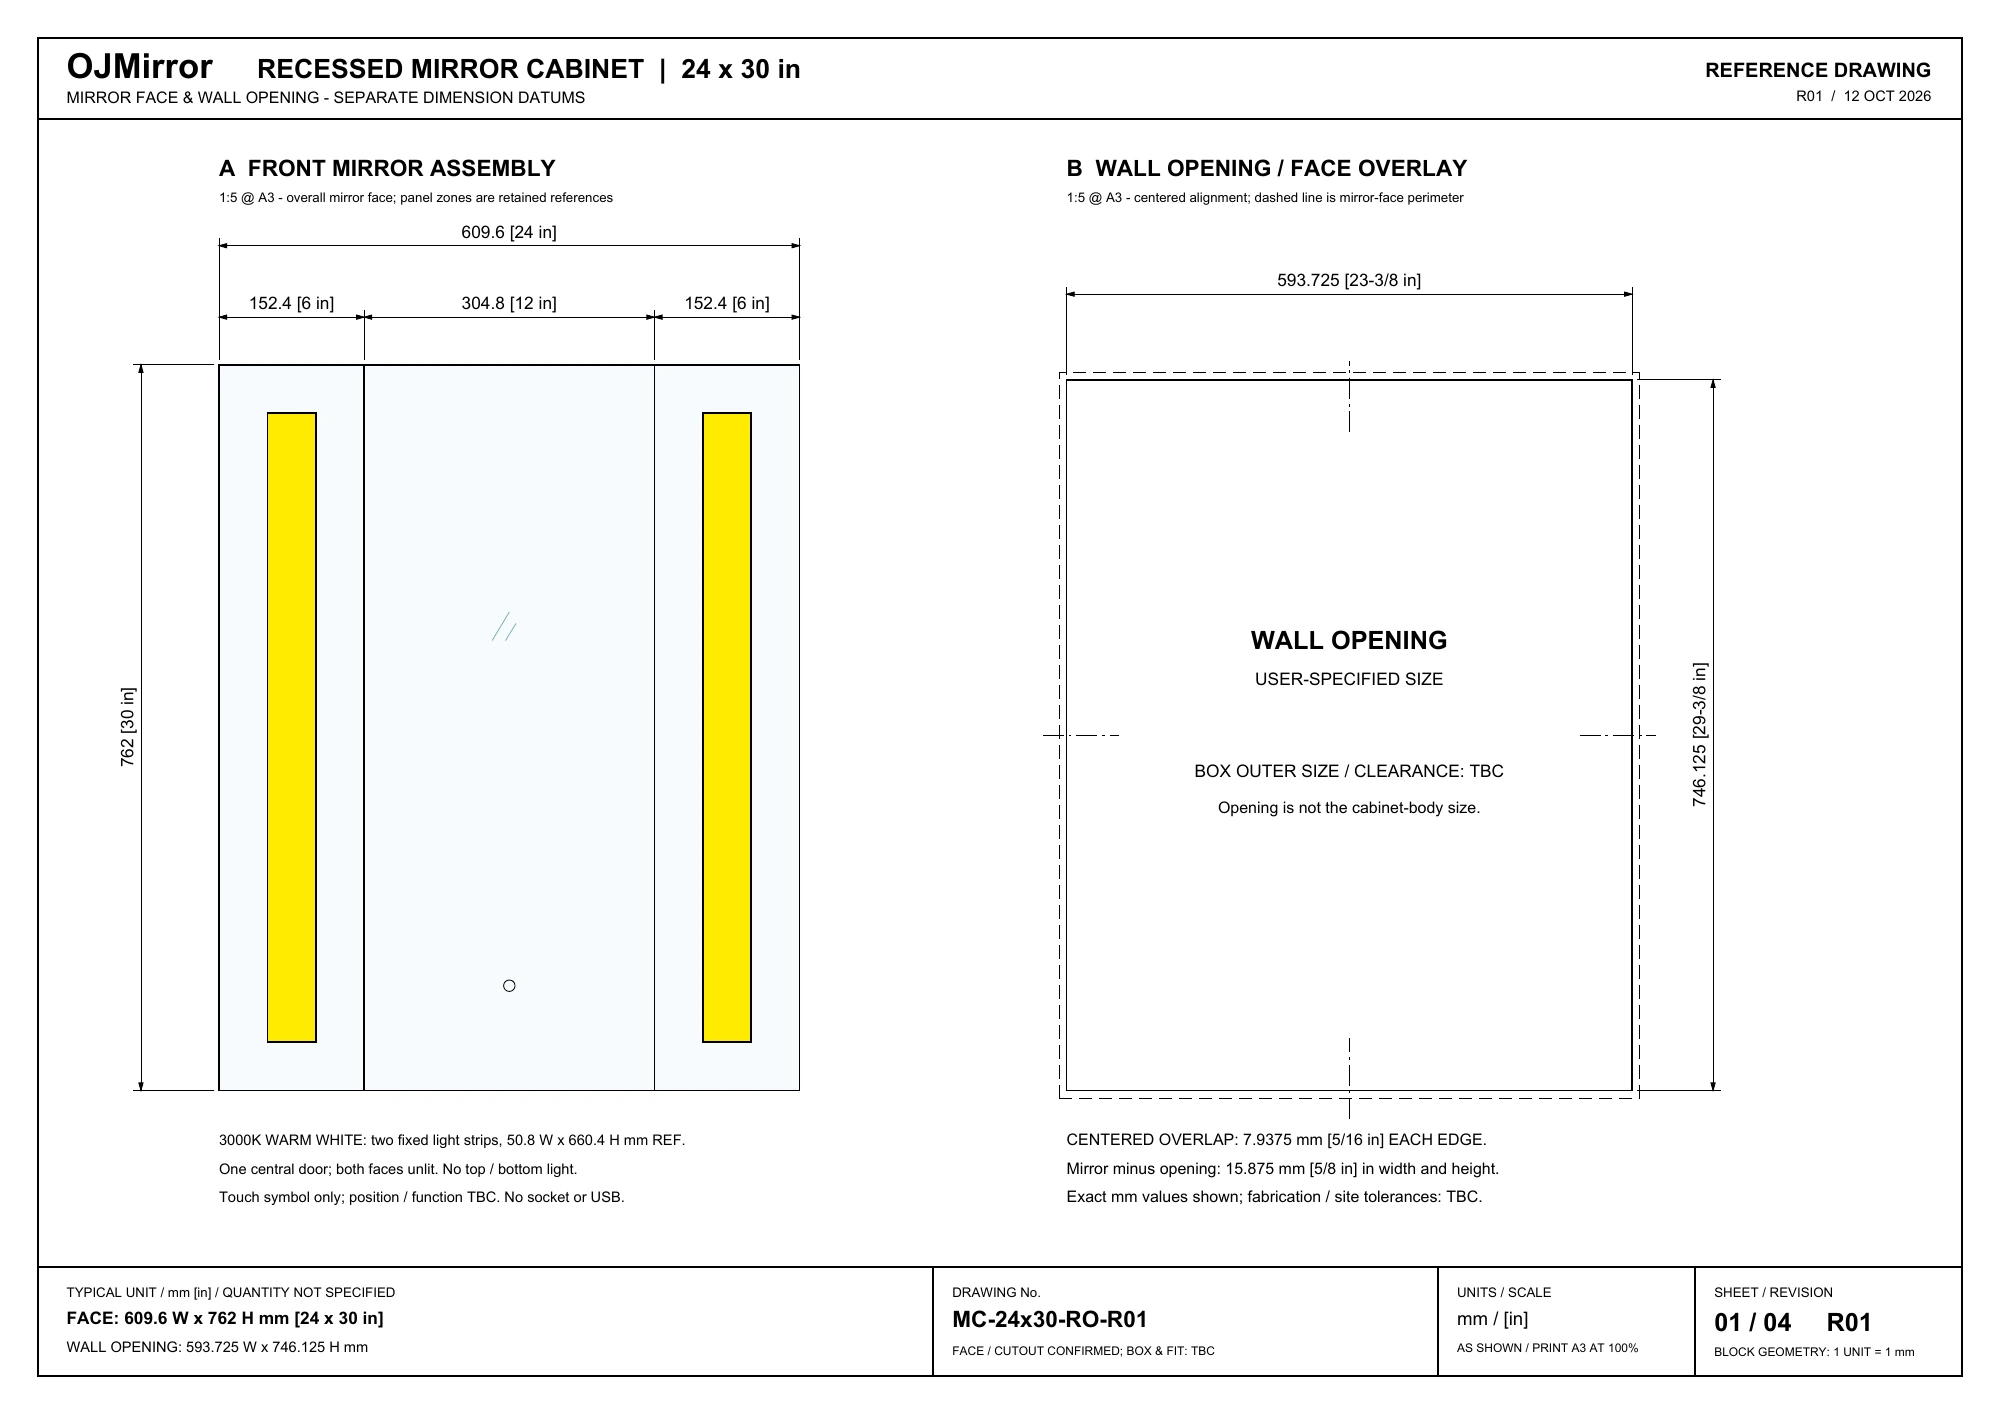
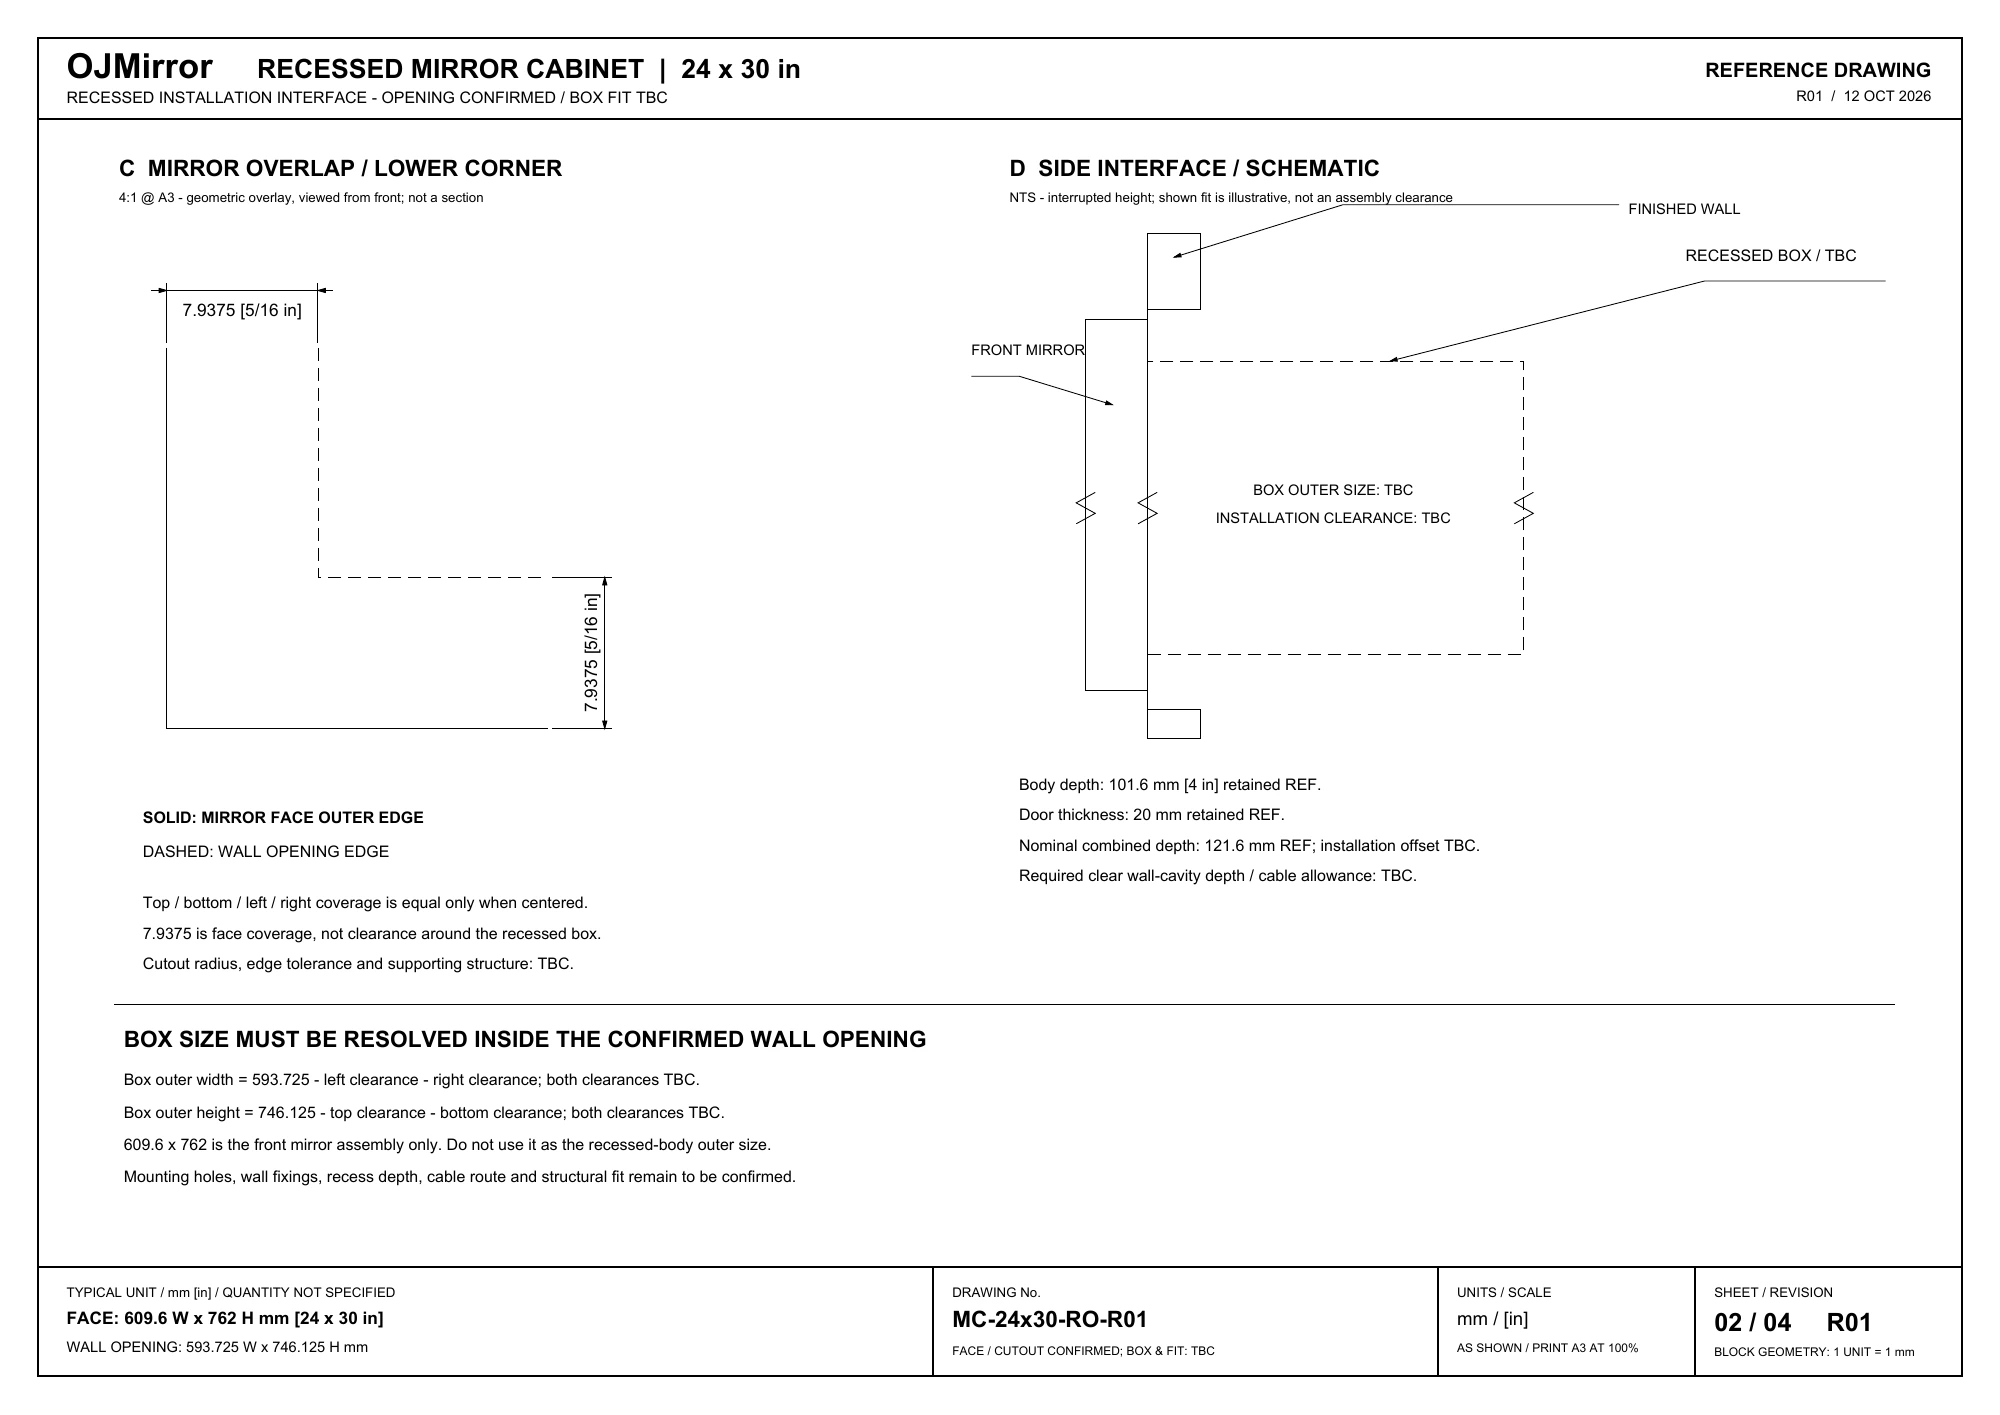
This drawing identifies a central opening door with fixed side mirrors but does not identify an OJ-CB-2430FS model code. Its side interface retains a 4-inch body-depth reference and a 20 mm door-thickness reference; it leaves required wall-cavity depth, cable allowance and installation offset unresolved. The separately confirmed 5-inch overall depth and 4¾-inch clear opening requirement for the model comparison above must not be treated as dimensions approved by R01. Match the model and drawing revision before setting the recess depth.
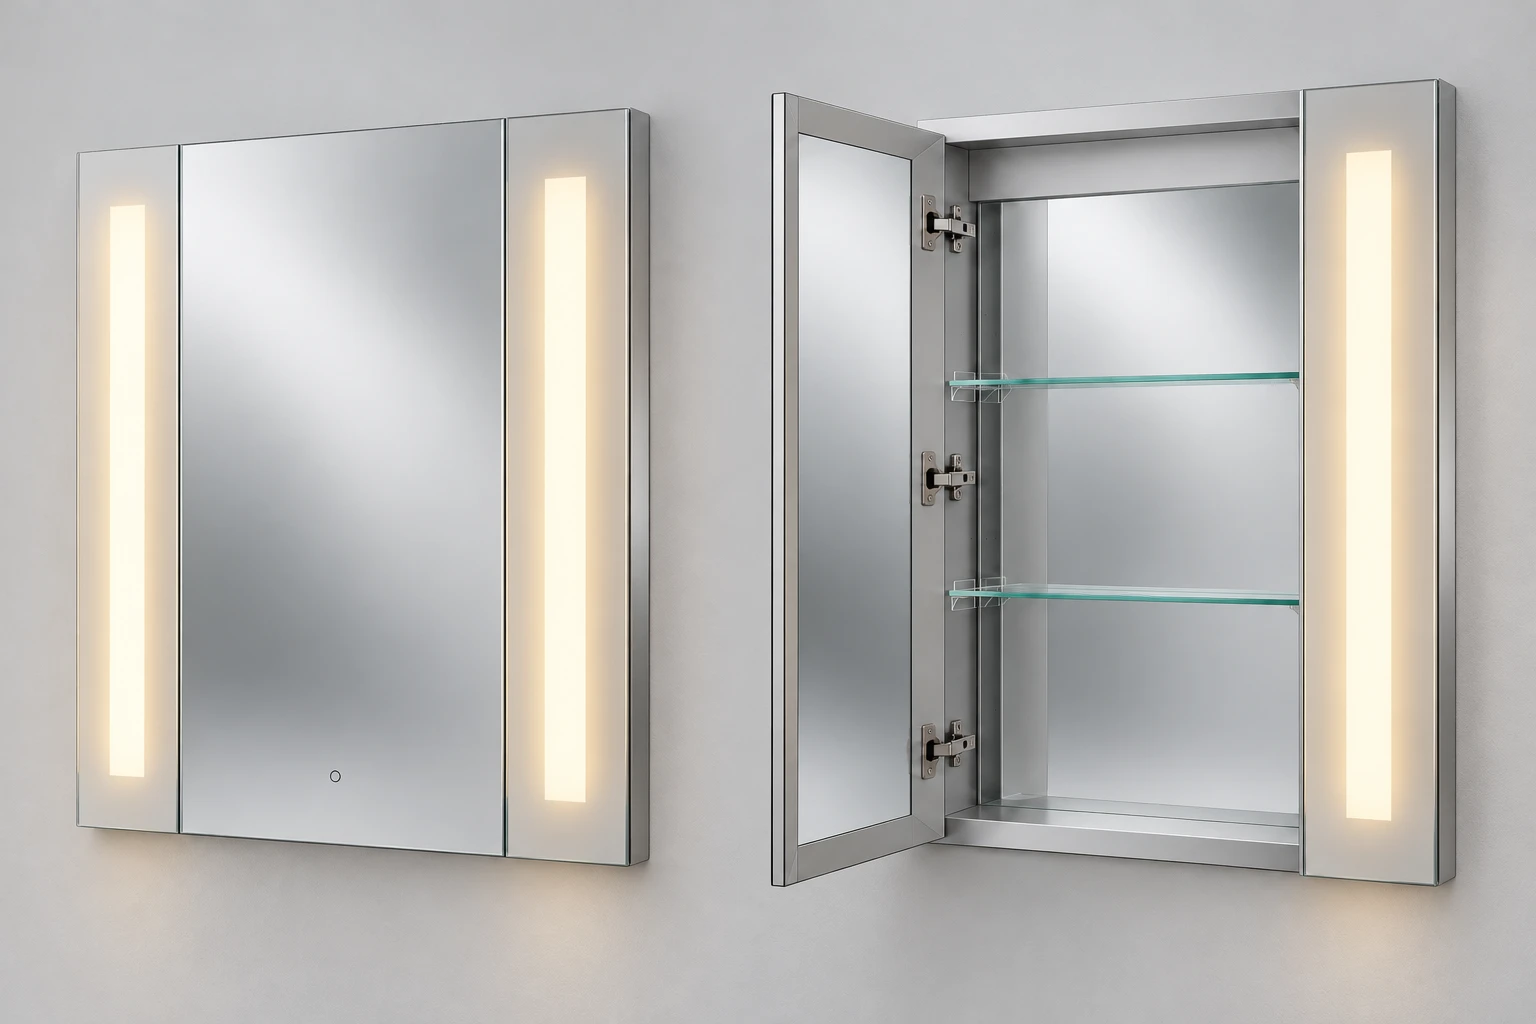
View the complete four-sheet R01 drawing (PDF), including the open-door arrangement and hardware references. It is a reference drawing with outstanding fit details, not a construction release.
View the face-versus-opening dimension sheet or download its editable SVG.
Which Drawing Can Be Used for Installation?
Reference layout: R01 explains the confirmed face and opening dimensions, with unresolved body fit and wall interfaces. Model-specific approved drawing: this must identify the exact model, revision and project approval before the opening or fixings are set out. An image in this article does not establish that approval.
Request one coordinated drawing showing face and body dimensions, rough opening, clear depth, mounting points, door handing and travel, and electrical entry where applicable. Check that its model code and revision match the quotation. If any of those fields is unresolved, record it before the wall is prepared.
If the Cabinet Will Be Recessed
The advertised face size is not a cutout dimension. Mark an opening only from the approved installation drawing and measured wall conditions; include depth, fixing points, and any electrical entry.
An existing hole may constrain the new cabinet even when the visible mirror looks right over the vanity. Record its actual width, height, and usable depth, along with framing, plumbing, wiring, and finished-wall details. Resolve conflicts with those services and the supporting structure before changing the wall.
If the Cabinet Will Be Surface-Mounted
Confirm that the chosen model permits surface mounting, then check its fixing requirements and projection from the finished wall. A listed cabinet depth may not equal its installed projection, especially where mounting hardware or wall finishes add distance. Include that projection when testing reach and door movement near the sink.
Choose a Cabinet in Five Steps
- Measure the vanity and countertop. Record their actual widths separately.
- Locate the sink centerline. Mark an offset before comparing mirror positions.
- Compare 24, 30, 34 and 36 inches. Shortlist a face width and the height required by the actual model.
- Check lights and open doors. Plot fixture projection, side walls and each leaf's complete travel.
- Confirm mounting and drawing revision. Verify the wall cavity or surface fixings against the selected model.
Five Common Sizing Mistakes
- Using the nominal vanity width: measure the installed cabinet and top.
- Treating the face as the body: obtain both sets of dimensions.
- Checking doors only when closed: plot their travel against fixtures.
- Using the product label as the cutout: use the approved opening dimensions.
- Choosing recessing before checking the wall: confirm cavity depth, services and support first.
Confirm the Layout and Model Before You Order
Use one layout sheet to compare the 24-, 30-, 34-, and 36-inch candidates. Record the room measurements alongside the selected model's current installation drawing and revision, then resolve each item below before ordering.
Swipe or scroll sideways to view all columns.
| Check | Record on the layout sheet | Decision it supports |
|---|---|---|
| Vanity and basin | Actual vanity and countertop widths; basin centerline | Which face width and position provide useful mirror coverage? |
| Cabinet and storage | Overall face width and height; body size; usable shelf dimensions | Does the candidate provide the reflection and storage needed? |
| Lights and wall edges | Fixture outlines and projection; side walls; faucet or backsplash below; obstacles above | Is there enough space around the proposed cabinet? |
| Door movement | Door type, hinge side, and complete opening path | Can every door open without hitting fixtures or adjacent surfaces? |
| Wall and mounting | Permitted mounting method, fixing points, installed projection; for recessing, cutout and usable cavity depth | Can the wall accept and support the cabinet? |
| Powered features, if included | Electrical entry and installation requirements | Can the electrical location be coordinated with the wall and cabinet? |
Use the model-specific installation dimensions for the final decision. The 6-, 3-, 1-, and 0-inch examples compare appearance; they do not establish cutout dimensions or door clearance.
For comparisons across different vanity widths, see the medicine cabinet size guide. Use this 36-inch guide to work through the narrower decision: four candidate face widths, an offset basin, and the door and wall conditions that can rule a candidate out.
For other vanity sizes, compare the 30-inch vanity guide or the 48-inch vanity guide. Keep the model and wall checks separate when moving between widths.
Frequently Asked Questions
What Is the Best Medicine Cabinet Size for a 36-Inch Vanity?
A 30-inch face is a useful starting comparison for a centered basin. Choose 24 inches when a narrower face helps the layout; consider 34 or 36 inches for a fuller-width effect only after checking lights, wall edges and doors. There is no single size that fits every 36-inch installation.
Is a 30-Inch Medicine Cabinet Too Wide for a 36-Inch Vanity?
Not by width alone: it leaves three inches per side when centered. It can still conflict with a sconce, nearby wall or offset basin. A 24-inch alternative leaves more visual space, but you must measure the actual conflict to know whether it helps.
Can the Medicine Cabinet Be the Same Width as the Vanity?
Yes, if the wall layout and door operation permit it. A centered 36-inch face leaves zero visual width difference at the vanity edges; that does not mean there is zero wall space beyond the vanity, or that door clearance has been checked.
What Size Recessed Medicine Cabinet Fits a 36-Inch Vanity?
Choose the face width for the basin and elevation, then check the cabinet body and wall opening independently. OJ-CB-2430FS has a 24 × 30-inch face and a 23⅜ × 29⅜-inch reference opening with 4¾-inch clear depth. Use the selected model's approved installation drawing before cutting.
Can I Keep My Existing Cabinet When Installing a 36-Inch Vanity?
Possibly. A wider vanity does not by itself require a new cabinet. Recheck the basin alignment, mirror coverage, lighting, and door path after the vanity position changes. If the sink moves off the old cabinet centerline, a cabinet that technically fits the wall may no longer serve the user well.
Does a 24 × 30 Cabinet Always Measure 24 Inches Wide?
Check how the manufacturer defines the two dimensions. A size shown in a product name may not match every overall cabinet dimension, so distinguish the face, body, and required opening in the specification. Also confirm the intended installation orientation rather than assuming the cabinet can simply be rotated.
Can a Larger Mirror Face Cover an Old Recessed Opening?
It might cover the opening visually, but that does not prove the new cabinet body fits, has proper support, or matches the required cutout. A replacement needs adequate cavity depth, suitable fixing points, and the specified opening—not just a face large enough to conceal the edges.
Request a Model-Specific Size Review
Planning medicine cabinets for a hotel, apartment building, or other multi-unit project? Send a marked wall elevation, measured vanity and countertop widths, basin and lighting positions, mounting preference, unit count, destination market, and any candidate model drawing through the OJMirror project inquiry page. These details let the size and drawing requirements be discussed against a specific layout.
Model specifications and the OJMirror opening requirement were confirmed by OJMirror; site-specific mounting and final construction dimensions require the selected model drawing. Include the drawing revision with your inquiry so the review refers to the same configuration.