Table of Contents
Quick Size Chart
| Mirror size | Side inset over a 24-inch vanity* | Best use | Watch for |
|---|---|---|---|
| 18 × 28 in | 3 in per side | Tight walls, broad frames or side sconces | May provide a narrow reflection |
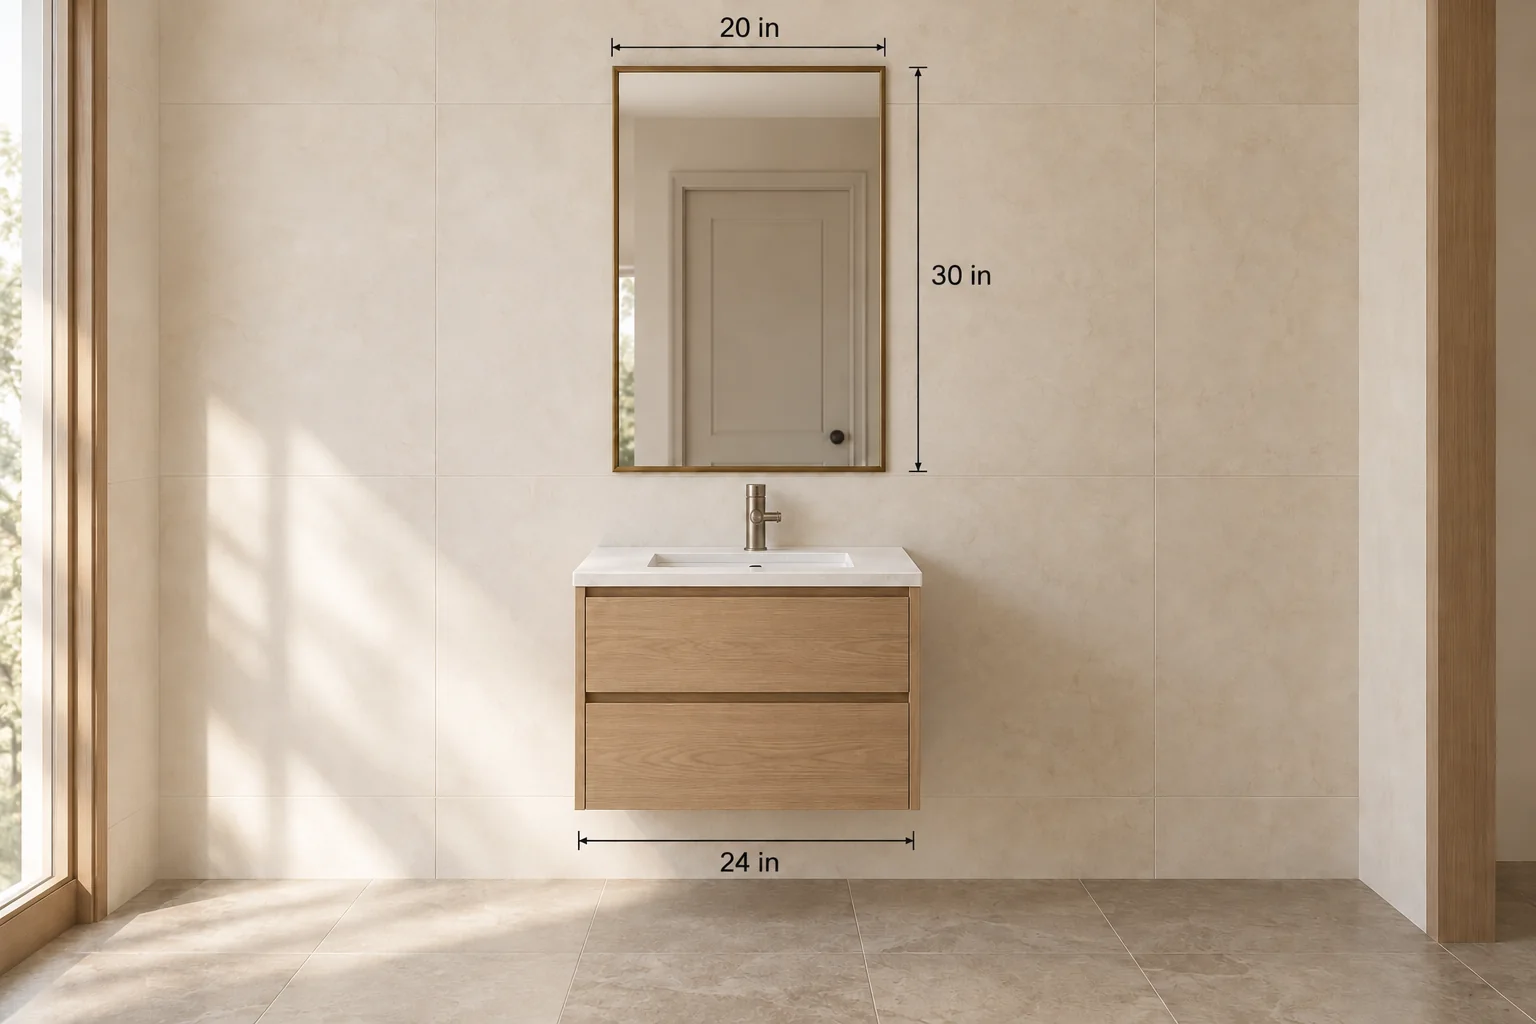
| 20 × 30 in | 2 in per side | Balanced default for a centered single sink | Confirm the frame’s outside dimensions |
| 22 × 30 or 32 in | 1 in per side | Fuller coverage with a slim frame | Limited tolerance for an uneven or off-center layout |
| 24 in wide | 0 in relative to vanity | Deliberate full-width look or round mirror | Requires careful alignment; side lighting becomes difficult |
*The inset assumes the mirror and vanity share the same centerline and uses the mirror's overall outside width.
Why do recommendations range from 18 to 24 inches? They describe different layouts. An 18-inch outside width leaves more visible countertop at each side; 20–22 inches balances reflection with side margin; 24 inches creates a deliberate full-width composition. Frame thickness, wall obstructions and lighting determine which starting point makes sense. None of these widths guarantees installation clearance.
Which Mirror Size Should You Choose?
The right width depends on what surrounds the mirror, not on a percentage alone. Choose a starting layout, then check the product drawing.
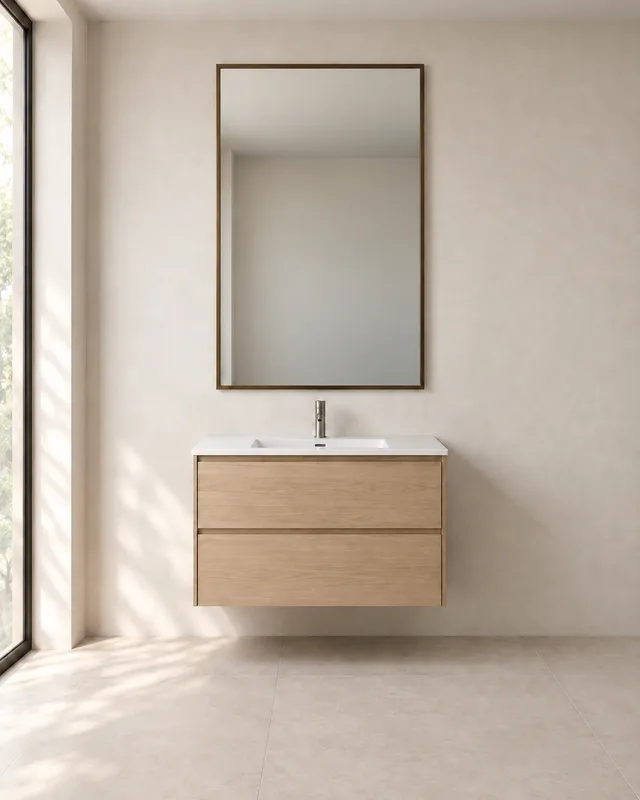
Standard centered 24-inch vanity
20 × 30 in
Balanced width, height and side margin
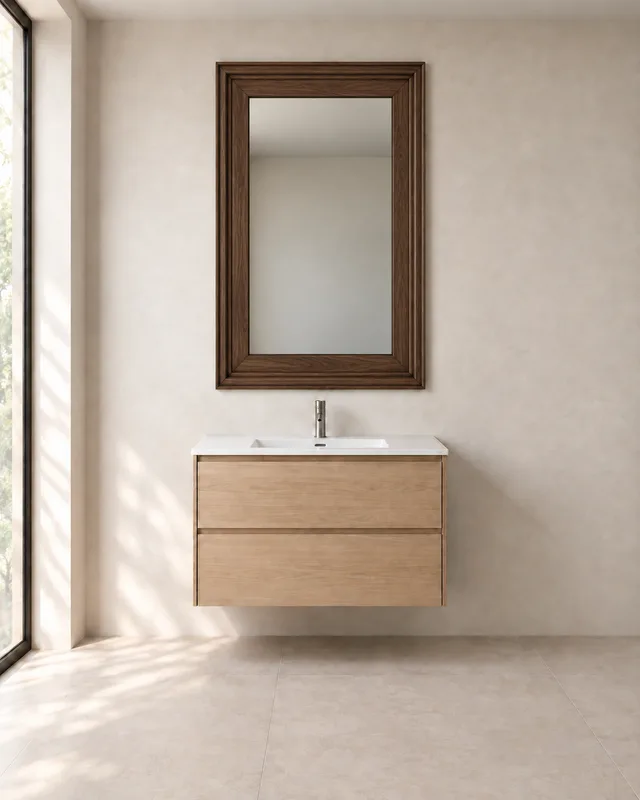
Thick decorative frame
18–20 in wide
The frame adds visual weight and reduces usable glass
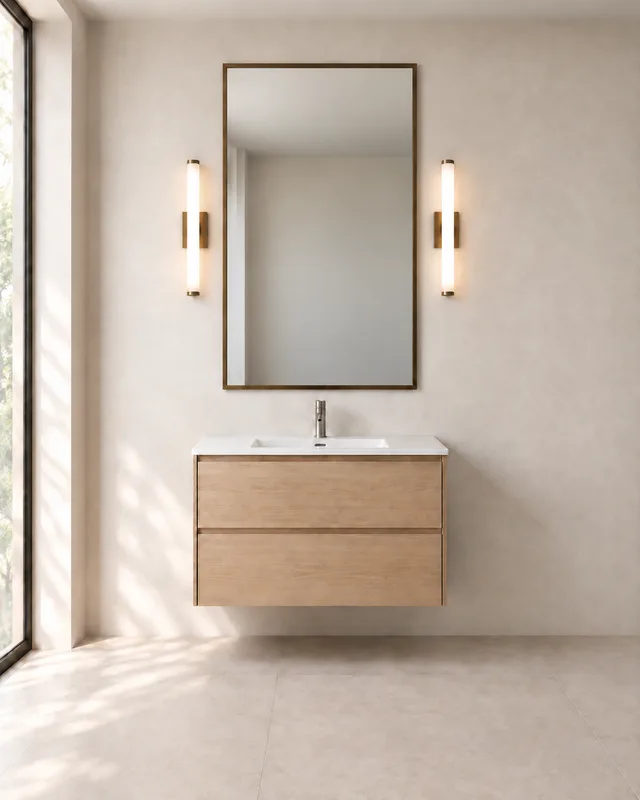
Side sconces
18–20 in wide
Preserves more room for fixtures and clearance
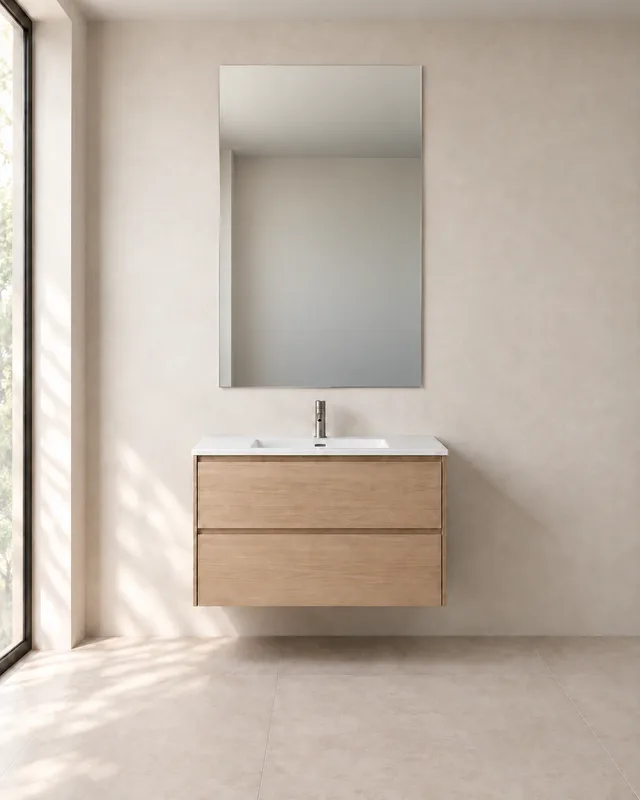
Slim-framed or frameless mirror
20–22 in wide
Provides more reflection without looking too heavy
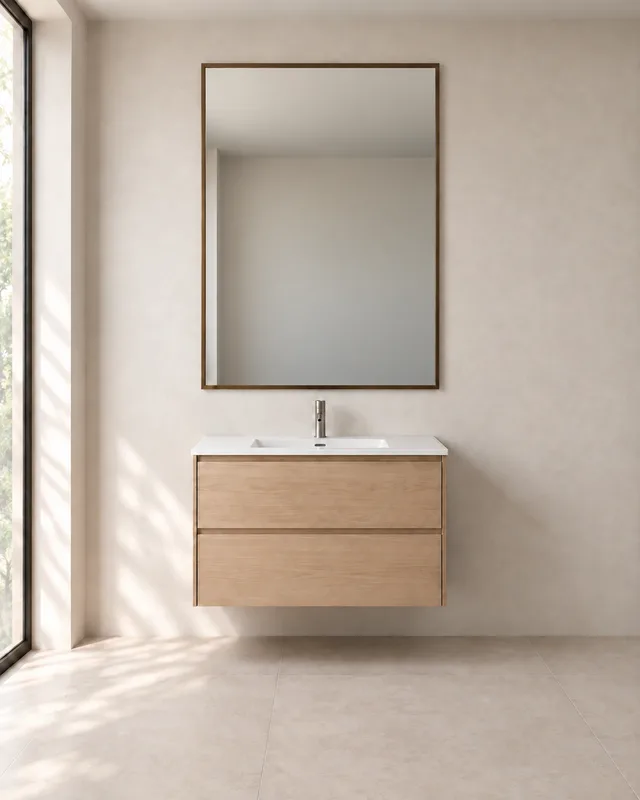
Fuller-width appearance
22–24 in wide
Fills more of the wall but needs accurate alignment
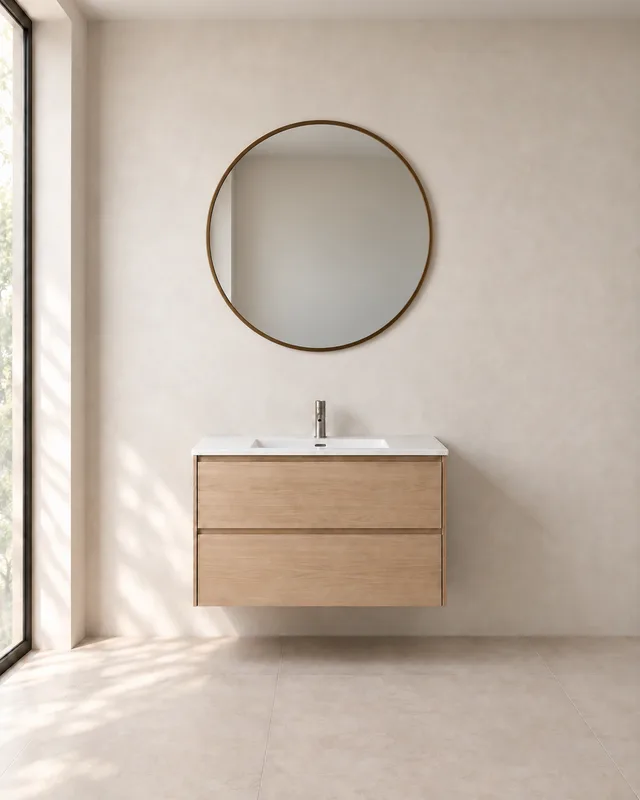
Round mirror
20–24 in diameter
Curved edges reduce its visual weight
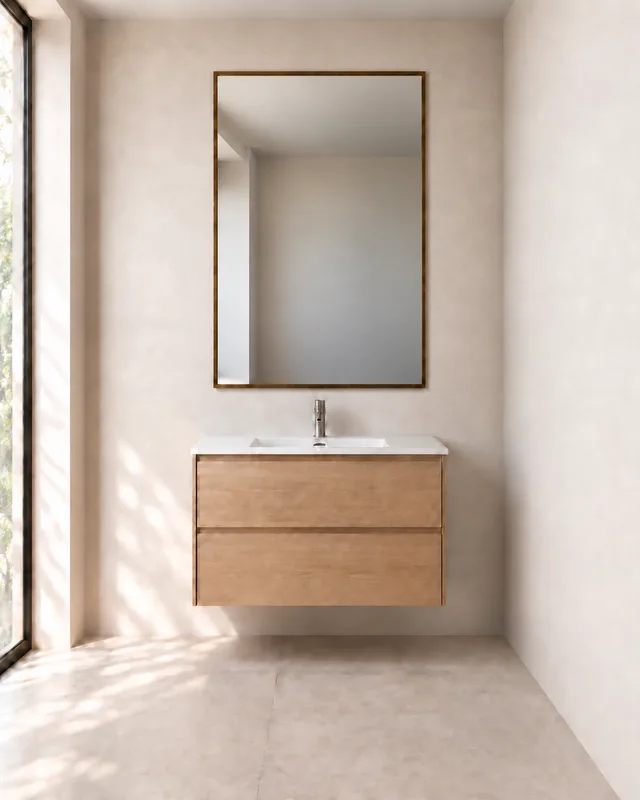
Vanity close to a side wall
18–20 in wide
Leaves more installation and cleaning space
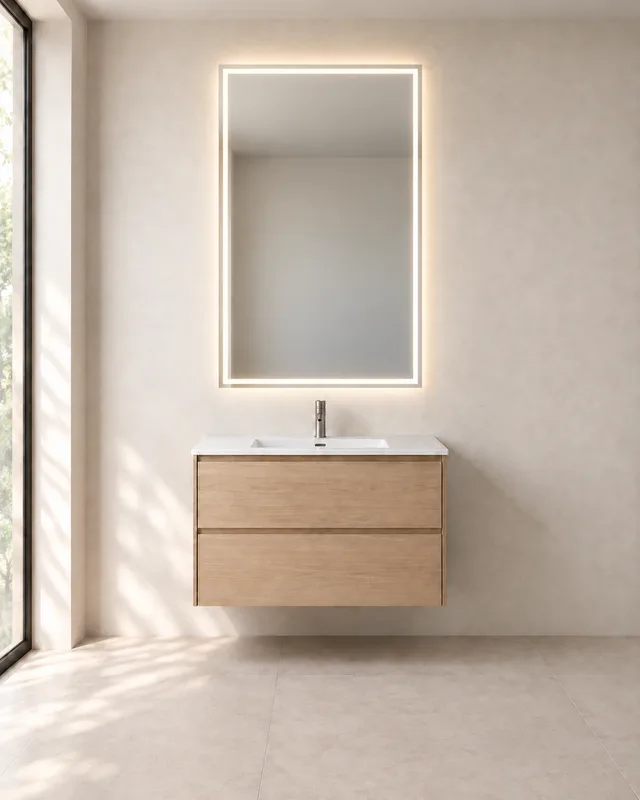
Integrated LED lighting
20–22 in overall width
Check the illuminated border, rear envelope, power entry and mounting access
Verify outside dimensions and actual fixture clearances before installation.
Need to test your measurements? Use the bathroom mirror size calculator to compare outside width and side inset. The 24-inch preset starts with 2 inches per side; this is an editable design choice, not installation clearance.
20 × 30 vs. 22 × 30: Which Is Better?
Choose 20 × 30 inches when you want more visible wall beside the mirror or need tolerance for the frame and alignment. Choose 22 × 30 inches when the wall is open and a slim frame or frameless edge makes fuller coverage practical. Both choices have the same height; the decision is about width, not a taller reflected view.
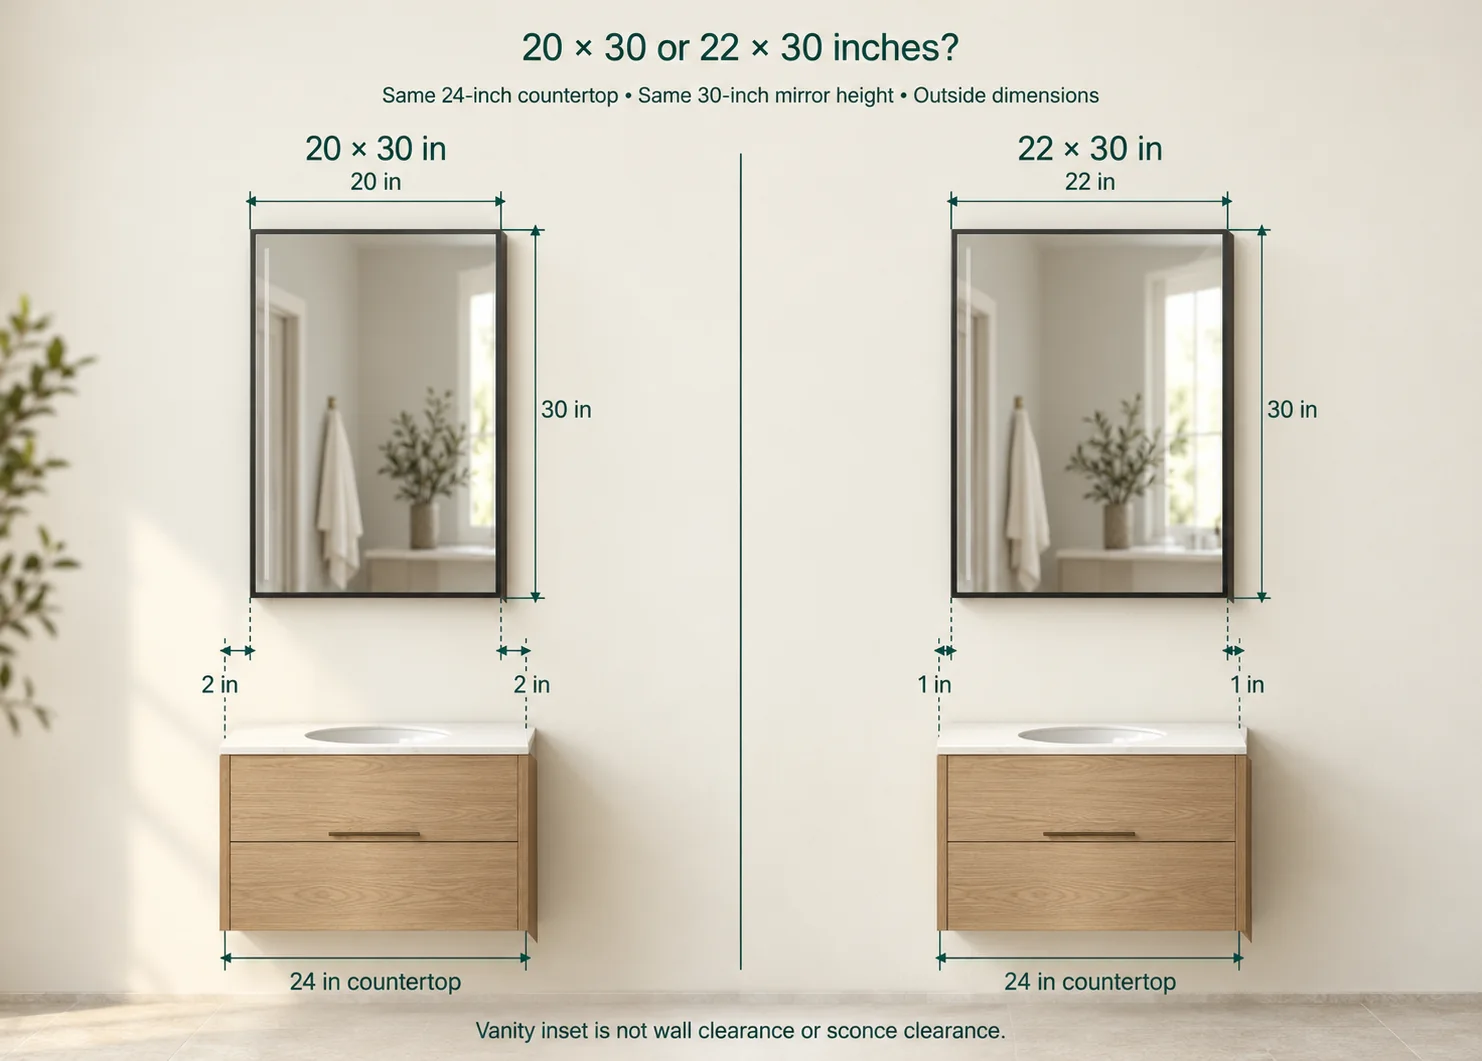
| Check | 20 × 30 in | 22 × 30 in |
|---|---|---|
| Centered vanity inset | 2 in each side | 1 in each side |
| Typical starting condition | Standard centered basin; more side margin | Open wall; slim-framed or frameless edge |
| Frame consideration | More room for visual weight; verify usable glass | Keep the outside envelope and visible glass distinct |
| Main trade-off | Less total width | Less tolerance for off-center alignment |
Neither option establishes sconce clearance. That requires the actual fixture width, location, projection and manufacturer instructions. A 2-inch vanity inset is not automatically a 2-inch gap between a mirror and a light.
For a tight wall, an 18-inch mirror leaves 3 inches per side. A 24-inch mirror leaves zero inset and is an intentional full-width choice. Confirm the installed countertop width rather than relying on the vanity's product name.
How to Measure the Vanity and Wall
The final size comes from the wall elevation. Take measurements after the vanity, countertop and finished-wall dimensions are known.
Quick calculation
Side inset = (vanity width − mirror width) ÷ 2
For a 24-inch vanity with a 20-inch mirror:
(24 − 20) ÷ 2 = 2 inches per side
Check your centered side inset
Assumes a shared centerline. This is countertop inset, not clearance to a light, wall or cabinet door. Verify those separately.
Measure the vanity and usable wall separately
Measure the countertop at its widest point; overhang, trim or filler strips can change the nominal 24-inch width. Then record side walls, windows, tall cabinets, tile transitions and door trim. A mirror can fit the vanity on paper and still conflict with the finished wall.
Mark the sink centerline
With a centered basin, the mirror normally shares the basin centerline. For an offset basin, decide whether the mirror should align with the basin, the vanity or a wider composition that includes lighting. Those centerlines are not always identical.
Record the vertical limits
Measure the finished-floor height of the countertop, backsplash, faucet top and bottom of any fixed light fixture. The mirror must clear these elements while keeping the reflective area useful.
How Tall Should the Mirror Be?
For a 24-inch vanity, a 28- to 32-inch-tall mirror is a practical starting range. A 30-inch height works in many compact single-vanity layouts, but the available wall space and user sightlines determine the final position.
Use this sequence:
- Mark the countertop, backsplash, faucet and light fixture on the elevation.
- Set a tentative bottom edge that clears the faucet and backsplash.
- Check the top edge against the light and ceiling.
- Test the reflected view for the shortest and tallest expected users.
- Locate the bracket and electrical connection from the exact product drawing.
Do not mount solely from a generic “center at eye level” rule. When several people use the bathroom, the position of the reflective glass matters more than the decorative frame edges.
Worked example: countertop, faucet, mirror and light
Suppose the countertop is 34 inches above finished floor (AFF) and the faucet reaches 40 inches AFF. Placing a 30-inch-tall mirror with its bottom at 42 inches AFF puts its top at 72 inches AFF. If the light's lowest edge is 78 inches AFF, the vertical gap above the mirror is 6 inches.
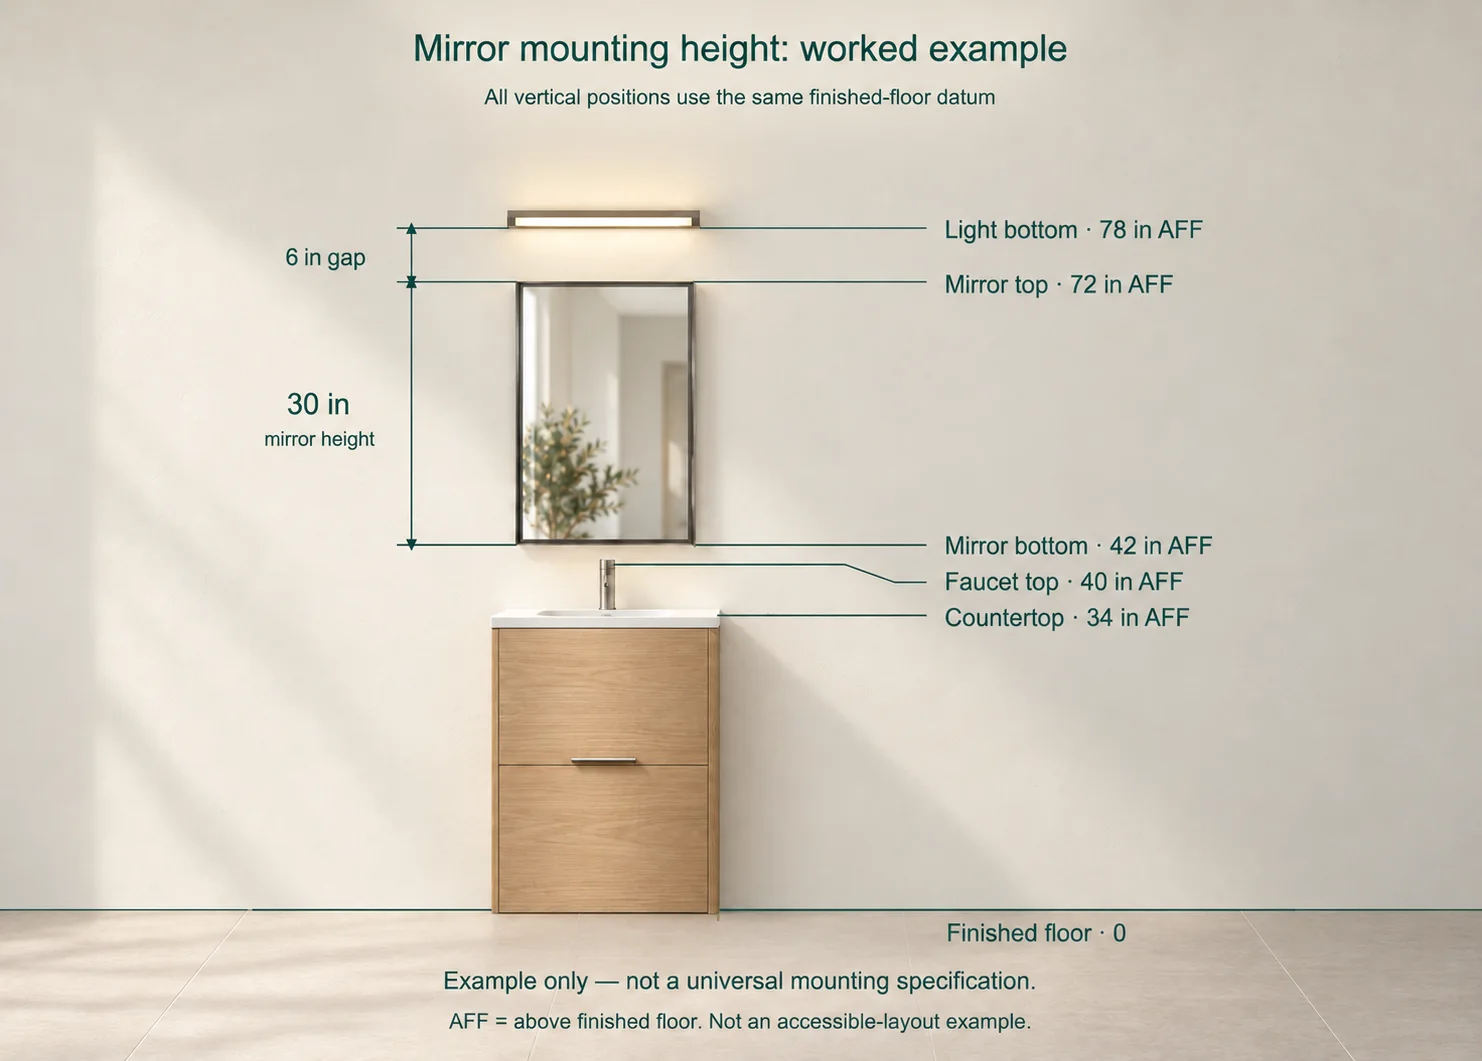
This arrangement leaves 2 inches between faucet top and mirror bottom, but your selected faucet, mirror brackets and lighting may require a different layout. Test user sightlines and cleaning access before approving it. This is not an accessible-layout example. For a U.S. accessible project, review the position of the reflecting surface—not merely the frame—with the project designer against the applicable accessibility requirements.
Rectangle, Round or Oval?
Shape changes both visual weight and usable reflection, even when the maximum width is the same.
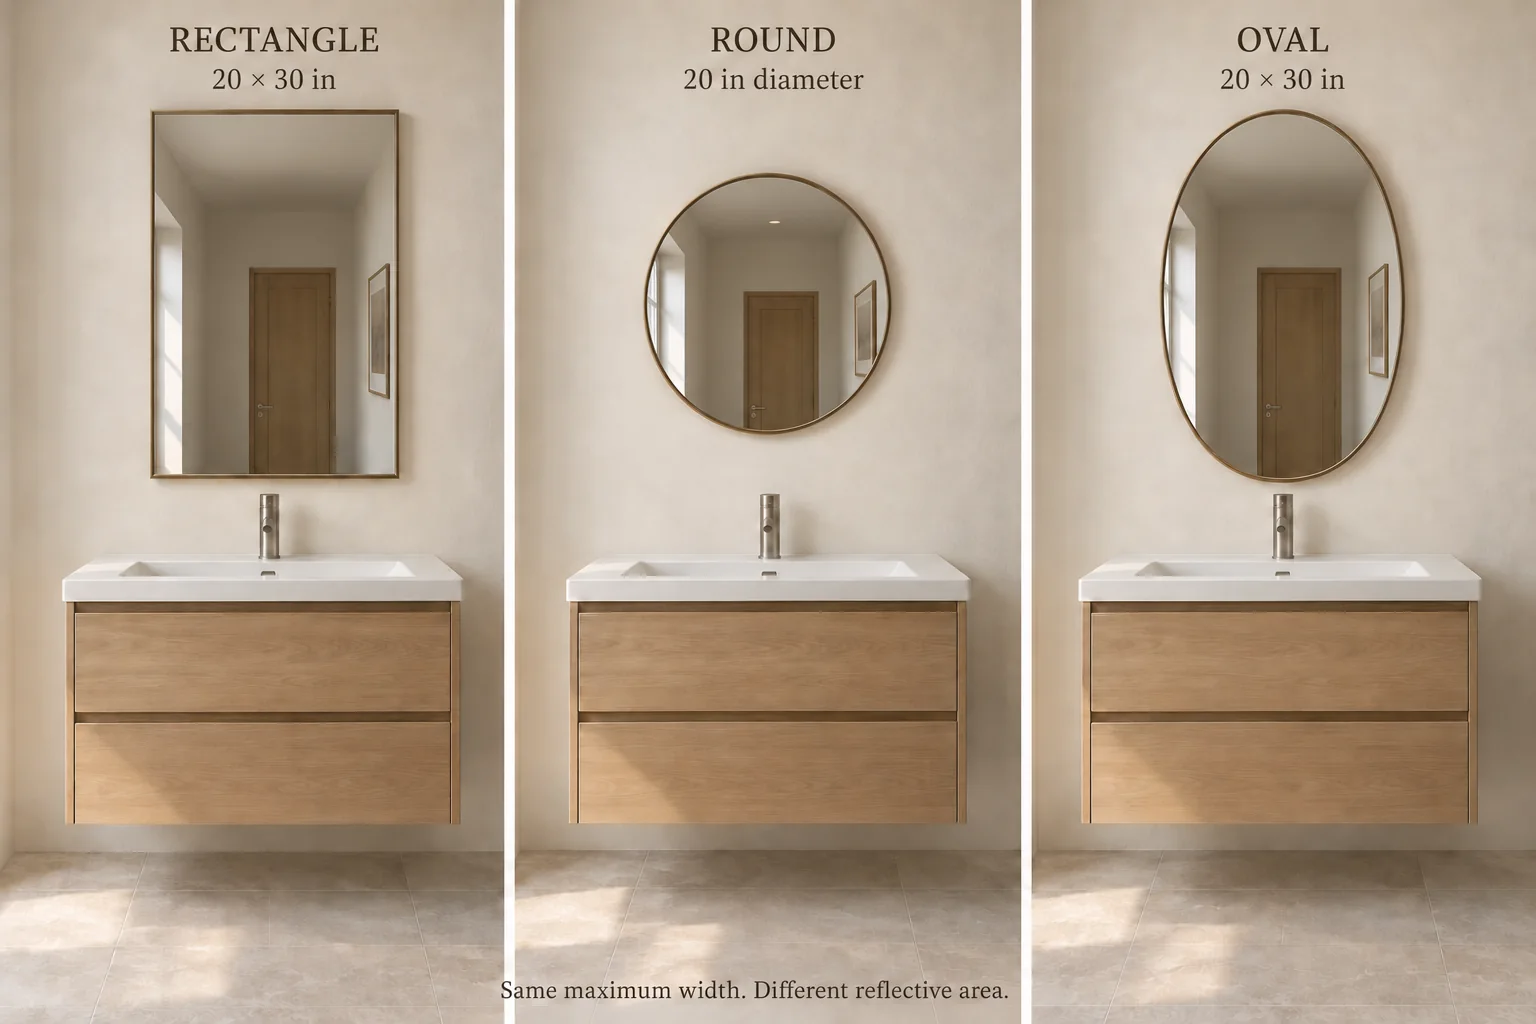
Rectangle: A vertical rectangle makes efficient use of a 20-inch width and gives generous reflection height.
Round: A 20- to 24-inch diameter can work because the outline narrows above and below the center. OJMirror's round mirror planning guide uses 18–24 inches as an early planning range for 24–30-inch vanities, subject to product and wall review.
Oval or pill: These shapes add height without filling the full wall width. Compare the reflective width at face level, not only the widest outside dimension.
Arch: An arch retains the lower width of a rectangle while softening the top. Confirm whether the specified height includes the complete arch and frame.
Lighting, Faucet and Frame Clearance
If sconces sit beside the mirror, obtain their full width, projection and required clearance first. An 18- or 20-inch mirror is more likely to leave usable side space than a 24-inch mirror. For an overhead light, confirm the gap needed for installation, cleaning and future replacement.
A tall faucet or backsplash may push the mirror upward and reduce the height available below the light. Mock up the proposed mirror outline on the wall before drilling.
Use the mirror's overall outside dimensions, including its frame. A heavy frame can make a smaller mirror feel substantial while also reducing the usable reflective area.
Front-lit or backlit over a small vanity?
Front-lit designs emit light through the mirror face; backlit designs direct light toward the wall. Front lighting can contribute to grooming illumination, while a rear halo changes how the mirror sits visually against the wall. Neither appearance proves adequate task lighting: output, diffusion, face distance, wall finish and other room lights all matter.
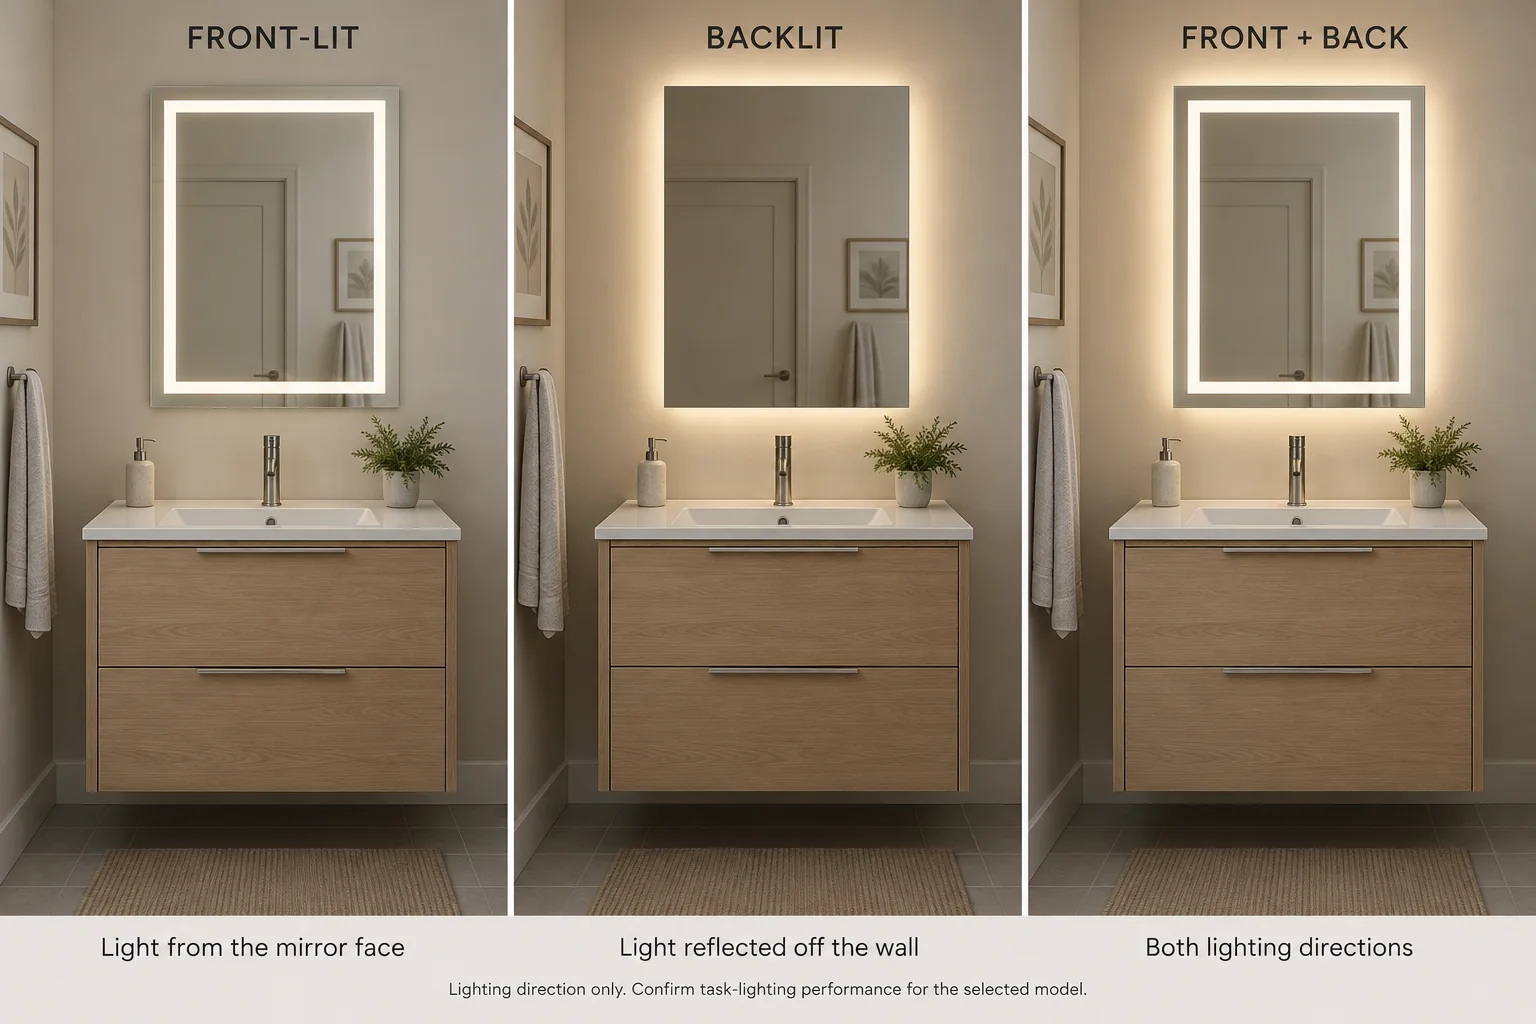
For a 24-inch vanity, compare usable reflective glass as well as overall width. Ask for the selected model's lighting data and test the sample with the intended room lighting. Do not remove a planned task light merely because a mirror has an illuminated border or halo.
Choosing a Mirror for a Powder Room
Start with the same 20 × 30-inch option, then check what makes the small room restrictive. A side wall, door casing or wall-mounted faucet may matter more than the nominal vanity width. Mark the mirror outline and open the room door fully before approving the layout.
A 20–22-inch round mirror can soften a narrow wall, but its reflected area becomes narrower above and below the center. A vertical rectangle may be more useful when reflection height matters. If sconces compete for space, compare their full envelopes with an 18–20-inch mirror or review overhead lighting. Keep the widest edges clear of obstructions; a smaller vanity does not reduce the fixtures' installation requirements.
Wall Mirror or Medicine Cabinet?
Choose a wall mirror when storage is not needed and a shallow wall arrangement is the priority. A medicine cabinet adds storage but also introduces body depth, door swing and installation constraints. Its nominal door size does not confirm that the cabinet body or recessed opening will fit.
Over a 24-inch vanity, check the cabinet's overall outside width, projection above the faucet, hinge-side clearance and fully open door position. For recessed installation, verify the specified rough opening and available wall cavity, including any framing or services, before ordering. Surface mounting avoids a recessed opening but increases projection into the room.
Use the medicine cabinet size guide to distinguish the mirror face, cabinet body and rough opening. Confirm the selected model's drawing rather than applying flat-mirror sizing alone.
LED Mirror Electrical and Mounting Checks
An LED mirror adds requirements that are not visible in a front-view photograph. Before electrical rough-in or drilling, confirm:
- cable exit and wall-power location;
- rear component depth;
- hardwired or plug-in configuration;
- access for connection and future service;
- bracket position and lift-on clearance; and
- local electrical requirements for the installation.
These details vary by model and project. Use the selected mirror's approved drawing and installation instructions rather than placing power from a generic image.
Three Mirror Design Options to Discuss
These are planning directions, not stock models or completed installations. Dimensions, frame details, LED configuration and mounting remain subject to a project drawing and sample approval.
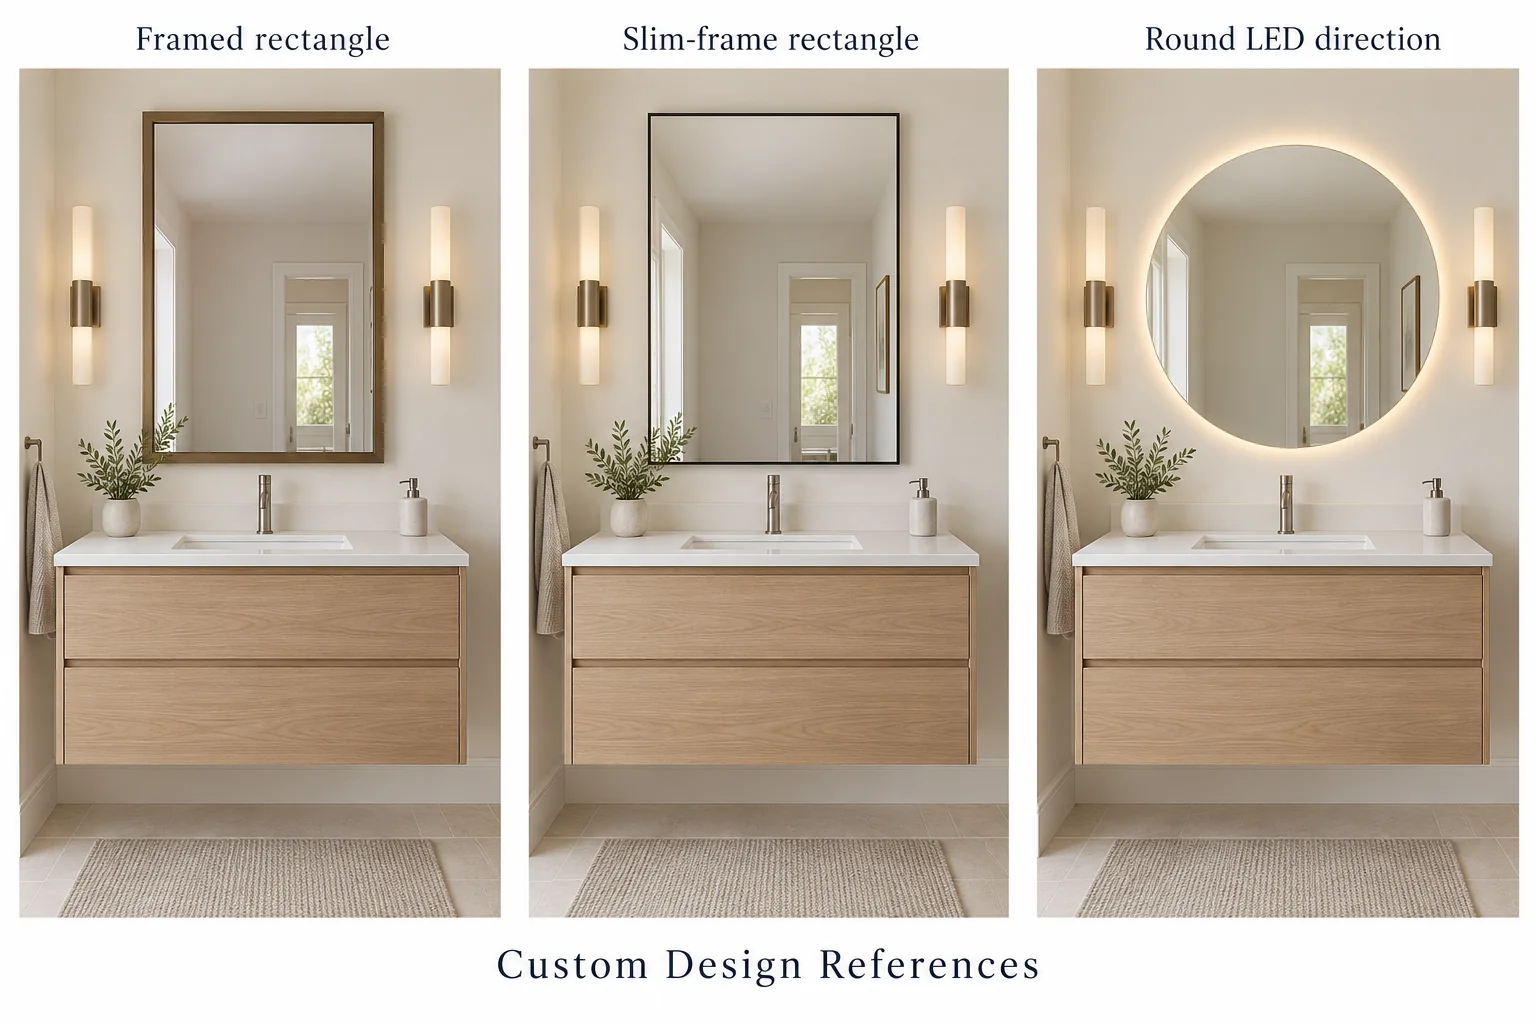
- 20 W × 30 H in rectangle: start here for a centered basin. Record outside frame width and visible glass separately; a broad border reduces useful reflection.
- 22 W × 30 H in slim-frame rectangle: consider it on an open wall with accurate centering. Check the frame's outside envelope, rear depth and lift-on space.
- 22–24 in diameter round LED direction: verify both horizontal and vertical fit. An illuminated border may occupy part of the face; confirm the usable reflective area, cable exit and lighting function in the selected drawing.
Explore the LED bathroom mirror range for rectangular lighting directions, the vanity mirror planning page for frame and layout decisions, or the round mirror page for circular options. These routes are for product discussion; the example dimensions above are not a stock-availability promise.
Hotels, Apartments and Multi-Unit Projects
Do not order one mirror size for every “24-inch vanity” until each room type has been checked. Nominally identical vanities can sit in different wall conditions.
Compare room types for:
- actual countertop width and overhang;
- side-wall and tile-edge clearance;
- faucet and backsplash height;
- junction-box or cable-exit position;
- sconce model and mounting location;
- framed versus frameless outside dimensions; and
- accessible-room elevations or other project-specific requirements.
Create a mirror schedule by room type and verify a coordinated elevation before bulk approval. A successful sample room does not prove that every unit has identical wall, plumbing and electrical conditions.
Common Sizing Mistakes
- Using the nominal vanity size as a site measurement: countertop overhang and filler strips can change the finished width.
- Choosing the mirror before the lights: lay out the mirror, sconces, switches and outlets together.
- Ignoring the frame: record both the overall size and visible glass when the frame is substantial.
- Roughing in power from a photograph: use the model drawing for the cable exit, bracket and service access.
- Scaling every room from one sample: verify each room type because walls, finishes and service positions may vary.
Project Specification Checklist
Before requesting a quote or approving a sample, provide:
- mirror overall width × height and orientation;
- vanity and countertop finished width;
- basin centerline and faucet height;
- frame profile and finish, if applicable;
- front-lit, backlit or non-lighted direction;
- required controls and functions;
- destination market and electrical requirements;
- wall construction, power point and mounting direction;
- quantity by room or unit type; and
- an elevation, dimensioned sketch or clear site photograph when available.
The OJMirror vanity mirror page provides a planning route based on vanity dimensions, basin layout, lighting and wall services. Final dimensions and functions must still be confirmed for the selected model and project.
Frequently Asked Questions
Can the mirror be the same width as a 24-inch vanity?
Yes. A 24-inch mirror can match a 24-inch vanity when the wall is open, the alignment is accurate and no side-lighting clearance is needed. A narrower mirror provides more visual and installation tolerance.
Is a 24-inch round mirror too big for a 24-inch vanity?
Not necessarily. A round mirror narrows above and below its center, so a 24-inch diameter can feel lighter than a 24-inch rectangle. Check its widest point against walls, sconces and trim.
What height mirror works over a 24-inch vanity?
Start with 28–32 inches high; 30 inches is a versatile default. Adjust it for the faucet, backsplash, light, ceiling and required user sightlines.
Should the mirror be centered over the sink or the vanity?
For a centered single sink, these centerlines are normally the same. With an offset sink, coordinate the mirror with the basin, vanity and lighting as one wall composition.
How much space should be left between the faucet and mirror?
There is no universal gap. Leave enough clearance for the faucet, backsplash, cleaning and mounting method, then test the reflected view before drilling.
Does a framed mirror need to be smaller than a frameless mirror?
Often, yes. A broad frame adds visual weight and reduces reflective width, so an 18- or 20-inch framed mirror may suit a wall that can carry a wider frameless mirror.
Is a 24 × 36-inch mirror too large for a 24-inch vanity?
It is a full-width, taller choice rather than the default. It can work on an open wall, but has no centered side inset and needs 36 inches of usable vertical space plus the selected products' clearances. Check the actual countertop and mirror outside dimensions.
Should I choose a 20 × 30 or 22 × 30-inch mirror?
Start with 20 × 30 for more side margin; choose 22 × 30 for fuller coverage on an open wall with a slim frame. Their centered side insets are 2 and 1 inches respectively over a measured 24-inch countertop.
What size vanity light should I use?
There is no universal light width dictated by a 24-inch vanity. Coordinate fixture width, projection, output and mounting position with the mirror, and follow the fixture instructions. Integrated mirror lighting also needs a task-lighting check; a backlit appearance alone does not confirm useful face illumination.
Can the mirror be wider than the vanity?
Yes, as an intentional wall composition, but it is not the starting recommendation here. Check side walls, trim, light fixtures and basin alignment. A centered 26-inch mirror over a 24-inch countertop extends 1 inch beyond each side instead of leaving an inset.
Final Recommendation
Use 20 × 30 inches as the starting size for a standard centered 24-inch vanity. Adjust the width for the frame, wall and lighting, then confirm the height, power and mounting details from the chosen product drawing.
Planning Mirrors for a Hotel or Multi-Unit Project?
Send your vanity schedule, room types, proposed mirror sizes and available elevations. OJMirror can review mirror dimensions, lighting direction, mounting and electrical requirements before quotation or sample approval.
You can also compare available directions on the LED bathroom mirror and vanity mirror pages.
Related Guides and Sizing Method
Moving up a vanity size? Read the 30-inch vanity mirror size guide. For other widths, use the mirror size calculator or browse Mirror Sizing & Placement.
By Kris Chou · Product Manager, OJMirror. Recommendations in this guide are planning judgments based on outside dimensions, centered-inset arithmetic and coordinated wall elevations. They are not product availability, engineering approval or universal mounting requirements. No independent technical reviewer is claimed.
Before installation: verify the available height between faucet and lighting, then use the selected products' installation instructions. Accessible projects require a separate review of the reflecting-surface position and applicable requirements. The example elevations do not establish installation compliance.