Written by Kris Chou, Product Manager · About this guide
Quick answer: Check the mirror's stability and construction before cleaning. Gently remove loose dust from sound surfaces. Only a known, stable old decorative mirror is a candidate for a barely damp cloth test, followed by immediate drying. Keep its edges dry. Historic, valuable, damaged, or uncertain mirrors need conservator advice before liquid treatment. Stop when a mark does not change.
Five-step overview: inspect and secure → dust dry → test if appropriate → wipe a small area → dry and reassess. Go to the full eight-step guide, or check which mirror type you have first.
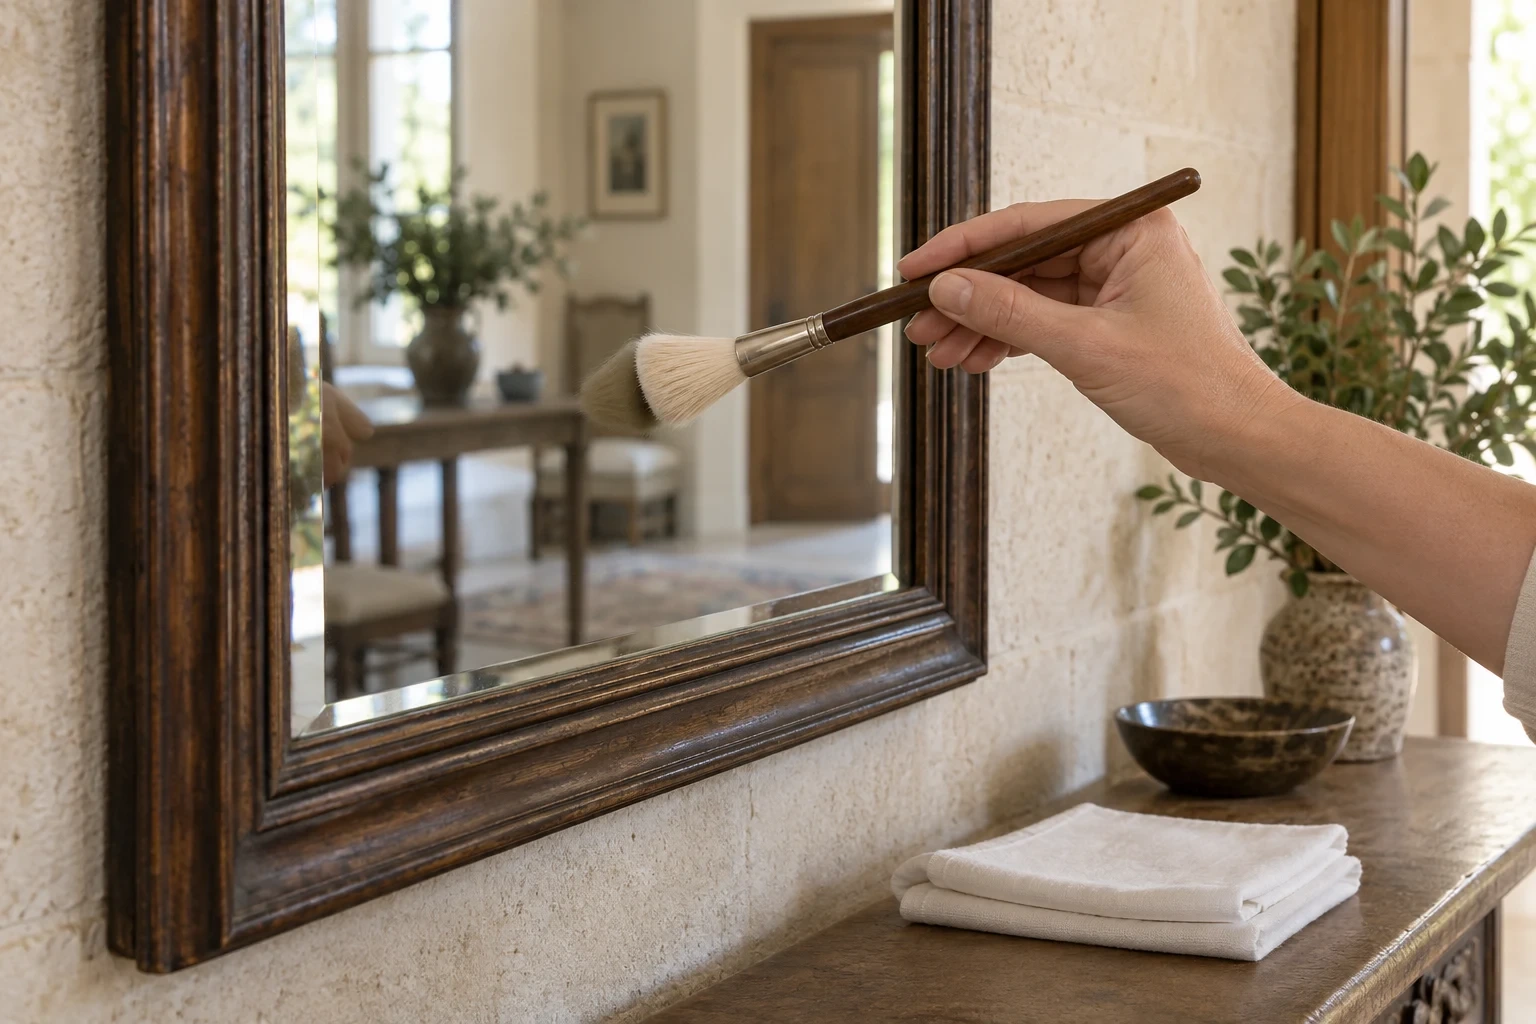
Table of Contents
Before You Clean: Is Your Antique Mirror Safe to Clean?
The word “antique” describes different objects in search results. Age, ownership history, and known construction matter more than a distressed appearance. Use the records you already have; do not remove the frame or backing to identify the mirror.
| Mirror type | Starting approach | Main concern |
|---|---|---|
| Historic or valuable original | Conservator advice before any cleaning solution | Preserving original glass, backing, decoration, and labels |
| Ordinary old decorative mirror with known, sound construction | Gentle dry dusting; a minimal-moisture test only when appropriate | Edge moisture and compatibility with nearby finishes |
| Modern antique-style mirror glass | Follow the supplied care instructions for that finish | Decorative treatments and backing systems vary |
| Loose, flaking, cracked, damp, or suspected mercury-backed mirror | Stop routine cleaning and seek assessment | Instability and irreversible loss |
Historic antique mirrors
An inherited or collectible mirror may contain fragile original materials or past repairs. If its construction or significance is unresolved, treat it as uncertain. CCAHA's mirror-care guidance calls for conservator advice before cleaning solutions are used on historic mirrors and leaves mercury mirrors to conservators.
Ordinary old decorative mirrors
The steps below are for known, stable assemblies with front-surface dirt—not for loose glass, flaking finishes, detached backing, or unexplained particles. Check accessible edges and supports without shifting a heavy mirror. The National Park Service's guidance supports conservator assessment when a mirror is unstable.
Modern antique-style mirror glass
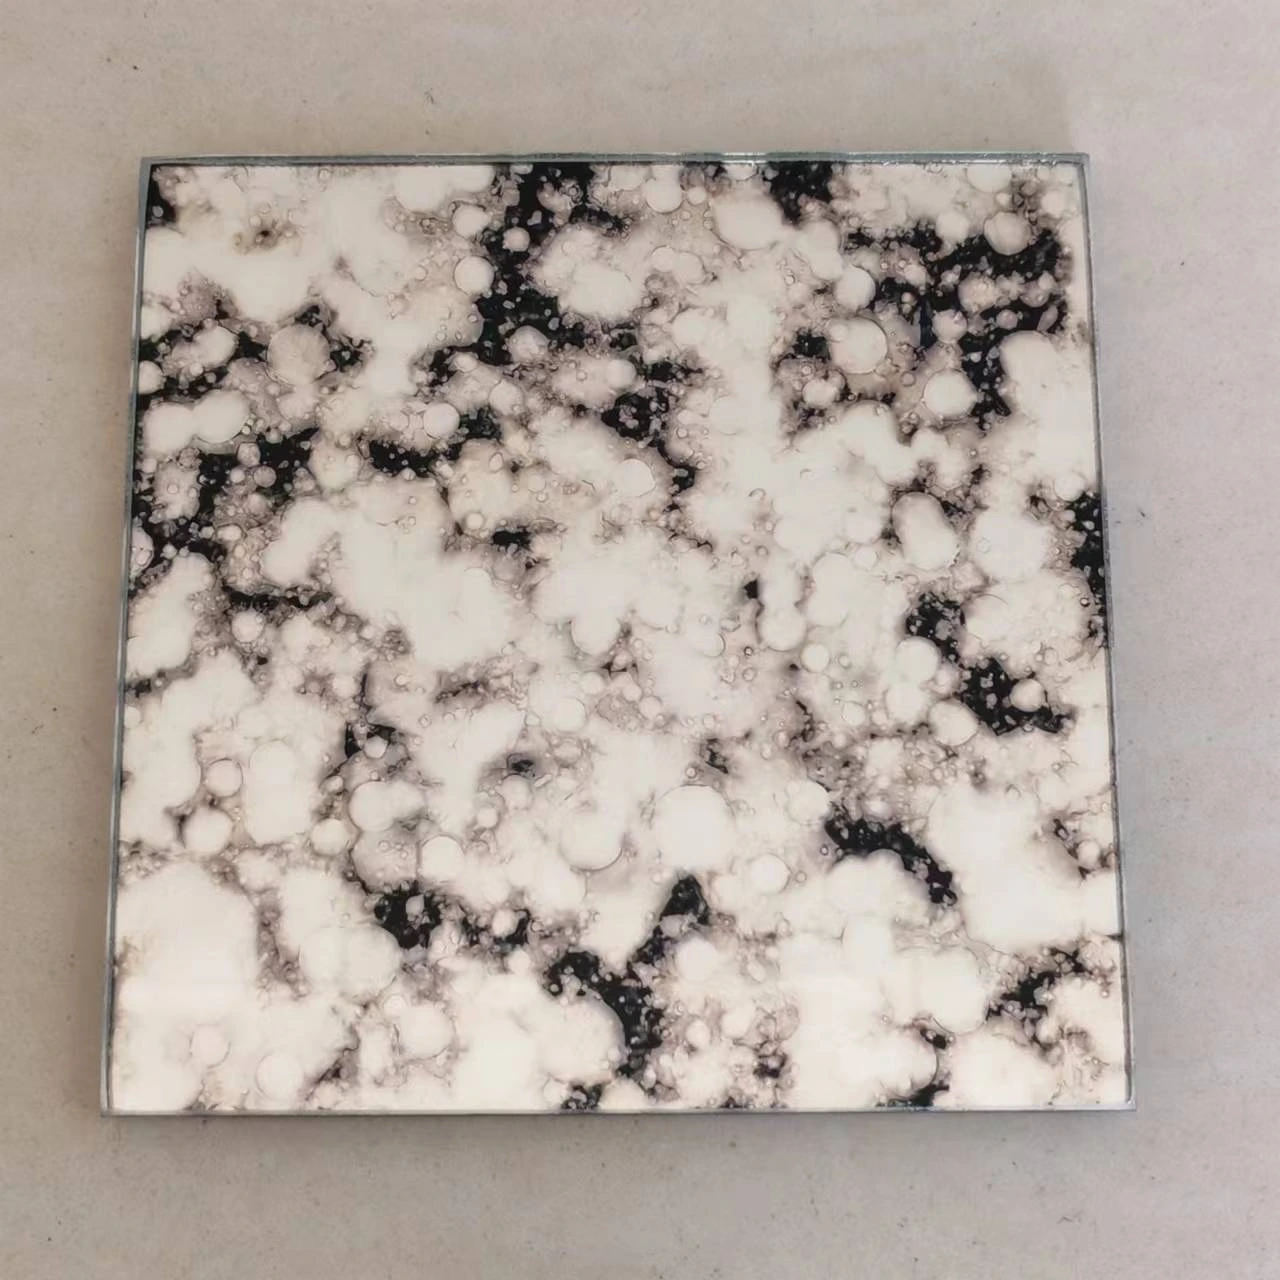
New decorative glass can have deliberate mottling that looks like age. That pattern is not necessarily dirt to remove. Check the product identity and care sheet, then distinguish accidental residue from the specified finish. For a new interior, see antique-style mirror glass; a new panel does not restore a historic original.
What You Need to Clean an Antique Mirror
You'll need:
- A clean, soft brush for lifting loose dust.
- Two clean, lint-free cloths: one for an appropriate small test and one for drying.
- A dry towel to protect the work area.
- A phone or camera to record the original condition.
- Side lighting to reveal surface residue and fixed marks.
Keep the brush free of grit and reserve it for delicate surfaces. Use plain cloths without polish or cleaning-product residue. Keep liquids away while setting up.
What Can You Safely Use to Clean an Antique Mirror?
There is no universal best cleaner for antique mirrors. Start with a soft, dry brush on stable surfaces; choose any liquid by the identified materials, not by how stubborn the mark looks.
| Material or condition | What to use—and its limit |
|---|---|
| Loose dust on sound glass | A clean, soft brush; do not brush across lifting decoration |
| Known, stable ordinary decorative mirror | If its care guidance permits water, use a few drops of clean water on a lint-free cloth corner for a small front-surface test; dry immediately |
| Historic, valuable, or uncertain mirror | Obtain conservator advice before selecting a cleaning solution |
| Flaking backing or suspected mercury mirror | No DIY liquid treatment; front cleaning cannot repair the backing |
| Modern antique-effect panel | Use the cleaner and method specified for that finish, backing, and installed assembly |
Distilled water is not a safety exemption: it can still enter joints or affect water-sensitive finishes. Do not add vinegar, alcohol, or detergent to improvise a stronger mixture. CCAHA discusses an alcohol-based glass cleaner in its mirror guidance but requires conservator advice before any solution on historic mirrors; that is not a universal home recipe. If you cannot establish that a damp test is appropriate, stay with condition assessment rather than experimenting.
How to Clean Antique Mirror Glass: Eight Steps for a Stable Old Mirror
Use this sequence only after the checks above establish that the old decorative mirror is suitable for surface cleaning. Historic or valuable mirrors need conservator advice before liquid treatment; this sequence cannot treat loose silvering, flaking finishes, or cracked glass.
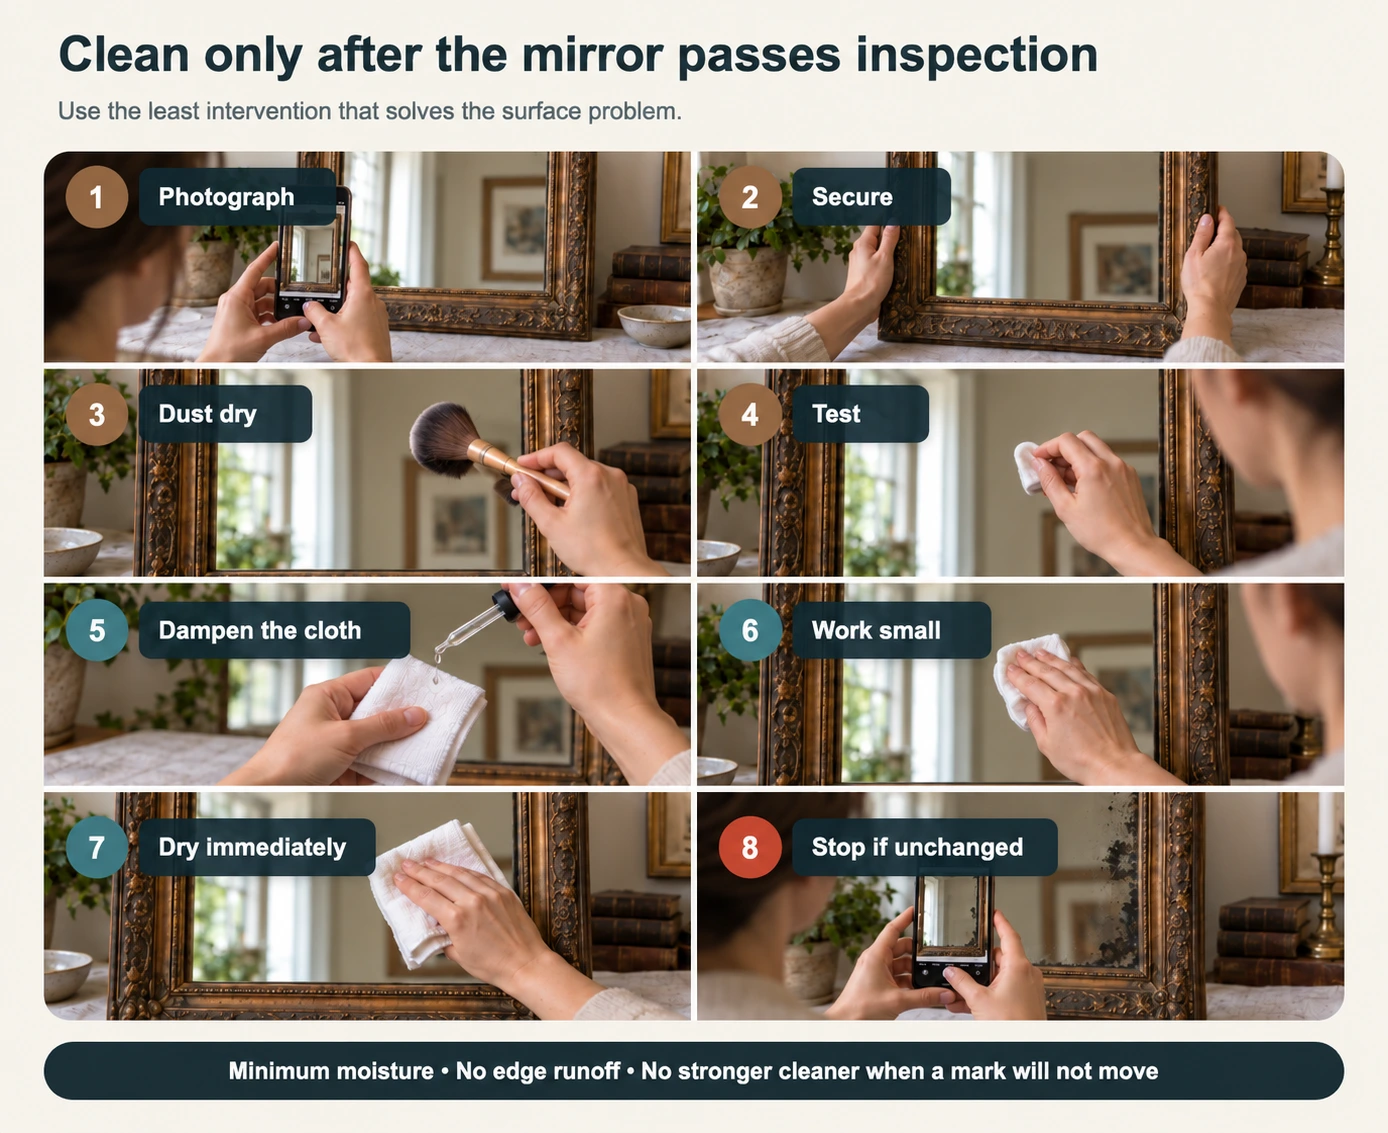
1. Inspect and photograph the condition
Photograph the full mirror, edges, cloudy areas, black spots, backing, labels, and hardware. This separates existing defects from handling changes.
2. Secure the mirror
Confirm the hardware and frame are stable. Ask for help with a large mirror, protect the area below, and do not remove the frame merely to reach a stain.
3. Remove loose dust while everything is dry
Brush from the top down, moving dust away from carved recesses and the glass-to-frame joint. Stop at flaking areas.
4. Test a small, stable area
Choose sound glass away from an edge. Start dry; if moisture is justified, test before expanding. Stop if the cloth picks up color, finish, or particles.
5. Dampen the cloth—not the mirror
If a damp test is appropriate, add only a few drops to one corner of the cloth away from the mirror. It should be barely damp, never dripping. Do not spray the glass; runoff collects at the bottom edge and corners.
6. Work in small sections
Use light strokes from a central area and keep the perimeter drier. Moisture control and low pressure matter more than a particular wiping pattern.
7. Dry immediately
Dry with the second cloth. Check corners, the lower edge, and joints. Do not use heat.
8. Stop if a mark does not change
A fixed dark or cloudy area may be behind the glass. Set the cloth aside and photograph the mark without touching the affected edge. More pressure, liquid, or stronger chemicals will not restore missing silvering.
How to Tell Surface Dirt from Mirror Damage
In a conventional back-silvered mirror, the reflective material sits behind the glass. Front-surface dirt and backing deterioration may look similar, but they do not have the same remedy.
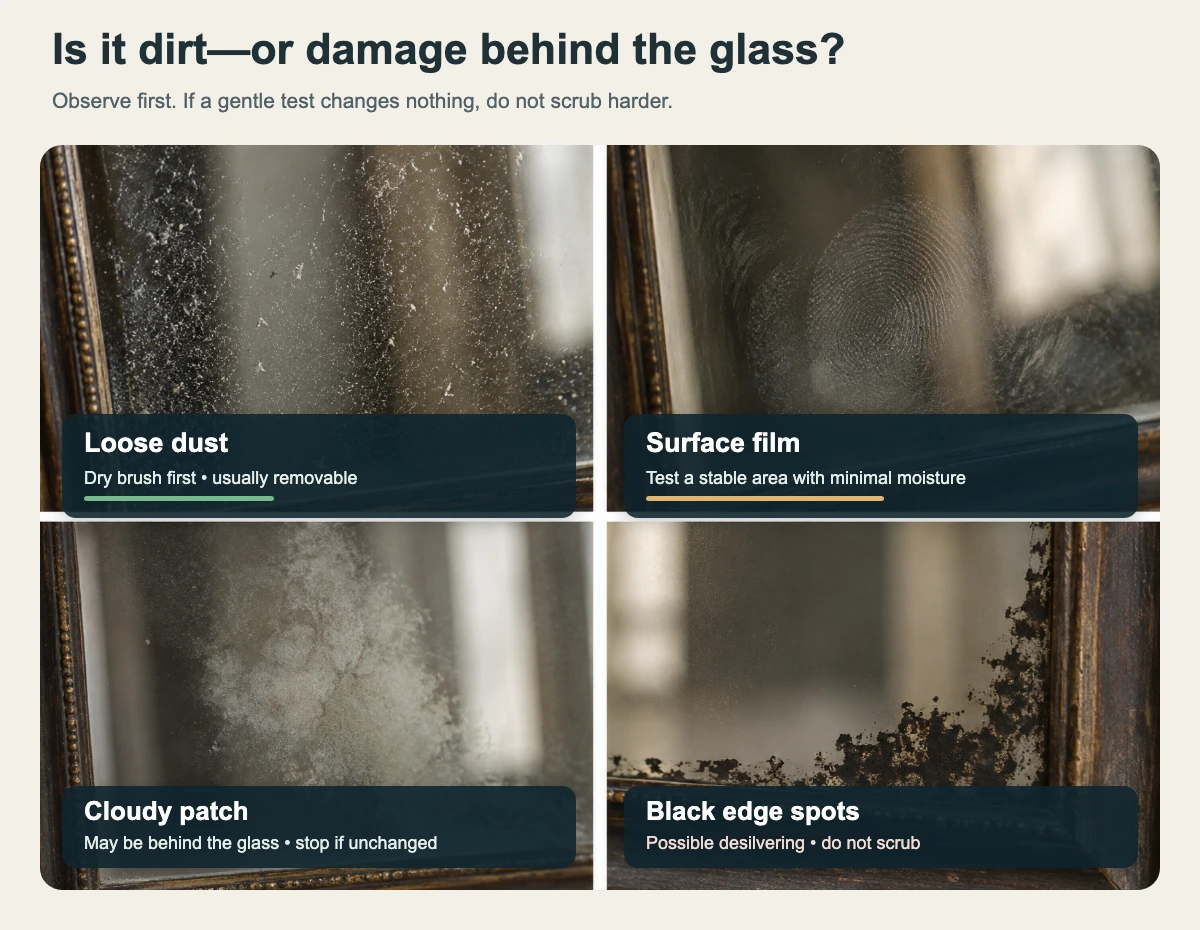
Surface dust and fingerprints
Loose dust, fingerprints, and light film sit on the front and may change during cautious dry cleaning or a small test on stable glass.
Dried splashes may also be on the front, but extra liquid near the perimeter can enter the glass-to-frame joint. Test away from the edge; do not jump to an acidic limescale remover.
Cloudy glass
Cloudy patches may come from residue, the reflective layer, an old coating, a repair, or the glass. If a gentle test changes nothing, do not increase pressure or use a stronger product.
Black spots and desilvering
Black spots and dark edges may indicate loss of the reflective backing, often called mirror desilvering. Front cleaning cannot replace it. Keep the perimeter dry because moisture and incompatible cleaners can worsen edge damage. Foxing is often used loosely for mottling; it is not a precise diagnosis.
| What you observe | Likely location | Will front cleaning remove it? | Safest next move |
|---|---|---|---|
| Loose dust | Glass or frame surface | Usually | Dry dust gently |
| Fingerprint or light film | Glass surface | Often | Test a small stable area |
| White splash mark | Surface, possibly near an edge | Maybe | Test with minimal moisture |
| Fixed cloudy patch | Surface, glass, coating, or backing | Uncertain | Stop if a gentle test changes nothing |
| Black or brown-black patch | Reflective layer or backing | Usually not | Do not scrub harder |
| Flaking gold, paint, or gesso | Frame surface | Not a glass-cleaning problem | Stop and seek advice |
Illustrated examples: surface dirt versus coating damage
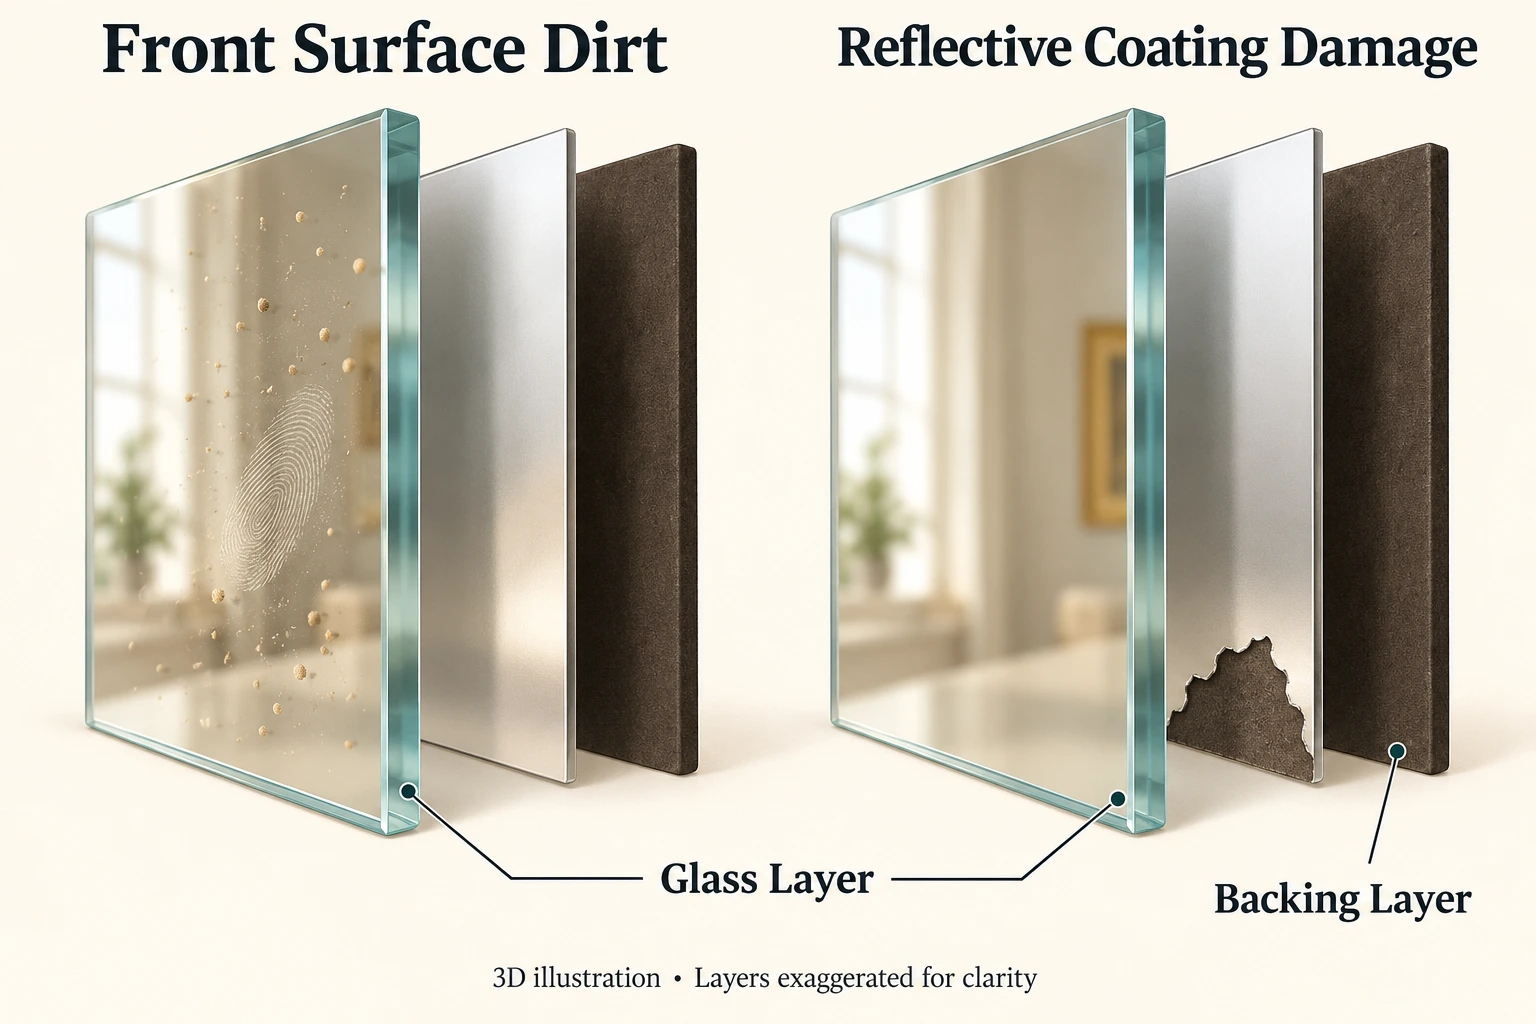
In the left example, dust sits on the front glass and may move during appropriate surface cleaning. In the right example, the front is intact but the reflective coating behind it is missing in places. Wiping cannot replace that layer. These examples explain location, not a diagnosis from appearance alone. Do not dismantle a mirror to reproduce the cutaway.
How to Clean an Antique Mirror Frame
Treat the frame separately; its finish may be more fragile than it looks.
Gilded or gold-leaf frames
Gilding may be extremely thin and sit over water-sensitive gesso. Dust a stable surface very lightly. Stop if color or powder transfers; never use metal polish.
Painted or gesso frames
Paint, gesso, and old fills may soften or detach. Use a soft brush around raised decoration and keep liquid out of cracks.
Finished wooden frames
Old wood may combine wax, varnish, shellac, paint, and repairs. Furniture spray can change gloss, and water can enter joints. Dust dry unless the finish is known.
Metal frames
Darkening may be patina, plating, lacquer, or corrosion rather than dirt. Metal polish can create permanent bright patches; seek advice when the original surface matters.
A frame may combine several materials. Choose care for the most vulnerable component, not just the dominant visible finish. If a brush catches a lifted edge, stop instead of trying to brush it flat.
Cleaning Products to Avoid
Household methods for replaceable modern glass make poor defaults when an old mirror's backing and finishes are unknown.
| Product or method | Why it is a poor default for an antique mirror |
|---|---|
| Spraying glass cleaner directly | Runoff can reach the lower edge, corners, backing, and frame joints |
| Vinegar | The acidic liquid may contact vulnerable edge or frame materials |
| Ammonia cleaner | It may be incompatible with the mirror backing or adjacent finishes |
| Baking soda or toothpaste | Abrasive particles can scratch or alter surfaces |
| Magic eraser or scouring pad | Micro-abrasion can change gloss and leave visible damage |
| Newspaper | Paper, grit, and ink condition are not controlled |
| Shaving cream | The formulation is not designed as a conservation treatment and may leave residue |
| Silver polish | The reflective layer is behind the glass, not an exposed silver object to polish from the front |
| Blade or scraper | It can scratch glass, catch decoration, or damage coatings |
| Cleaning the back | It can directly remove backing paint or reflective material |
“Natural” does not mean compatible, and “glass cleaner” does not mean suitable for every mirror assembly. Respect the object's most vulnerable material.
When Not to Clean an Antique Mirror
Arrange an assessment when the initial checks reveal instability or a test leaves the problem unresolved. Provide photographs of the front, accessible back, edges, labels, and hardware, together with a note of anything already applied. Do not dismantle the mirror to obtain a photograph.
Stop at moving glass, shedding finishes, cracks, damp backing, or a change during testing. An unchanged mark also ends the cleaning test, even if the mirror otherwise seems stable. These are observations to record, not a diagnosis to settle with another product.
How Often Should You Clean an Antique Mirror?
Inspect regularly, but clean only when the condition calls for it. A fixed weekly wet-cleaning routine is not appropriate for every old mirror. Distinguish looking for change from touching the object.
| Setting or observation | Practical response |
|---|---|
| Quiet room; no visible dust | Leave the surface alone and check it during routine housekeeping |
| Loose dust on a known, stable mirror | Dust gently as needed; stop at loose decoration |
| Fingerprints after handling | Test only the affected sound front surface if its construction allows it |
| Condensation, repeated splash, or damp staining | Address the source of moisture; seek advice if the assembly is affected |
| Historic collection object | Follow its condition-specific conservation care plan |
Keep a short record: date, location of the mark, method used, and whether it changed. Photograph the same area under similar light. Avoid direct heat, nearby cleaning spray, and damp storage; do not stack objects against the glass or frame. A record of gradual change is more useful than repeated attempts to make old glass look new.
Cleaning vs Conservation, Restoration, and Re-Silvering
| Approach | Main purpose | Typical effect on original material |
|---|---|---|
| Cleaning | Remove safely removable surface dirt | Limited when properly controlled |
| Conservation | Stabilize existing materials and slow further loss | Intentionally minimal |
| Restoration | Improve structural or visual completeness | May add or replace material |
| Re-silvering | Rebuild or replace the reflective layer | Substantial change to the backing |
| Replacement glass | Restore everyday reflection with a new mirror | Original glass is no longer the working mirror |
Re-silvering is not “deep cleaning.” It alters backing material and may affect an important mirror's meaning or value. Seek conservation and valuation advice before approving it.
Frequently Asked Questions
Can I use vinegar to clean an antique mirror?
Vinegar is a poor default: its acidity may affect vulnerable edge, backing, or frame materials. Start with dry dusting and use only a method appropriate to the mirror's construction and condition.
How do I remove black spots from an antique mirror?
Front cleaning cannot remove spots caused by lost reflective backing. An assessment can establish whether treatment is appropriate or the aged surface should remain intact.
Why is my antique mirror still cloudy after cleaning?
The haze may be behind the glass, within an old coating, or related to the glass itself. If a gentle surface test makes no difference, document the area rather than trying a stronger cleaner.
Should I clean the back of an antique mirror?
Leave the back alone during routine maintenance: it may contain protective paint, reflective material, historic labels, and repairs. Cleaning or dismantling it can remove original material.
How do I clean a gilded antique mirror frame?
Very lightly dry-dust intact gilding with a soft brush; stop if gold-colored material, powder, or flakes transfer. Avoid metal polish, furniture spray, and wet cloths on unidentified gilded surfaces.
Can an antique mirror be re-silvered?
Some can, but re-silvering changes the backing and may affect historical significance or value. Obtain conservation and valuation advice before authorizing it for an important mirror.
How can I tell whether an old mirror contains mercury?
Appearance alone cannot confirm mercury silvering; examination and sometimes specialist analysis are needed. Do not open the backing to investigate. Leave a suspected mercury mirror to a conservator.
Can I use Windex on an antique mirror?
Do not treat a brand name as proof of compatibility. Formulations differ, and even an ammonia-free cleaner may be unsuitable for an unknown backing or frame. Use only a cleaner approved for the identified mirror; historic mirrors need conservator advice before liquids.
How do I clean an old mirror without leaving streaks?
For eligible, sound glass, remove loose dust first. Use a clean, barely damp cloth for a small area and dry it immediately with a second lint-free cloth, changing to a clean section as needed. Persistent haze is a reason to reassess, not keep polishing.
How often should antique mirrors be cleaned?
Clean when needed, not automatically on a wet-cleaning schedule. Inspect without touching first; the mirror's condition, dust exposure, and any conservation care plan determine what happens next.
Can I clean modern antique-style glass the same way?
Not automatically. Follow the manufacturer's instructions for the selected finish and backing. Intentionally distressed patterns may be part of the product; do not try to clean them away.
Antique-Style Mirror Glass for Modern Interiors
If the goal is an aged appearance for a hotel, shop, restaurant, or home, specify new decorative glass instead of treating a historic object as a material source. The useful decisions are finish, panel size, joints, exposed edges, and acceptable variation—not how to remove every dark area.

Review a physical sample under the intended lighting. Agree how adjacent panels may vary and confirm fabrication, backing, installation compatibility, and care requirements before ordering. A render communicates a design direction; it cannot approve a finish or determine panel dimensions.
Caring for modern antique mirror glass panels and tiles
The approved distressed pattern is part of the finish, not a cleaning target. Keep a reference photograph and finish code so maintenance staff can distinguish the intended appearance from new splashes or a changing mark. For panels or tiles, identify exposed edges, joints, and nearby porous materials before choosing the cleaning method.
Ask for written care instructions with the selected sample: permitted cleaner, application method, drying, edge precautions, and what to do if a mark changes. The glass alone does not establish compatibility with adhesive, sealant, furniture, or the surrounding wall finish. Do not apply a historic-mirror recipe to a new panel—or the reverse.
Looking for Antique-Style Mirror Glass for a Modern Project?
Compare the actual AMG-01–AMG-08 finish photographs on the Antique Mirror Glass product page, then request a physical sample and care requirements for your selected glass. Share the finish reference, panel dimensions, quantity, and intended setting. Screens and 3D concepts cannot approve color, pattern variation, or project-specific construction.
About This Guide and Sources
First published: September 30, 2026 (China Standard Time). Updated: October 13, 2026.
About the author: Kris Chou is a Product Manager at OJMirror. This guide addresses mirror construction and general care; the role is not presented as a conservation qualification. No individual conservator review, treatment assessment, or original cleaning test is claimed.
The AMG-07 photograph shows a real modern finish sample. The other illustrations explain actions and material relationships, not completed projects or repair cases. General glass guidance does not automatically apply to vulnerable framed mirrors. See OJMirror's company background; this article does not claim that OJMirror provides conservation services.